Quick Answer
To make your hand-poured candles last longer, always trim the wick to 1/4 inch before each burn, let the wax melt to the edges on the first burn, and keep the candle away from drafts. These simple candle care steps will ensure an even burn and extend the life of your candle.
Hand-poured candles are more than just a source of light—they're crafted experiences that fill your home with warmth and scent. Whether you've invested in a luxury candle or a gift set, proper care can significantly extend its burn time and maintain its fragrance. In this guide, we'll walk you through essential candle care tips that will help you make your candles last longer and burn more evenly.
From trimming the wick to understanding the first burn, these steps are designed for both beginners and seasoned candle lovers. By following these practices, you'll not only get more hours of enjoyment from your candles but also ensure safety and optimal performance.
Why Candle Care Matters
Hand-poured candles are made with care, and they deserve the same in return. Proper candle care not only extends the life of your candle but also enhances the scent throw and prevents issues like tunneling or soot buildup. When you trim the wick and burn the candle correctly, you're ensuring that the wax pool reaches the edges, allowing the fragrance to release fully and evenly.
Neglecting candle maintenance can lead to a shorter burn time and a wasted candle. For example, if you don't trim the wick, it can become too long, causing a larger flame that burns the wax faster and creates soot. By incorporating simple habits into your candle routine, you'll enjoy a cleaner, longer-lasting burn.
Step-by-Step Candle Care Routine
Developing a consistent candle care routine is key to maximizing the lifespan of your hand-poured candles. Here are the essential steps to incorporate into your candle burning habits:
First, always trim the wick to about 1/4 inch before lighting. This prevents the flame from getting too large and ensures a steady burn. Second, allow the candle to burn long enough for the entire top layer to melt on the first use—this can take 1-2 hours depending on the candle size. This step prevents tunneling, where the wax burns down the middle, leaving wasted wax on the sides.
Third, keep your candle away from drafts, which can cause uneven burning and excessive smoke. Fourth, limit burn sessions to 4 hours at a time to prevent overheating and ensure the wick stays centered. Finally, always extinguish the candle properly using a snuffer or by dipping the wick into the wax, rather than blowing it out, to avoid smoke and wick damage.
- Trim the wick to 1/4 inch before each burn to prevent soot and uneven burning.
- Burn for at least 1-2 hours on the first use to create a full melt pool.
- Avoid drafts to ensure an even burn and prevent tunneling.
- Limit burn time to 4 hours to prevent overheating and wick drift.
- Extinguish with a snuffer or by dipping the wick to minimize smoke.
Common Mistakes to Avoid
Even with the best intentions, candle care mistakes can happen. One common error is burning a candle for too short a time, which leads to tunneling and wasted wax. Another is ignoring the wick length, which can cause the flame to flicker and produce soot. Additionally, burning a candle all the way down to the bottom can be a fire hazard, so it's best to stop using it when about 1/2 inch of wax remains.
Another mistake is using a candle in a drafty area, which can cause uneven melting and a shorter lifespan. Also, don't forget to keep the wax pool free of debris like matchstick remnants, as these can affect the burn. By being mindful of these pitfalls, you'll get the most out of your hand-poured candles.
Your Candle Care Checklist: Steps to Longer Burn Time
- Trim the Wick: Before each burn, trim the wick to about 1/4 inch. Use a wick trimmer or scissors to ensure a clean cut. This helps maintain a steady flame and prevents soot. Checkpoint: If the flame is too high or flickers, the wick may be too long—trim it before the next burn.
- First Burn: Allow a Full Melt Pool: On the first lighting, let the candle burn until the entire top layer of wax is melted, reaching the edges of the container. This can take 1-2 hours. This prevents tunneling and ensures an even burn in future uses. Checkpoint: If the wax doesn't reach the edges, extinguish and relight later to complete the melt pool.
- Limit Burn Time: Do not burn your candle for more than 4 hours at a time. This prevents overheating, which can cause the wick to shift or the fragrance to degrade. After extinguishing, let the candle cool and solidify before relighting. Checkpoint: After each 4-hour session, trim the wick again before the next burn.
- Keep Away from Drafts: Place your candle in a draft-free area away from open windows, fans, or air vents. Drafts can cause uneven burning, excessive smoke, and a shorter burn time. Checkpoint: If you notice uneven melting or smoking, move the candle to a more sheltered spot.
- Extinguish Properly: Use a candle snuffer or dip the wick into the melted wax to extinguish the flame. Blowing out a candle can cause smoke and may damage the wick. After extinguishing, straighten the wick and trim it before the next use. Checkpoint: A properly extinguished candle will have a clean wick and no lingering smoke.
Candles That Benefit from Proper Care
- The Candle Greats Kit: An olfactory journey through Flamingo Estate with our six favorite scents. Our Candles, since day one, carry a specific purpose: to teleport us somewhere warm and exquisite. We’ve gathered our six greatest scents of all times — from green to sweet and everything in between —for the full aromatic story of Flamingo Estate. With six distinct scents, proper candle care ensures you enjoy each fragrance fully and extend the life of the entire kit.
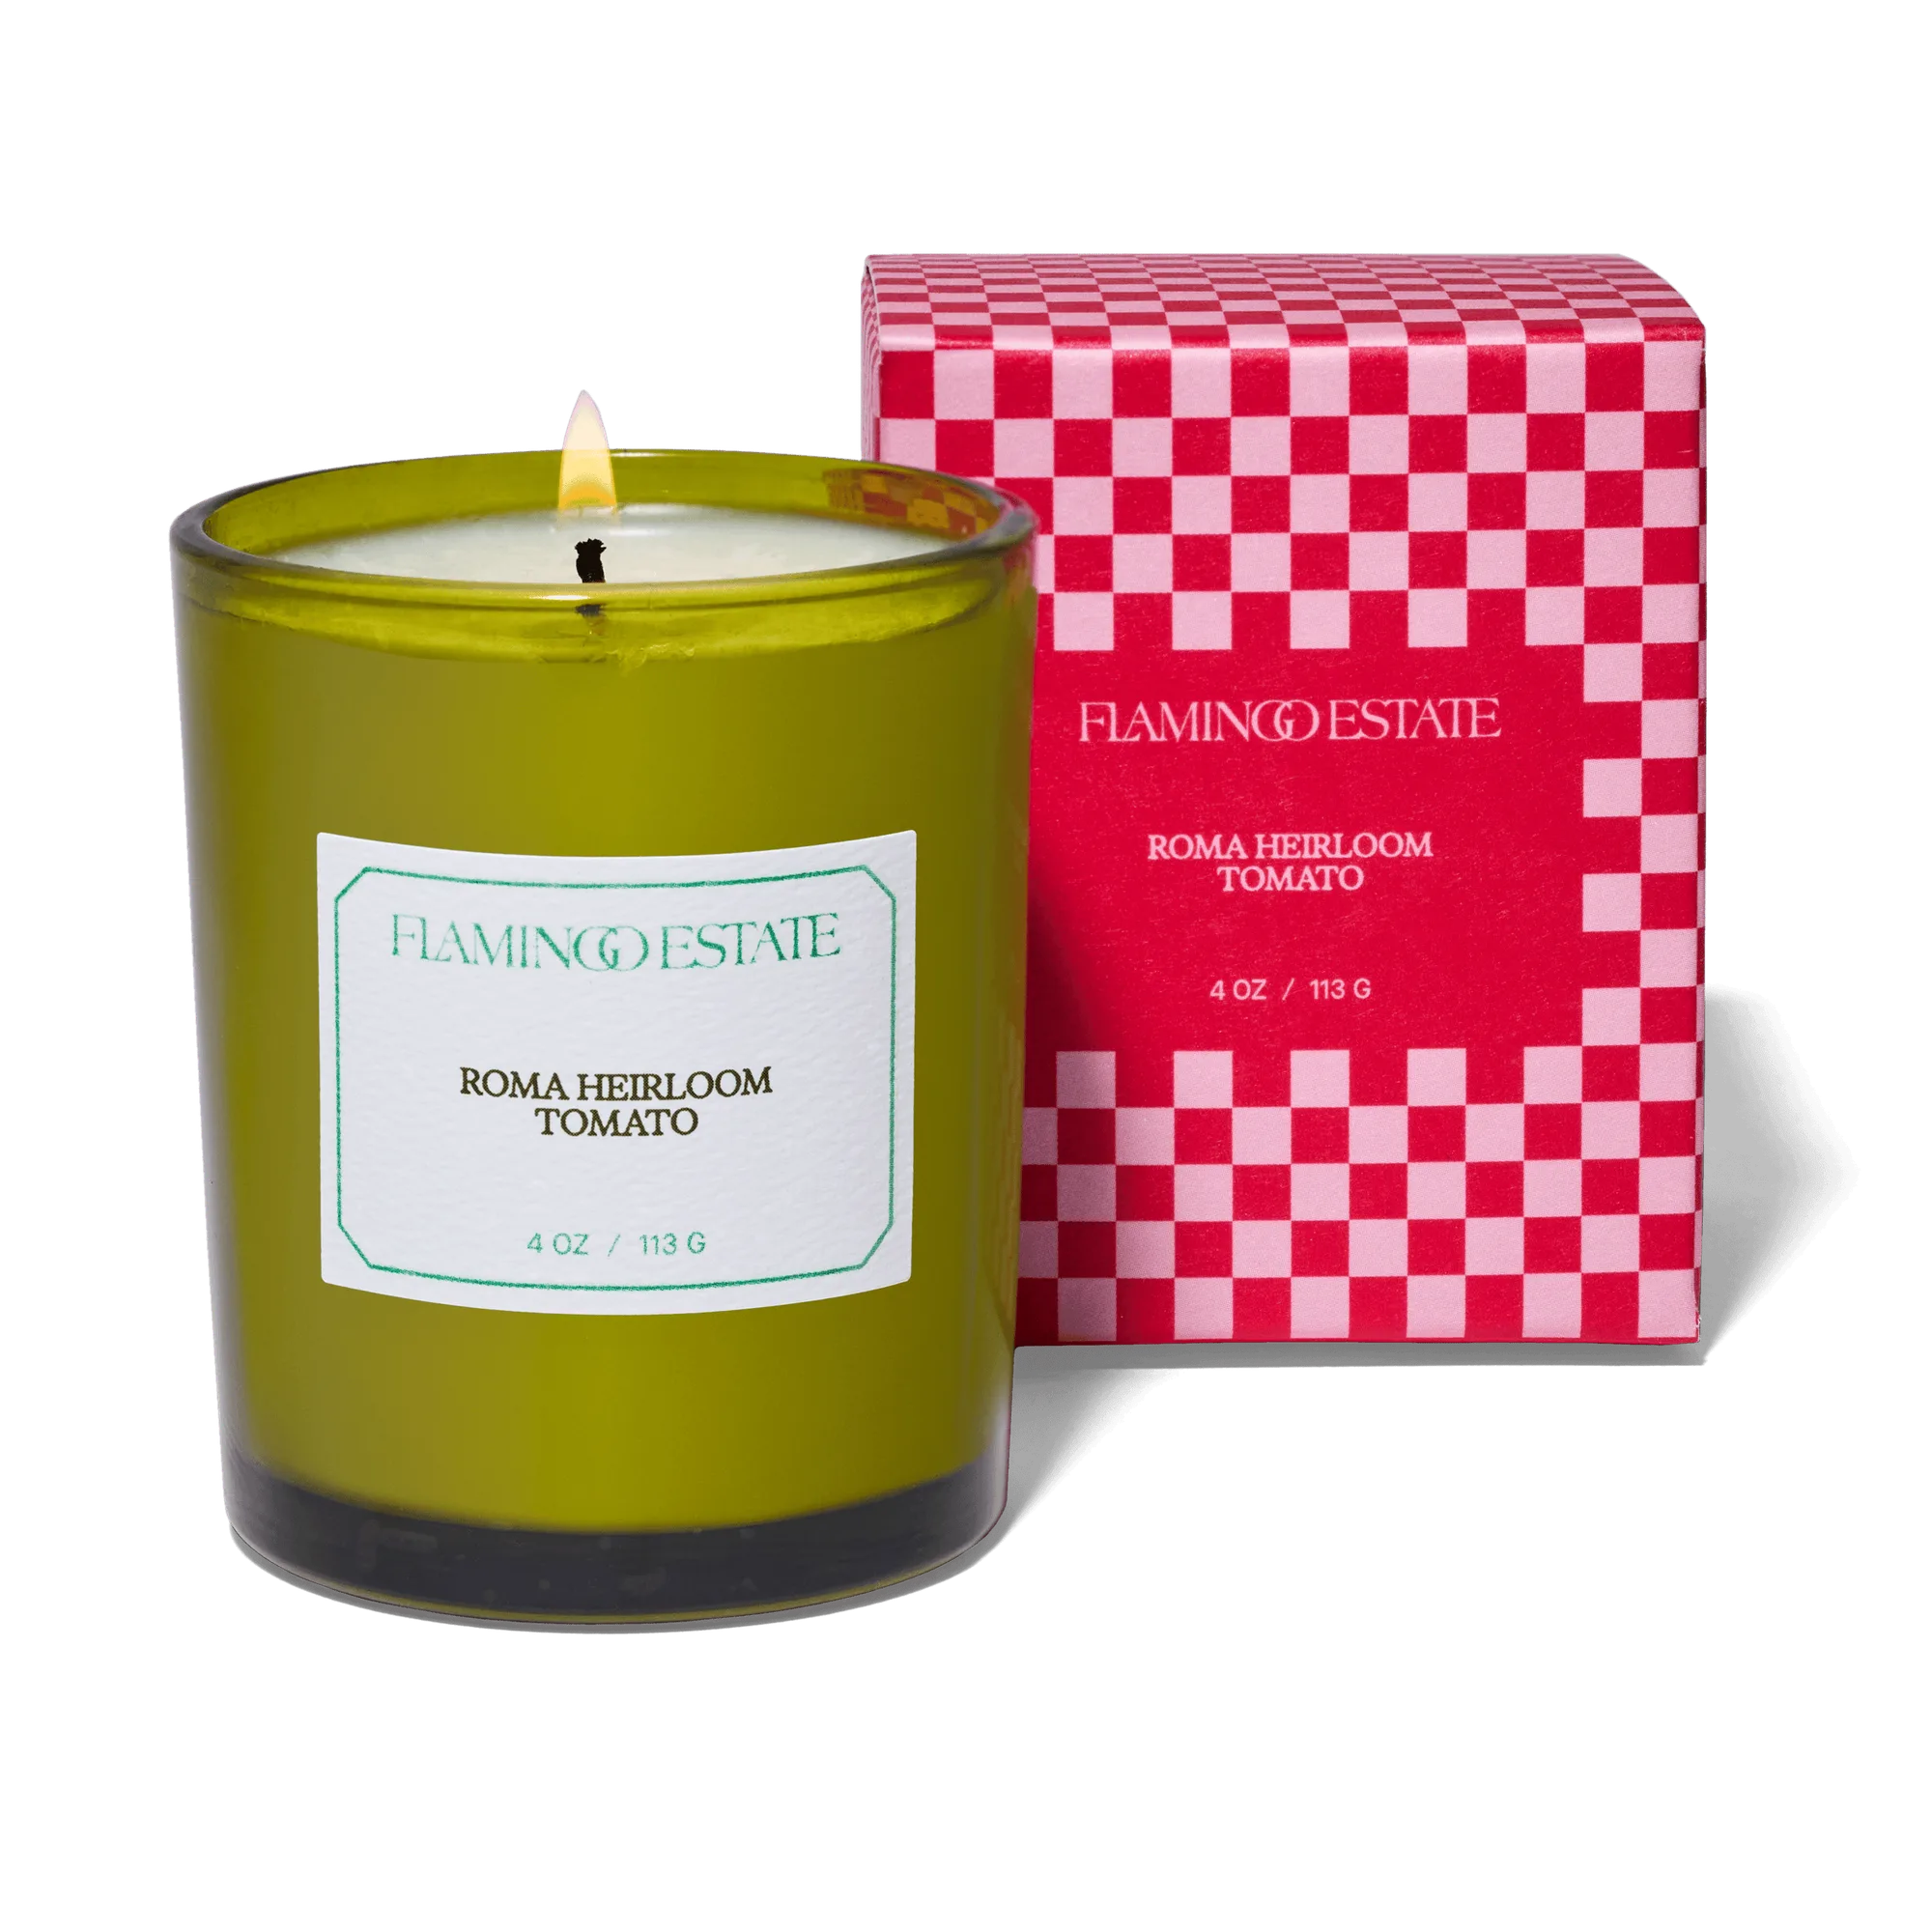
- Roma Heirloom Tomato Candle 4oz: Our most beloved scent, the Heirloom Tomato Candle, captures the supple, green essence of balmy Summer nights in the garden. Think ripe Tomatoes hanging heavy from freshly watered vines, when their leaves are the most fragrant. To get the full nostalgic aroma, burning it correctly is key—trim the wick and allow a full melt pool to release the scent completely.
By following these candle care tips, you'll not only make your hand-poured candles last longer but also enjoy a cleaner, more fragrant burn every time. Remember, a little maintenance goes a long way in preserving the beauty and aroma of your favorite candles.