Quick Answer
Developing black and white film at home requires a few basic tools: a developing tank, reels, chemicals (developer, stop bath, fixer), and a changing bag. The process involves loading the film onto a reel in complete darkness, then processing it through timed chemical baths in your tank. With careful temperature control and agitation, you can produce high-quality negatives for a fraction of lab costs.
What You Need for Home Film Developing
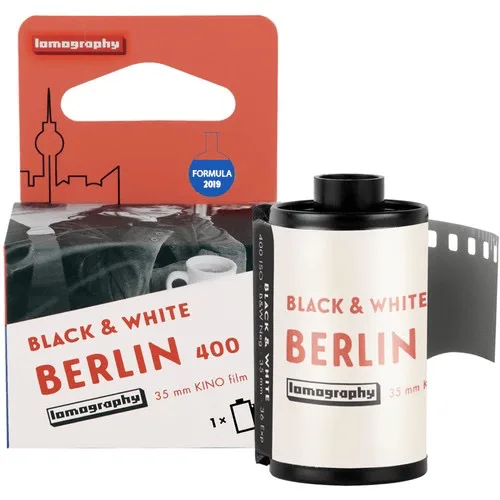
Before starting, gather a developing tank and reels (compatible with 35mm or 120 film), a changing bag or darkroom, a thermometer, measuring graduates, and a timer. For chemicals, you'll need a developer (like Kodak D-76 or HC-110), stop bath (or plain water), fixer, and a wetting agent. A film squeegee and drying clips are helpful for the final steps. The LOMOGRAPHY Berlin Kino Black and White 400 ISO 35mm film is a great choice for home development because its cine film emulsion responds well to standard processing and rewards careful technique with rich monochrome tones.
Setting Up Your Workspace
Choose a room that can be made completely dark for loading film into the tank. A bathroom with no windows or a closet works well. Lay out all your equipment within arm's reach before you start. Mix your chemicals to the recommended temperature—usually 68°F (20°C)—and pre-wet the tank to stabilize temperature. A common mistake is rushing the setup; if you forget a tool or chemical, you'll have to break the dark seal and start over.
Step-by-Step Home Film Developing Process
- Load the Film onto the Reel in Complete Darkness: In a changing bag or completely dark room, open the film canister, cut the leader, and feed the film onto the developing reel. Ensure the film is properly seated in the spiral grooves to avoid touching adjacent layers. Checkpoint: If the film touches itself during development, it will create permanent marks. Practice with a sacrificial roll first.
- Pre-Wet and Add Developer: Place the loaded reel into the developing tank and close the lid. Pre-wet the film with water at the same temperature as your developer for 1 minute, then pour out. Pour in the developer and start your timer immediately. Common mistake: Using water that is too hot or cold can cause reticulation (cracking of the emulsion). Keep within 1°F of your target temperature.
- Agitate According to Developer Instructions: For the first 30 seconds, invert the tank continuously. Then, agitate for 5 seconds every 30 seconds for the remainder of the development time. Consistent agitation ensures even development. Checkpoint: Over-agitation can increase contrast, while under-agitation leads to uneven density. Follow the developer's recommended agitation pattern.
- Stop Bath and Fixer: After development, pour out the developer and add stop bath (or water) for 30 seconds with agitation. Then add fixer and agitate according to the fixer's instructions (typically 3-5 minutes). Common mistake: Skipping stop bath can lead to uneven development and shortened fixer life. Always use fresh fixer.
- Wash and Dry: After fixing, wash the film with running water at the same temperature for 5-10 minutes. Add a few drops of wetting agent to the final rinse to prevent water spots. Hang the film to dry in a dust-free area using clips. Checkpoint: Do not squeegee the film too hard—it can scratch the emulsion. Let it air dry naturally.
Recommended Film for Home Development
- LOMOGRAPHY Berlin Kino Black and White 400 ISO 35mm x 36 exp.: Berlin Kino Berlin Kino - Capture life’s most elusive moments in everlasting monochrome charm with this rare black and white cine film. Inspired by the New German Cinema sweeping through Berlin in the 1960s, our original Berlin Kino Film emulsion was an utter blockbuster. However, as German cinema evolved through time, adapting to meet the innovatory spirit of its founding fathers, so did our film formula. Refined… This film's cine-origin emulsion is designed for consistent development and offers a distinct, cinematic look that rewards careful home processing.