Quick Answer
The fastest way to finish bag seams is to bind them with adhesive binding tape or bias tape. Adhesive tape holds itself in place before sewing, which is a big help on curves. For straight seams, sew-in binding works well and costs less. Whichever you choose, clip or pin first—adhesive alone won't stop shifting.
You've sewn the bag, turned it right side out, and now you're looking at the inside seams. They're raw, fuzzy, and already shedding. Finishing them isn't just about looks—it stops fraying, adds structure, and makes the bag last longer. The method you pick depends on the seam shape, the fabric, and how much time you want to spend.
This guide walks through the main options: adhesive binding tape, sew-in bias tape, and a few alternatives like French seams and zigzag stitching. You'll get an ordered process with checkpoints so you can finish seams cleanly on your next bag.
Why Bag Seams Need Finishing
Raw seam allowances inside a bag rub against everything you carry. Over time, woven fabrics like canvas and linen fray, and the seam can weaken. Finishing the seam encases the raw edge, so there's nothing left to unravel. It also gives the interior a professional look—important if you sell your bags or gift them.
There's a structural benefit too. A bound seam adds a little bulk and stiffness along the seam line, which can help the bag hold its shape. On curved seams, like the bottom of a rounded pouch, binding also prevents the curve from distorting when you turn the bag.
- Finish seams before you turn the bag right side out—it's much harder afterward.
- If you're short on time, at least zigzag the raw edges to stop fraying.
Choosing Your Seam Finish Method
Adhesive binding tape is the easiest for beginners. It has a thin PVC adhesive backing that holds the tape in place while you sew. That means fewer pins and less shifting, especially on curves. The tradeoff is that you still need to clip or pin—the adhesive is a helper, not a permanent bond. Sew-in bias tape is cheaper and comes in endless colors, but you'll need to pin or clip it carefully.
For straight seams on light-to-medium fabrics, a simple zigzag or overcast stitch can be enough. French seams work on straight seams with lightweight fabric but add bulk, so they're not ideal for heavy canvas or vinyl. If you're binding a curved seam, adhesive tape is usually the least frustrating option.
- Curved seams: use adhesive binding tape or bias tape cut on the bias.
- Straight seams on heavy fabric: binding tape adds durability.
- Light fabrics: French seams or zigzag may be sufficient.
Step-by-Step: Binding a Bag Seam
Start by trimming your seam allowance to a consistent width—usually 3/8 inch to 1/2 inch. If it's uneven, the binding will look lumpy. Next, wrap the binding tape around the raw edge, encasing it completely. If you're using adhesive tape, press it down with your fingers; the adhesive will hold it temporarily. For sew-in tape, pin or clip every inch or so.
Sew along the binding, close to the inner edge. Use a walking foot if you have one, especially on thick fabrics. Go slowly around curves. After sewing, trim any loose threads and press the seam. If you used adhesive tape, the needle may get slightly sticky—clean it with alcohol if you notice skipped stitches.
- Checkpoint: Before sewing, flip the bag inside out and make sure the binding covers the entire raw edge.
- Common mistake: Sewing too fast on curves, which causes the binding to slip off the edge.
Working with Adhesive Binding Tape
Adhesive binding tape like the LINEN OXFORD ADHESIVE 1” BINDING (10 Yards Roll) has a PVC backing with full thin adhesive coverage. The adhesive is strong enough to hold the tape in place while you sew, but the manufacturer still recommends clipping prior to sewing. That's because the adhesive can release under the needle's heat and pressure, especially on tight curves.
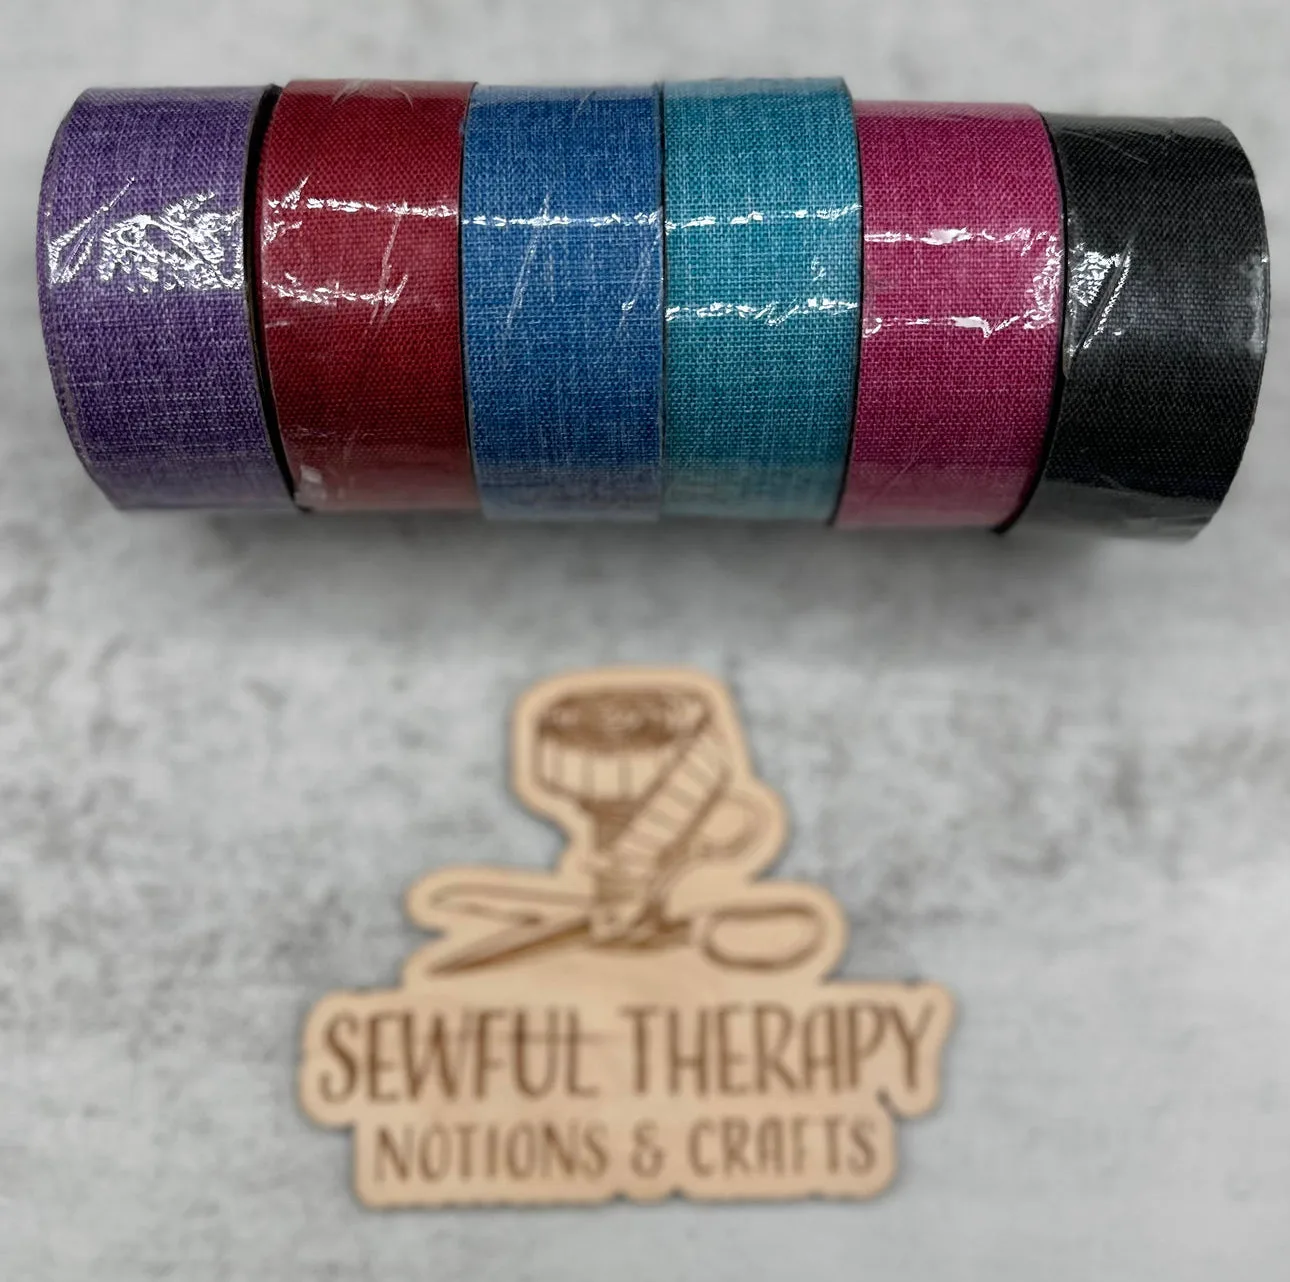
LINEN OXFORD ADHESIVE 1” BINDING (10 Yards Roll)
The 1-inch width is versatile for most bag seams. It's wide enough to wrap around 1/2-inch seam allowances without struggling, but not so wide that it adds unnecessary bulk. The linen oxford texture gives a nice finish that blends with natural fabrics. One roll is 10 yards, which is enough for several bags.
- If the adhesive feels too sticky and gums up your needle, try a fresh needle and sew a bit slower.
- Store leftover tape flat, adhesive side down on the backing paper, to keep it clean.
Alternatives: Bias Tape, French Seams, and More
Bias tape is the classic choice for binding seams. Cut on the bias, it curves smoothly around rounded edges. You can buy pre-made bias tape or make your own from matching fabric. It's usually sew-in, so you'll pin or clip it. For a decorative touch, use a contrasting color. Just remember that bias tape can be slippery—clips help.
French seams are a clean finish for straight seams on lightweight fabric. You sew the seam wrong sides together, trim, then sew again right sides together, encasing the raw edge. They're bulky on heavy fabric, so save them for linings or lightweight bags. Zigzag stitching is the quickest option: just zigzag over the raw edge. It doesn't encase the edge, but it slows fraying.
- Bias tape: best for curves and decorative finishes.
- French seams: best for straight seams on light fabric.
- Zigzag: fastest, but least durable.
Tools and Supplies That Help
A walking foot is a game-changer for sewing through multiple layers of binding and bag fabric. It feeds evenly and prevents the bottom layer from shifting. Clips are also essential—they hold binding better than pins and don't leave holes. For adhesive tape, a small roller or your fingers can press the tape down firmly.
If you're binding a lot of bags, consider a binding foot attachment. It folds and feeds the binding for you, which speeds up straight seams. But for curves, freehand with clips is often easier. Keep a seam ripper handy—if the binding slips, you'll want to fix it before topstitching.
- Walking foot: reduces shifting on thick seams.
- Clips: better than pins for holding binding.
- Binding foot: good for straight seams, not curves.
Seam Finishing Steps at a Glance
- Trim the seam allowance: Trim to a consistent 3/8 to 1/2 inch width. Uneven allowances make the binding look lumpy. Checkpoint: Run your fingers along the edge—it should feel uniform.
- Wrap the binding around the raw edge: Center the binding over the seam allowance and wrap it so it covers both sides. For adhesive tape, press down; for sew-in tape, pin or clip every inch. Common mistake: Not covering the raw edge completely, which lets fraying happen later.
- Secure with clips or pins: Even with adhesive, use clips to hold the binding in place. This prevents shifting while you sew, especially on curves. Checkpoint: Lift the bag and gently shake—nothing should move.
- Sew along the binding: Sew close to the inner edge of the binding, using a walking foot if available. Go slowly around curves. Common mistake: Sewing too fast and catching the binding unevenly.
- Press and inspect: Press the seam with an iron (if fabric allows) and check that the binding is secure all around. Next step: Trim any loose threads and clean your needle if it feels sticky from adhesive.
Products That Help with Seam Finishing
- LINEN OXFORD ADHESIVE 1” BINDING (10 Yards Roll): 1 quantity = 10 yards roll; width 1 inch; thickness 0.4mm; PVC backing with full thin adhesive coverage. The manufacturer highly recommends clipping prior to sewing because the adhesive holds but can shift. The adhesive saves time on curves, but you still need clips. The 1-inch width suits most bag seam allowances without extra bulk.
- Rainbow Hearts Hexatex (YD): Base shipping starts at $11.99 but product will always be shipped the cheapest method available and overages over $2 will be refunded when order is processed. If you're ordering Hexatex for bag linings or accents, shipping is adjusted fairly, so you won't overpay on a small order.
Finishing bag seams doesn't have to be fussy. Pick the method that matches your fabric and seam shape, clip or pin before sewing, and go slowly. With a little practice, the inside of your bag will look as good as the outside.