Quick answer
To frame round needlepoint, choose a frame with a circular opening that matches your stitched canvas diameter, or use a square frame with a mat opening that crops the canvas to a circle. Center the design precisely, lace or tape the canvas taut over an acid-free board, and secure it behind the frame opening. For a 4-inch round canvas, a dedicated round frame with a 3.8-inch opening is the most straightforward option.
Match the frame opening to your canvas size
Round needlepoint canvases are usually sold by their diameter, such as 4 inches. The frame opening must be slightly smaller than the canvas so the stitched area fills the visible circle without gaps. A 4-inch round canvas typically needs an opening around 3.75 to 3.8 inches. If you use a square frame with a mat, the mat’s circular or square opening determines what is visible. Measure your stitched design, not the raw canvas edge, because the canvas extends beyond the stitching and will be hidden under the frame lip.
Prepare the canvas: block and check roundness
Before framing, your round canvas should be clean, pressed, and as circular as possible. Needlepoint can stretch out of shape during stitching. If the canvas is noticeably oval or wavy, block it first by dampening the back and pinning it into a true circle on a blocking board. Let it dry completely. Skipping this step means the canvas will fight the frame opening and may look lopsided behind the glass or open frame.
Mount the canvas: lace or tape over an acid-free board
Cut a piece of acid-free foam board or mat board slightly smaller than the frame’s inner opening but large enough to support the entire stitched area. Center the canvas over the board, right side up. Fold the canvas edges to the back and secure them with stainless steel pins or acid-free tape. For a more archival finish, lace the canvas with strong thread in a crisscross pattern across the back. Pull gently and evenly so the design stays centered and taut. Check from the front that the round design is not distorted.
Insert into the frame and secure
Place the mounted canvas into the frame from the back. If the frame has a removable back panel, reattach it. For a frame with stand-up pegs or a hanging option, make sure the pegs are oriented correctly before closing. Some round frames are self-finishing, meaning the canvas is simply pressed into the opening and held by friction or a backing ring. In that case, test the fit first without forcing. If the canvas is too thick, trim the excess canvas margin, not the stitched area.
Finish the back and choose display style
A clean back is optional but protects the stitching. You can cover the back with a piece of felt or acid-free paper cut to the frame size and glued or taped around the edges. Decide whether the frame will stand on a table or hang on a wall. Frames with stand-up pegs can do both, but hanging requires a small nail or adhesive hook. Avoid placing the frame in direct sunlight, which can fade threads over time.
Step-by-step: framing round needlepoint
- Measure the stitched circle: Use a ruler to measure the diameter of the stitched area, not the raw canvas. A 4-inch round canvas typically has stitching that spans about 3.75 to 4 inches. Write down this number. Common mistake: measuring the canvas edge instead of the stitching, which leads to a frame opening that is too large and shows bare canvas.
- Block the canvas into a true circle: Dampen the back of the canvas, pin it into a perfect circle on a blocking board, and let it dry completely. This corrects any distortion from stitching. Checkpoint: the canvas should lie flat and circular before you proceed. If it springs back to an oval, block it again.
- Cut an acid-free backing board: Trace the frame’s inner opening onto acid-free foam or mat board and cut it slightly smaller so it fits inside the frame without bulging. The board should support the entire stitched area. Common mistake: using cardboard, which is acidic and can damage threads over time.
- Center and mount the canvas: Place the canvas right side up over the backing board. Fold the excess canvas to the back and secure with stainless pins or acid-free tape. For a more archival finish, lace the back with strong thread in a crisscross pattern, pulling evenly. Checkpoint: view the canvas from the front. The design should be centered and not stretched out of round.
- Insert into the frame: Slide the mounted canvas into the frame from the back. If the frame has a backing panel, reattach it. For self-finishing round frames, press the canvas into the opening gently; if it resists, trim the excess canvas margin, not the stitched area. Common mistake: forcing the canvas into a too-small opening, which can bend the frame or distort the stitching.
- Finish the back and display: Optionally cover the back with felt or acid-free paper. Decide whether to stand the frame on its pegs or hang it. Keep it out of direct sunlight to prevent fading. Next step: if you plan to hang it, attach a small sawtooth hanger or use an adhesive hook rated for the frame’s weight.
Frames that work for round needlepoint
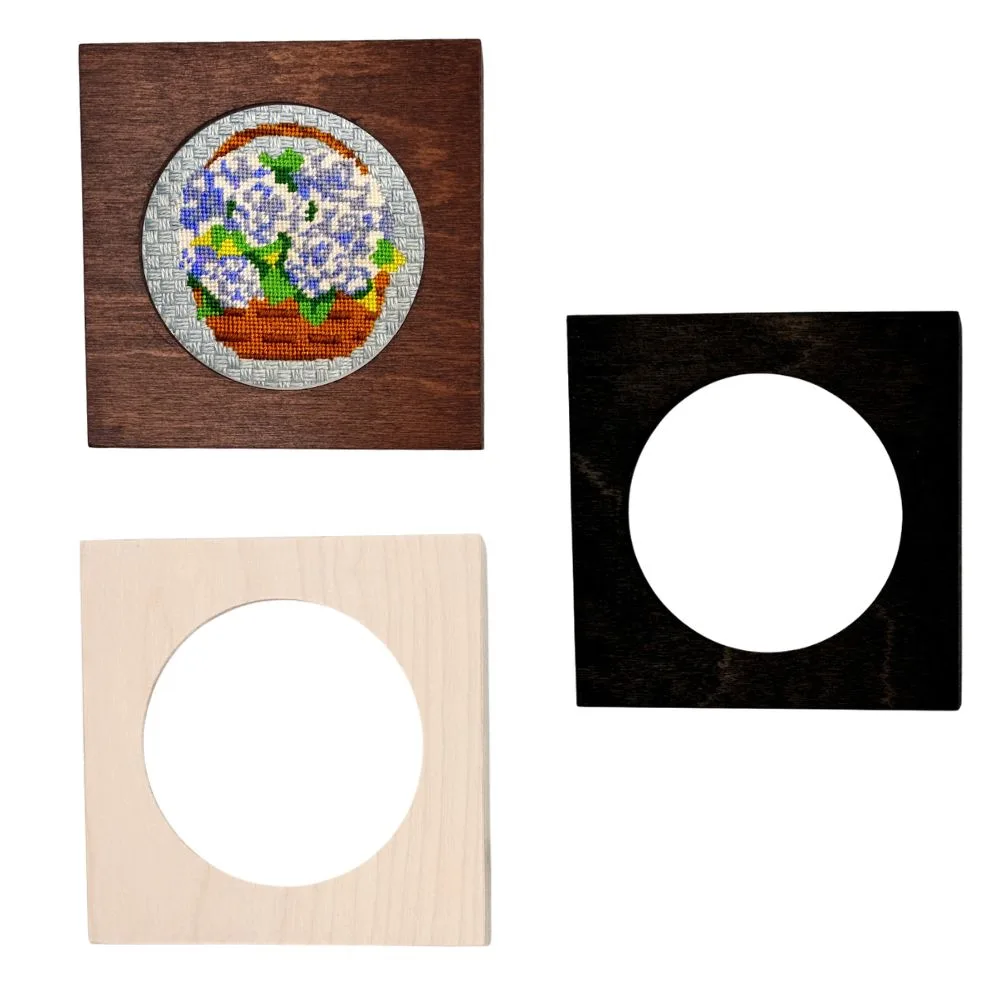
- Needlepoint Frame For Rounds | 3 Colors: Furniture-grade birch plywood frame, 0.75 inch thick, 5.5 x 5.5 inches, with a 3.8-inch center opening designed for a 4-inch round needlepoint canvas. Stand-up pegs allow tabletop or wall display. This frame is purpose-built for round canvases, so you avoid the guesswork of matching a square frame opening to a circular design. The 3.8-inch opening crops the canvas edge cleanly.
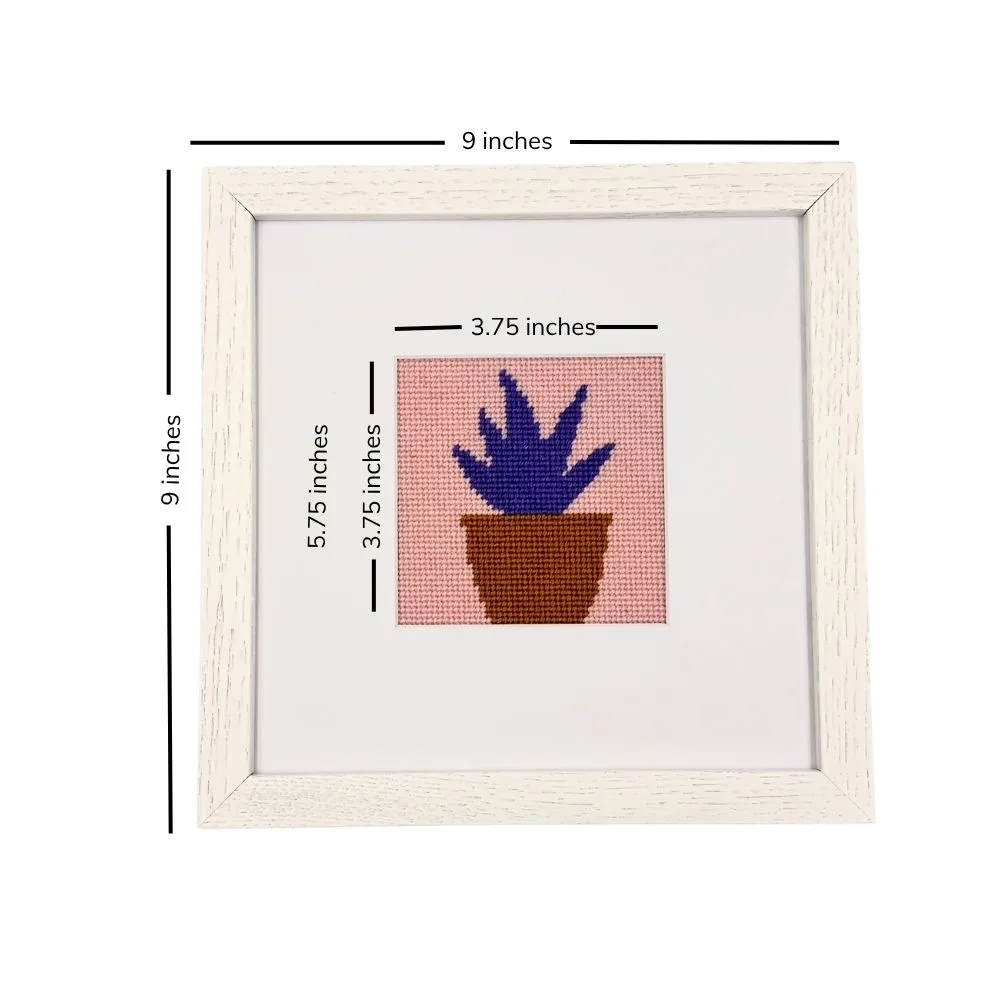
- Premium White Oak Frame | 4" x 4": Solid oak frame with white stain, outside dimensions 9 x 9 inches, 7/8 inch thick, includes a crisp white mat with a 3.75 x 3.75-inch opening and clear glass. If your round design fits within a 3.75-inch square, this frame offers a traditional matted look. The mat opening is square, so it will crop a round canvas into a square view unless you add a custom circular mat.