Installing your Clek Foonf rear-facing with the anti-rebound bar is one of the best ways to maximize safety and comfort for your little one. The anti-rebound bar reduces rotational movement in a crash, and when installed correctly, it adds an extra layer of protection. In this guide, we'll walk you through the entire process, from understanding the parts to securing the seat in your vehicle.
Whether you're using the LATCH system or the vehicle seat belt, we'll cover everything you need to know. We'll also share some practical tips to ensure your install is rock-solid every time. Let's get started.
What You'll Need Before You Start
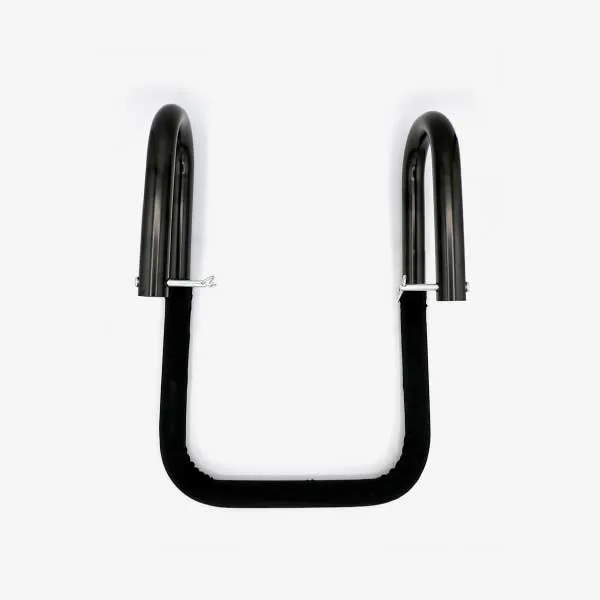
Before you begin, gather the necessary items: your Clek Foonf car seat, the anti-rebound bar (sold separately), your vehicle's owner's manual, and the Foonf manual. If you don't have the anti-rebound bar yet, you can purchase the Foonf Anti-Rebound Bar directly from Clek. It's a simple add-on that makes a big difference in rear-facing safety.
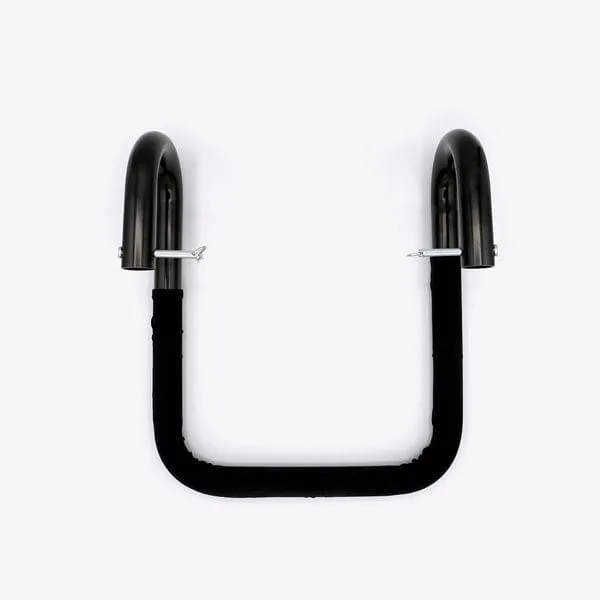
Foonf Anti-Rebound Bar
Check the seat's manufacturing date and ensure it hasn't expired. Also, clean the seat if needed—avoid using harsh chemicals. Having a clean, dry surface helps the anti-rebound bar attach securely.
- Foonf Anti-Rebound Bar (sold separately)
- Vehicle owner's manual and Foonf manual
- Towels or pool noodles (if needed for angle adjustment)
Step 1: Prepare the Foonf for Rear-Facing Installation
Start by adjusting the harness to the correct height for your child. For rear-facing, the harness straps should be at or below the child's shoulders. Loosen the harness by pressing the adjuster button and pulling the straps. Also, adjust the headrest to the appropriate position—it should be just above the child's shoulders.
Next, locate the rear-facing belt path. On the Foonf, it's clearly marked. If you're using LATCH, find the lower anchor connectors stored in the seat. If you're using the seat belt, you'll need to route it through the rear-facing belt path as shown in the manual.
Step 2: Install the Anti-Rebound Bar
The anti-rebound bar attaches to the front of the Foonf (the side that faces the vehicle seat back when rear-facing). Align the bar with the two slots on the base of the seat. Push the bar in until you hear a click, indicating it's locked. Make sure it's fully seated—give it a tug to confirm.
If you have the Foonf Anti-Rebound Bar, it's designed to fit perfectly. For a secure fit, ensure no clothing or fabric is caught between the bar and the seat. The bar should be parallel to the ground when the seat is installed.
Step 3: Position the Seat in Your Vehicle
Place the Foonf rear-facing in the back seat. The anti-rebound bar will be against the vehicle seat back, so it's important to have a tight fit. If the seat is too reclined, you may need to adjust the angle. The Foonf has a built-in recline foot, but you can also use a rolled towel or pool noodle under the front edge to achieve the correct angle (between 30-45 degrees for rear-facing).
Make sure the seat is stable and doesn't move more than 1 inch at the belt path. If you have a vehicle with a steep slope, you might need extra help to get the right angle.
Step 4: Secure with LATCH or Seat Belt
If using LATCH, attach the lower anchors to the vehicle's lower anchor points. Tighten by pulling the strap through the adjuster, alternating sides to keep the seat level. If using the seat belt, thread it through the rear-facing belt path and buckle. Lock the seat belt according to your vehicle's instructions (most require pulling the belt all the way out to engage the locking mechanism).
Once secured, push down firmly on the seat while tightening to remove any slack. The seat should not move more than 1 inch side-to-side or front-to-back at the belt path. If it does, re-tighten.
Step 5: Final Checks and Harness Adjustment
Double-check that the anti-rebound bar is still securely attached and that the seat is at the correct angle. Place your child in the seat and adjust the harness to fit snugly. The chest clip should be at armpit level, and you shouldn't be able to pinch any slack in the harness at the shoulders.
If you need to tighten the harness, use the adjuster strap. Make sure the harness is not twisted. Also, verify that the anti-rebound bar does not interfere with the harness or your child's legs—it should be positioned below the harness.
Installing your Clek Foonf rear-facing with the anti-rebound bar is a straightforward process once you know the steps. By following this guide, you'll ensure a safe and secure ride for your little one. If you need the anti-rebound bar, you can find it on our site. Remember to always consult your vehicle and car seat manuals for specific instructions. Safe travels!