Quick answer
Sort first, then bag by project and fabric type. Store fabric in labeled, breathable fabric storage bags away from direct light, keep active quilt project storage in clear or labeled bags you can grab, and reserve small bags for notions like a screwdriver set. The order matters more than the bag brand.
A quilting space gets messy for one boring reason: fabric and projects have no home, so they land on the cutting table. Storage bags fix that only if you sort before you shop for them.
This plan walks through the order that actually works: measure, sort, choose bags, label, and maintain. It uses supplies you can already buy at GE Designs, and it calls out the mistakes that undo the whole system.
Step 1: Measure before you buy a single bag
Open a drawer, shelf, or closet and measure the usable depth, width, and height. Write those numbers down. Most storage failures happen because a bag was bought for a shelf that does not exist.
Decide where fabric storage bags will live before you buy them. If the shelf is shallow, deep bins waste space and hide fabric you will forget. If the closet is deep, shallow bags stack poorly and slide.
- Checkpoint: you can name the exact shelf or drawer each bag size will occupy before you order.
Step 2: Sort fabric by project, not by color
Pull every piece of fabric out and make three piles: active projects, stash yardage, and scraps. Active projects get first claim on your best bags because you touch them weekly.
A common mistake is sorting by color first. Color sorting looks tidy but does not help you finish a quilt. Project sorting does, because everything needed for one quilt stays together.
- Checkpoint: every active project has a complete fabric set in one pile, with the pattern or notes on top.
Step 3: Match bag type to what it holds
Yardage and large cuts need wide, flat bags or bins so folds stay smooth. Precuts and fat quarters do better in smaller bags sorted by collection or size. Notions and small tools need a dedicated small pouch or case.
Keep fabric out of sealed, non-breathable plastic for long-term storage. Breathable fabric storage bags reduce trapped moisture and dust, and they keep light off prints that can fade.
- Checkpoint: no long-term fabric storage in vacuum-sealed or airtight plastic.
Step 4: Bag one project at a time and label it
Work through your active pile one project at a time. Put the fabric, pattern, and any cut pieces in the same bag, then label the outside with the project name and the date you started.
Labeling is the step people skip, and it is the reason quilt project storage fails. An unlabeled bag becomes a mystery box within a month, and you will re-buy fabric you already own.
- Checkpoint: you can identify the contents of every bag without opening it.
Step 5: Give small tools their own home
Sewing room organization breaks down around tiny tools more than fabric. Screwdrivers, snips, and marking tools migrate across the room until you cannot find one when the machine needs a quick fix.
A compact screwdriver set belongs in a labeled pouch inside a drawer or machine caddy, not loose in a fabric bag where it can snag cloth.
- Checkpoint: small tools are stored separately from fabric so nothing snags or punctures a quilt top.
Step 6: Do a ten-minute reset each week
A storage system holds only if you reset it. Once a week, return loose fabric to its bag and put finished project leftovers into the scrap bin or a donation bag.
This is also when you spot problems: a bag that is too full, a project you have not touched in months, or fabric that needs to move out of sunlight.
- Checkpoint: after ten minutes, every horizontal surface in the room is clear enough to cut on.
Your storage bag setup, in order
- Measure the space: Record usable depth, width, and height of every shelf, drawer, and closet before buying anything. Checkpoint: each bag size has a named home.
- Sort into three piles: Active projects, stash yardage, and scraps. Do not sort by color yet. Checkpoint: each active project has its full fabric set together.
- Choose breathable bags by size: Wide flat bags for yardage, small bags for precuts, a dedicated pouch for notions. Checkpoint: no long-term storage in airtight plastic.
- Bag and label one project at a time: Fabric, pattern, and cut pieces go in one bag with the project name and start date on the outside. Checkpoint: you can identify contents without opening the bag.
- Store tools apart from fabric: Keep screwdrivers, snips, and marking tools in their own pouch so they cannot snag cloth. Checkpoint: no loose metal tools in fabric bags.
- Reset weekly: Ten minutes to return loose fabric, empty scraps, and check for fading or overcrowding. Checkpoint: cutting surface is clear when you finish.
Products that fit this system
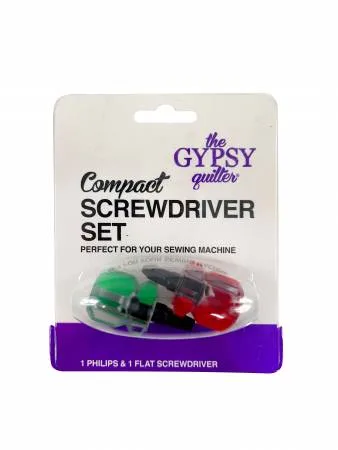
- The Gypsy Quilter Sewing Machine Screwdriver Set #TGQ132: The compact size of these tools allows you to get into those hard to reach spaces on your sewing machine and other locations, and the set includes one Phillips and one flat screwdriver. A small, dedicated tool set lives neatly in a notions pouch instead of rolling loose in a fabric bag.
- Mystery Basic Orange Stash Builder Bundle: Six different 1/2 yard cuts of assorted fabrics in shades of Orange, 3 yards total, and actual fabrics may vary. Half-yard cuts fold flat and stack well in a single labeled stash bag, which makes them easy to inventory.
- Kipling Garden Lil' Bundle: Bold florals in jewel tones from Lily Ashbury for Riley Blake, 44/45 inches wide. A coordinated bundle is ready to bag as one project, so you are not hunting for matching prints later.
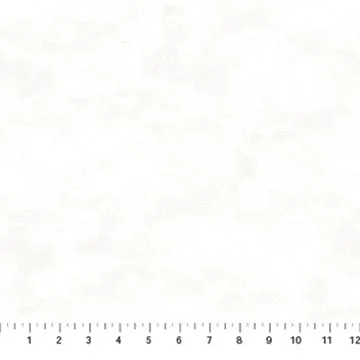
- Toscana Picket Fence - 3 yard 9020-10: A 3 yard cut of 100% premium quilting cotton by Northcott Fabrics, 44/45 inches wide. A long continuous cut needs a wide, flat bag so folds do not crease along the same line.
Sort first, bag by project, and label everything. That order turns quilting storage from a shopping problem into a habit, and it keeps your fabric, tools, and unfinished quilts where you can actually find them.