Quick answer
Pack your breast pump travel bag by starting with a clean, dry pump and assembling a dedicated cooler section for expressed milk. Use a universal bag like the Ameda Universal Breast Pump Travel Bag to keep everything organized and protected.
Why a dedicated travel bag makes a difference
A purpose-built breast pump travel bag saves time and reduces stress because it has designated compartments for your pump, bottles, and cooler elements. Without one, you risk leaking milk, damaged parts, or forgetting a critical piece. The Ameda Universal Breast Pump Travel Bag is designed to fit most standard pumps and includes an insulated milk storage pocket that works with cooling elements (sold separately) to keep your milk cold for hours.
What to leave behind to save space
You do not need to bring every accessory from home. Leave extra flanges, backup tubing, and the instruction manual behind unless you are traveling for more than a day. Stick to one complete pump set, one extra set of membranes, and a small brush for cleaning. Overpacking makes the bag heavy and harder to organize, especially when you are moving between rooms or commuting.
Step-by-step packing guide
- 1. Clean and dry all pump parts before packing: Wash each piece that touches milk (bottles, flanges, valves, membranes) with hot soapy water or a dishwasher, then air-dry completely on a clean towel. Moisture trapped in a closed bag can cause mold or bacterial growth within hours. Pack only fully dry parts to avoid contamination.
- 2. Assemble your pump and place it in the main compartment: Connect the tubing, flanges, and bottles to your pump motor as you would at home. Place the assembled unit into the largest compartment of your travel bag so it stays upright and protected. Do not coil tubing too tightly—kinks can reduce suction. Leaving the pump assembled saves setup time and prevents lost pieces.
- 3. Prepare the insulated cooler section with cooling elements: Insert frozen cooling elements (sold separately) into the insulated milk storage pocket of your bag. If you do not have cooling elements, use a small ice pack wrapped in a clean cloth. The insulated pocket keeps milk at a safe temperature for up to 4-6 hours depending on ambient heat. Always pre-chill cooling elements overnight for maximum cold retention.
- 4. Pack milk storage bags or bottles in the cooler pocket: Place filled milk storage bags or bottles upright in the insulated pocket, making sure they do not leak. If using bags, press out excess air before sealing and lay them flat initially to save space. Label each bag with the date and time. Never mix raw milk with cooled milk in the same storage bag.
- 5. Add a small cleaning kit and spare parts: Include a travel-sized brush, a small bottle of soap or sanitizing wipes, and one spare set of membranes in a zippered pouch. These take little space but can save a pumping session if a part gets lost or clogged. Keep the cleaning kit in an outer pocket so you can access it without opening the main compartment.
- 6. Secure everything and check before leaving: Zip all compartments closed and give the bag a gentle shake. If you hear rattling, something is loose—rearrange to prevent damage. Double-check that the cooler pocket is fully closed and that no bottles are tipped over. A quick shake test helps avoid surprises when you arrive.
Product spotlight
-
Universal Breast Pump Travel Bag: The Ameda Universal Breast Pump Travel Bag combines function and style, keeping your pumping equipment organized and protected while keeping breast milk cool using the insulated milk storage pocket and Ameda cooling elements (sold separately). This bag lets you carry your pump, accessories, and chilled milk in one compact bag, so you do not need to juggle separate containers or worry about spoilage during a commute.
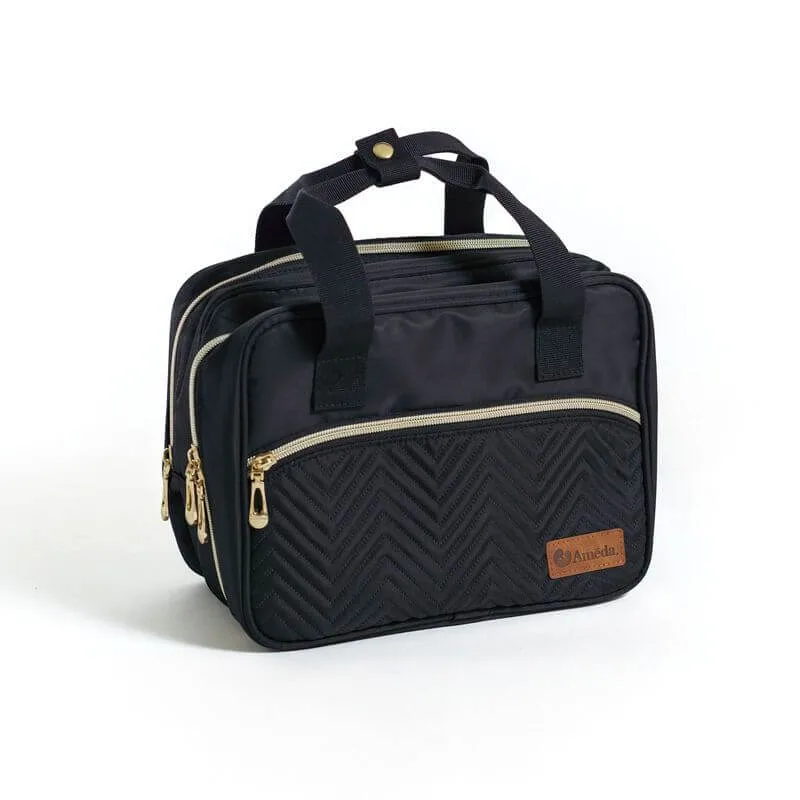
Universal Breast Pump Travel Bag