Why Choose the Rain Drop Orchid Planter for Repotting
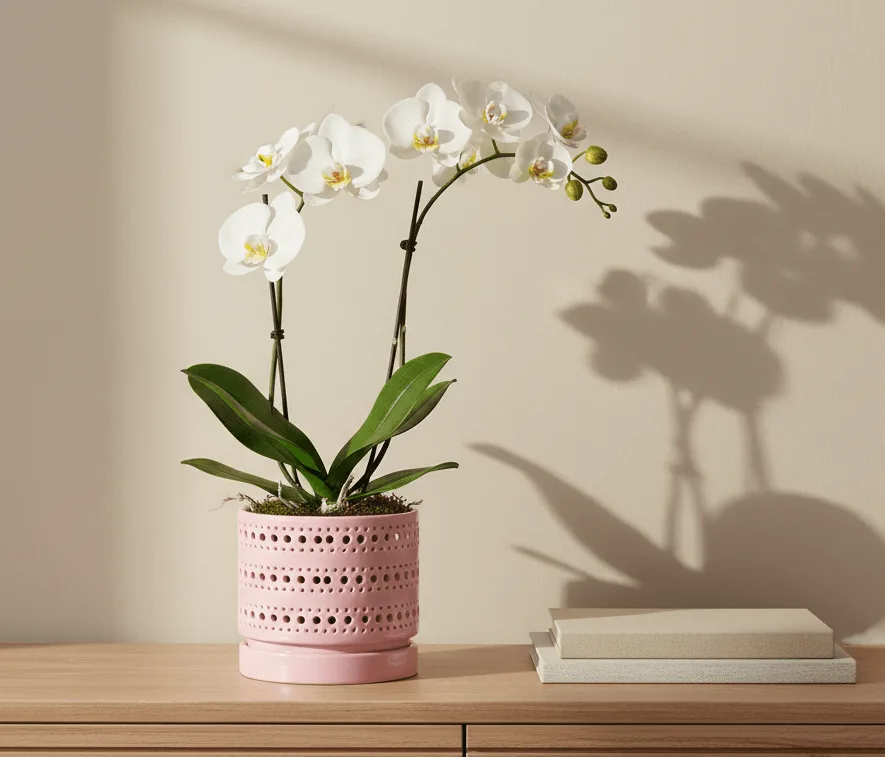
Repotting an orchid is a key step in keeping it healthy, and the Rain Drop Orchid Planter is designed to support that process. This handmade planter comes in soft pastel shades like petal pink, aqua blue, pure white, and gentle yellow, so it adds a calm, cheerful look to your home while giving your orchid a proper home.
The planter features drainage holes built into the pattern, which let air and water flow easily. That's important for orchids, whose roots need good drainage and air circulation. An included saucer keeps surfaces dry and clean, making it a practical choice for indoor use.
Planter Features That Help Your Orchid Thrive
-
Rain Drop Orchid Planter-Pastel By Plantatorem: The drainage holes in the pattern let air and water flow easily, keeping orchids and small houseplants healthy while showing off their leaves and blooms. Orchids are sensitive to overwatering and stagnant air. These built-in drainage holes help prevent root rot and promote healthy growth.

Rain Drop Orchid Planter-Pastel By Plantatorem
-
Rain Drop Orchid Planter-Pastel By Plantatorem: Its size fits most standard orchids or similar houseplants, and the included saucer keeps surfaces dry and clean. You don't need to guess if your orchid will fit. The planter accommodates typical orchid sizes, and the saucer protects your furniture from water damage.
Step-by-Step Orchid Repotting Guide
Repotting an orchid is straightforward when you have the right planter. Follow these steps using the Rain Drop Orchid Planter.
- Prepare the planter and materials: Choose your preferred Rain Drop Orchid Planter variant. Available sizes include 6.0" D x 5.5" H and 7.5" D x 6.5" H, in colors like Bright White, Pastel Baby Pink, Pastel Light Green, and Pastel Yellow. Have fresh orchid potting mix (bark-based), clean scissors or pruning shears, and a container of water ready.
- Remove the orchid from its old pot: Gently loosen the roots from the old container. If the pot is plastic, you can squeeze the sides to release the root ball. Carefully pull the orchid out, supporting the base.
- Trim dead or damaged roots: Use sterilized scissors to trim away any roots that are mushy, dry, or discolored. Healthy orchid roots are firm and silvery-green. Leave the healthy roots intact.
- Place the orchid in the Rain Drop Planter: Position the orchid in the center of the planter. The drainage holes in the pattern will allow excess water to escape. The planter's size fits most standard orchids, so the root ball should sit comfortably without crowding.
- Add fresh potting mix: Gently fill around the roots with orchid bark mix. Tap the planter lightly to settle the medium. Do not pack it too tightly; orchids need air pockets around their roots. Water lightly to moisten the new mix.
- Place the saucer underneath and position the planter: Set the included saucer under the planter to catch any drips. Place the planter on a sunny windowsill, a cozy corner, or a desk. The handmade pastel finish and raindrop pattern will add a light, inviting vibe to your space.
What to Keep in Mind After Repotting
After repotting, your orchid may need a few days to adjust. Keep it in a spot with indirect light and avoid fertilizing for the first month. The Rain Drop Orchid Planter's drainage holes and saucer make it easy to water without worrying about mess.
The planter is available as a single pot or in sets of four or six, so you can repot multiple orchids or use matching planters throughout your home. Each piece is handmade by skilled artisans, so slight variations in finish are normal and add to its charm.