Quick Answer
To set up hide poles with ground spikes on hard ground, first soften the soil with water, then drive the spikes in at an angle and use a rock or mallet for extra force. This ensures a sturdy anchor even in tough conditions.
Why Hard Ground Is a Common Challenge
Hard, dry, or compacted soil can make it difficult to insert ground spikes fully, compromising the stability of your hide poles. Without a secure anchor, wind or movement can knock over your setup, scaring away wildlife and ruining your session. Understanding how to adapt your technique is key to a successful hide setup.
The E20 Hide poles with ground spikes are designed with a double spike at the base for solid fixing, but even the best spikes need the right approach on hard ground. A little preparation goes a long way.
Tools That Help on Hard Ground
A mallet or heavy stone, a small trowel or digging stick, and water are your main allies. Water softens the soil without creating mud, while a mallet provides controlled force to drive spikes deeper. Avoid using sharp metal tools that could damage the spike finish.
Step-by-Step Setup on Hard Ground
- 1. Prepare the Spot: Pour a small amount of water onto the ground where each spike will go. Wait 1-2 minutes for the soil to soften. This reduces the risk of bending the spike or damaging the pole. Don't soak the area; just dampen the surface to a depth of about 2-3 cm.
- 2. Angle the Spikes: Hold the hide pole so the spike points into the ground at a slight angle (about 10-15 degrees), leaning away from the direction of expected wind. This creates a mechanical lock in the soil. Straight downward insertion on hard ground has less holding power; an angle improves stability.
- 3. Drive the Spikes In: Use a mallet or a heavy, flat stone to tap the spike head gently but firmly. Alternate taps around the spike head to drive it evenly. Stop when the spike is fully seated or the ground resistance is too high to go deeper safely. Never strike the pole tube—only the spike head. If the spike won't go deeper, it's secure enough if no wobble remains.
- 4. Test the Anchor: Gently push and pull the pole from the top to check for movement. If the spike shifts, repeat steps 1-3 with a bit more water or a slightly different angle. A stable pole should not rock more than 1-2 cm at the base. A quick test now saves you from a collapsed hide later. Adjust before attaching the net or fabric.
Product That Makes It Easier
-
E20 Hide poles with ground spikes: The E20 Hide poles have a double spike at the base for solid fixing and come in a set of 4 adjustable poles. The double spike design provides extra grip even in challenging ground, reducing the risk of the poles shifting or falling over once set up.
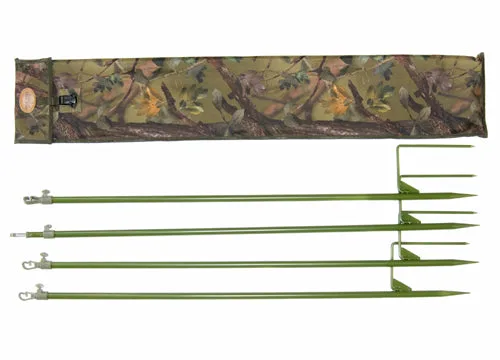
E20 Hide poles with ground spikes