Quick answer
Press the block flat, find its center, and trim it to the smallest size that still leaves all seam allowances intact. Trim one corner and two adjacent sides first, rotate the block 180 degrees, then trim the remaining two sides. Use a ruler large enough to cover the block, and make sure the ruler's grid lines sit on the block's seam lines before every cut.
Why blocks come out uneven in the first place
Blocks rarely finish perfectly square because piecing stretches fabric slightly, and pressing can push a block out of shape. The goal of squaring up is not to force a block to an exact measurement; it is to create four straight edges and four 90-degree corners while keeping the block's internal seams centered. If you trim a block down to a size that cuts into a seam allowance, the block will fray or lose points when it is sewn into the quilt. Always measure the block first, then choose a target size that is equal to or slightly smaller than the smallest measurement across the block.
Choosing the right ruler for the block size
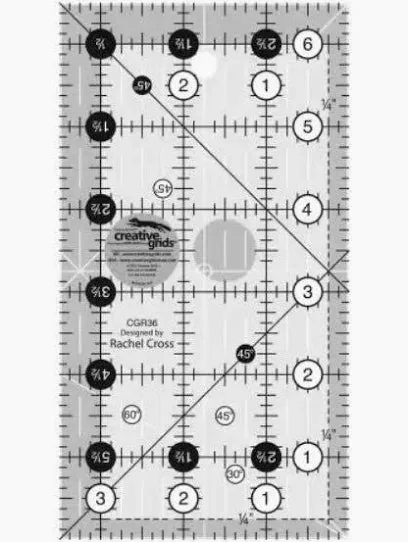
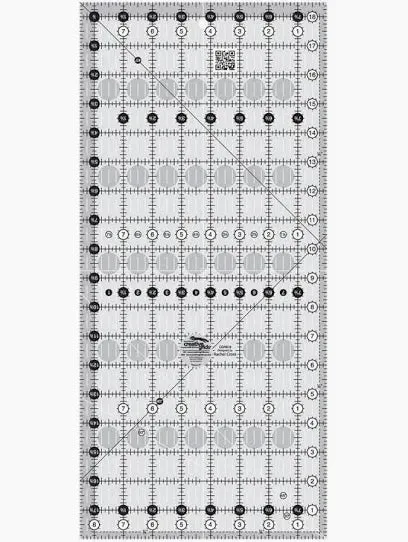
A ruler that is smaller than the block forces you to slide it and re-align, which adds error. A ruler that is much larger than the block can be awkward to control. For most blocks between 6 and 12 inches, a mid-size rectangle ruler gives you enough coverage without wrestling a large square. The Creative Grids Quilt Ruler 8-1/2in x 12-1/2in Rectangle (CGR812) covers blocks up to 8-1/2 by 12-1/2 inches, which handles many common block sizes and also works for cutting strips and squaring up units. For small blocks, trimmed units, or precut pieces, the Creative Grids Quilt Ruler 3-1/2in x 6-1/2in Rectangle (CGR36) is easier to position and control. Both rulers have a non-slip surface and clearly marked grid lines, which help you keep the ruler steady and read measurements quickly.
Step-by-step: squaring up a quilt block
- Press the block, don't iron it: Set the block on the ironing board and press straight down with a dry iron, lifting and lowering rather than sliding. Sliding the iron stretches bias edges and pushes the block out of square before you even start trimming. Checkpoint: the block should lie flat with no ripples and no flipped seams.
- Measure the block in both directions: Measure the width and height at the edges and through the center. The smallest measurement is your maximum trim size. If the block is supposed to finish at 12-1/2 inches but measures 12-1/4 inches in one direction, you cannot trim it to 12-1/2 inches without cutting into seam allowances. Write down the target size before you pick up the ruler.
- Find the center and align the ruler: Fold the block in half vertically and horizontally to find the center, or use the block's center seam as a guide. Place the ruler so its grid lines sit on the block's center seam and the target measurement line sits on the edge you plan to trim. The ruler's non-slip surface helps hold the fabric in place once you press down. Common mistake: aligning only the outer edge and ignoring the center, which shifts the block's design off-center.
- Trim two adjacent sides: Hold the ruler firmly with your spread hand, keeping your fingers away from the cutting edge. Cut the first side with a rotary cutter, then rotate the block and cut the adjacent side. Trim only the amount needed to create a clean, straight edge. Checkpoint: the two trimmed sides should meet at a true 90-degree corner.
- Rotate 180 degrees and trim the remaining two sides: Turn the block so the freshly cut corner is now opposite your ruler. Align the ruler's grid lines with the trimmed edges and the center seam, then trim the two remaining sides to the target size. Because you are measuring from the clean edges, the block ends up square rather than tapered. Common mistake: trimming all four sides from the original edges, which can leave the block slightly diamond-shaped.
- Check the final size and stack: Measure the finished block at the edges and through the center. It should match your target size within a scant 1/16 inch. Stack trimmed blocks in order so you can chain-piece them without re-measuring each one. If a block comes out more than 1/8 inch small, set it aside for a smaller project rather than forcing it into the quilt.
Rulers and fabric that support accurate squaring
- Creative Grids Quilt Ruler 8-1/2in x 12-1/2in Rectangle – CGR812: Creative Grids Quilt Ruler 8-1/2in x 12-1/2in Rectangle (CGR812) is a mid-size ruler for cutting strips, rectangles, and squaring up blocks; it has a non-slip surface and clearly marked grid lines. Its size covers many common quilt blocks, so you can trim two sides without repositioning the ruler mid-cut, which reduces alignment errors.
- Creative Grids Quilt Ruler 3-1/2in x 6-1/2in Rectangle – CGR36: Creative Grids Quilt Ruler 3-1/2in x 6-1/2in Rectangle (CGR36) is sized for cutting small rectangles, trimming units, and working with smaller quilt blocks and precut fabrics; it has a non-slip surface and clearly marked grid lines. Small blocks and trimmed units are easier to control with a smaller ruler, so you are less likely to shift the fabric while cutting.
- Tula Pink ROAR! Dinosaur Eggs - Mist 1/2 yd: Tula Pink ROAR! Dinosaur Eggs in Mist is a 100% quilting-weight cotton print, 44/45 inches wide, sold by the 1/2 yard, from the ROAR! collection by Tula Pink for Free Spirit Fabrics. Quilting-weight cotton presses flat and holds a crease, which makes it easier to square up blocks accurately than a stretchy or loosely woven fabric.