Quick answer
Store your needlepoint project in a dedicated storage bag with separate compartments for canvas, threads, and tools to prevent dust, tangles, and creases. A bag with a bottom gusset and transparent mesh lets you see contents and keeps everything organized.
Why a dedicated bag beats a drawer or bin
Tossing a half-finished canvas into a drawer invites dust, bent needles, and tangled floss. A storage bag with separate pockets keeps your project components separated and easy to grab when you want to stitch again. The transparent mesh on the Needlepoint Project Storage Bag Rectangle lets you spot your project without opening everything, and the card slot for labeling helps you identify which bag holds which design.
What to do if your bag doesn’t have a gusset
A bag without a bottom gusset may not stand open or hold bulky items like a scroll frame. If yours lies flat, place the canvas on top of threads rather than stacking heavy tools on the canvas. The Needlepoint Project Storage Bag Rectangle includes a bottom gusset that opens wide, making it easier to slide in a mounted canvas or a small frame without forcing the zipper.
How to store your needlepoint project in a storage bag
- 1. Prepare your canvas: Remove any loose dust or pet hair from the canvas with a soft brush. If the canvas is mounted on stretcher bars, make sure the tacks or staples are secure so nothing snags threads inside the bag. A quick brush prevents grit from working into the stitches during storage.
- 2. Wind and separate threads: Wind each color of floss onto a bobbin or stitch bow and label it with the symbol or number from your pattern. Place all bobbins in one pocket of the bag, not loose in the main compartment. Tangled floss is the most common frustration when restarting a project. Winding now saves untangling later.
- 3. Place the canvas in the main compartment: Slide the canvas into the largest pocket (or main compartment if the bag has a gusset). If the canvas is rolled, roll it with the stitches facing outward so they don't get crushed. Do not fold the canvas—creases are difficult to remove. Rolling instead of folding keeps the canvas flat and ready to stitch.
- 4. Store tools in the second pocket: Put needles (stuck into a felt needle keeper or cork), scissors, thread conditioner, and a small magnet or needle minder in the remaining pocket. Avoid placing sharp tools directly against the canvas. Separating tools from the canvas prevents accidental snags and bent needles.
- 5. Label and close the bag: Write the project name or pattern number on the card in the front slot. Zip the bag fully, pressing out excess air to keep the bag compact. Store the bag flat or upright on a shelf away from direct sunlight and humidity. Labeling helps you grab the right project quickly, and a sealed bag keeps dust out.
Product that helps
-
Needlepoint Project Storage Bag Rectangle | Two Colors: The bag measures 17.75 x 13 inches and has two spacious pockets plus a bottom gusset that opens wide. The size fits most standard needlepoint canvases, and the gusset lets you store a mounted canvas or small frame without bending or crushing stitches.
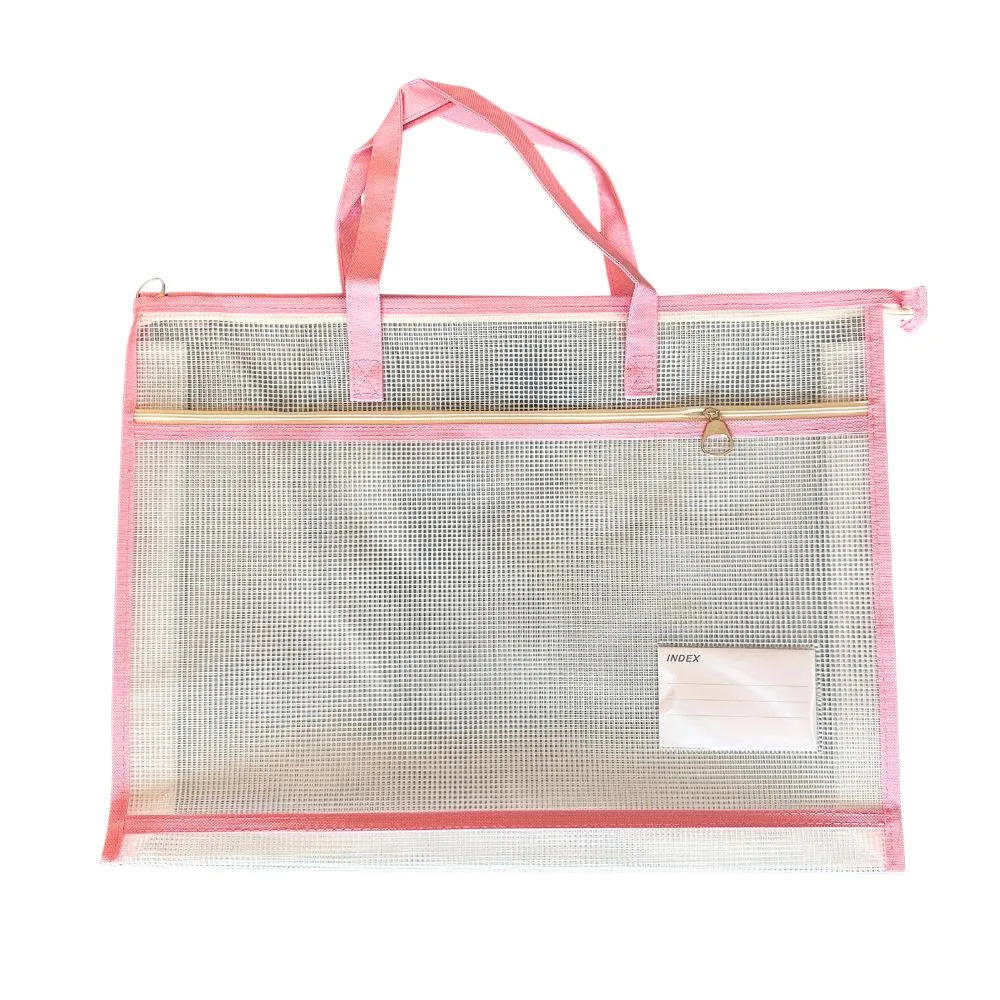
Needlepoint Project Storage Bag Rectangle | Two Colors


