Quick answer
Sort your notions first, then choose clear, labeled containers sized to each category, and store them by how often you reach for them. Keep buttons, labels, and needle minders in separate small bins rather than one mixed drawer, and put your everyday items at arm's reach. The goal is not a prettier shelf; it is fewer lost labels, no more spilled button tins, and faster starts on every project.
Most sewing rooms do not have a clutter problem so much as a sorting problem. Buttons end up in the same tin as zipper charms, loose labels slide behind the machine, and needle minders vanish the moment you set one down mid-seam. The fix is a repeatable system, not a bigger tote.
This guide walks through an ordered process you can finish in one afternoon, from the initial sort to a maintenance habit that keeps the system working. Along the way, note the checkpoints: they are where most sewing room organization plans quietly fall apart.
Step 1: Gather everything in one place and sort by category
Empty every drawer, tin, and project bag onto one surface. Sort into broad groups: buttons, woven and printed labels, needle minders and small tools, zipper charms and hardware, patches, and hair accessories or stickers if you also craft for gifts. Do not try to organize within a category yet; just get like items together so you can see the real volume you are storing.
This is also the moment to be honest about quantity. If you have three half-empty packs of buttons, combine them. Fewer containers holding full amounts are easier to keep tidy than many containers holding scraps.
- Common mistake: sorting while you tidy, which turns a 30-minute job into an all-day project. Sort first, contain later.
- Checkpoint: you should be able to name every category on the table without opening a single bag.
Step 2: Choose containers sized to the category, not the shelf
Small notions disappear in large bins. Buttons, needle minders, and zipper charms belong in shallow divided trays or small lidded boxes where a single layer is visible. Labels are flat and stack well in a slim envelope or a small card box, which also keeps them from curling. Larger tools and bulk backing supplies can go into deeper bins because you handle them less often.
Clear containers beat opaque ones for anything you search for by sight. If you prefer matching opaque boxes, add a label on the front and one on the lid so you do not have to open three boxes to find the right one.
- Common mistake: buying a beautiful matched set before measuring what you actually own.
- Checkpoint: every category fits in one container with room to close it easily.
Step 3: Label the container, not your memory
Write labels in plain terms you would actually search for: buttons, woven labels, needle minders, zipper charms. If a container holds a subcategory, say so, for example small heart buttons or rainbow labels. This matters most for label storage, where packs look nearly identical from the outside and mixing them up means digging through every one later.
If you keep a project bin for a work in progress, label it with the project name and the date you started. That single habit prevents the slow accumulation of mystery bags at the back of the shelf.
- Common mistake: labeling by brand or purchase date instead of by what the item is.
- Checkpoint: a friend could find your buttons in under ten seconds using only the labels.
Step 4: Store by frequency and by where you sew
Your most-used notions should live within arm's reach of the machine: needle minders, a small button assortment, seam ripper, and the labels you are currently sewing into projects. Seasonal or occasional items, like holiday costume labels or specialty buttons, can live higher or further away. This is the difference between organization that looks good and organization that survives a busy week.
Keep a small tray or cup for items in active use during a project. A needle minder parked in the same spot every time you pause is far less likely to be lost than one set down wherever you happen to be sitting.
- Common mistake: storing your most-used items in the prettiest container on the far shelf.
- Checkpoint: you can reach your needle minder and current project labels without standing up.
Step 5: Protect what is delicate or easily tangled
Not all notions tolerate the same storage. Woven and organic cotton labels should stay flat and dry, away from damp basements and direct sun that can dull colors over time. Buttons store best in a single layer so you can see the design without pouring them out, which also reduces chips and scratches. Small hardware like zipper charms benefits from a divided tray so chains and rings do not knot together.
If you buy in multipacks, keep the pack together until you open it. A sealed pack stays clean, stays countable, and is much easier to store than eight loose labels.
- Common mistake: storing labels in a crumpled bag, which leaves them creased when you sew them in.
- Checkpoint: nothing in your storage is bent, tangled, or damp.
Step 6: Do a five-minute reset after each project
The system only holds if you close the loop. When a project finishes, return leftover buttons, labels, and hardware to their labeled homes, then wipe the tray. Five minutes here prevents the pile that starts the whole problem again. If something no longer fits its category, either the category changed or you need a second container, and both are fine.
Once or twice a year, do a fuller pass: combine partial packs, pull anything you have not used in a long while, and relabel anything that has drifted. This keeps the storage matched to how you actually sew.
- Common mistake: waiting for a big clean-up day instead of resetting after each project.
- Checkpoint: the surface around your machine is clear before you start the next thing.
Your one-afternoon organization sequence
- Empty and sort: Pull everything onto one surface and group by category: buttons, labels, needle minders and tools, zipper charms and hardware, patches, and gift items. Checkpoint: every item on the table belongs to a named group.
- Match containers to categories: Use shallow divided trays for buttons and hardware, a slim flat box or envelope for labels, and a small cup or tray for needle minders in active use. Checkpoint: each category fits in one container that closes easily.
- Label by content: Write what the item is, not where it came from, and add subcategory notes such as small heart buttons or rainbow labels. Checkpoint: you can find any category in ten seconds or less.
- Place by frequency: Put daily notions within arm's reach of the machine and move seasonal or occasional items higher or further away. Checkpoint: your needle minder and current project labels are reachable while seated.
- Protect delicate items: Store woven and organic cotton labels flat and dry, keep buttons in a single visible layer, and separate chains and rings so they cannot tangle. Checkpoint: nothing is bent, tangled, or damp.
- Reset after every project: Return leftovers to their labeled homes and clear the tray, then do a fuller combine-and-relabel pass once or twice a year. Checkpoint: your work surface is clear before the next project starts.
Notions worth storing well
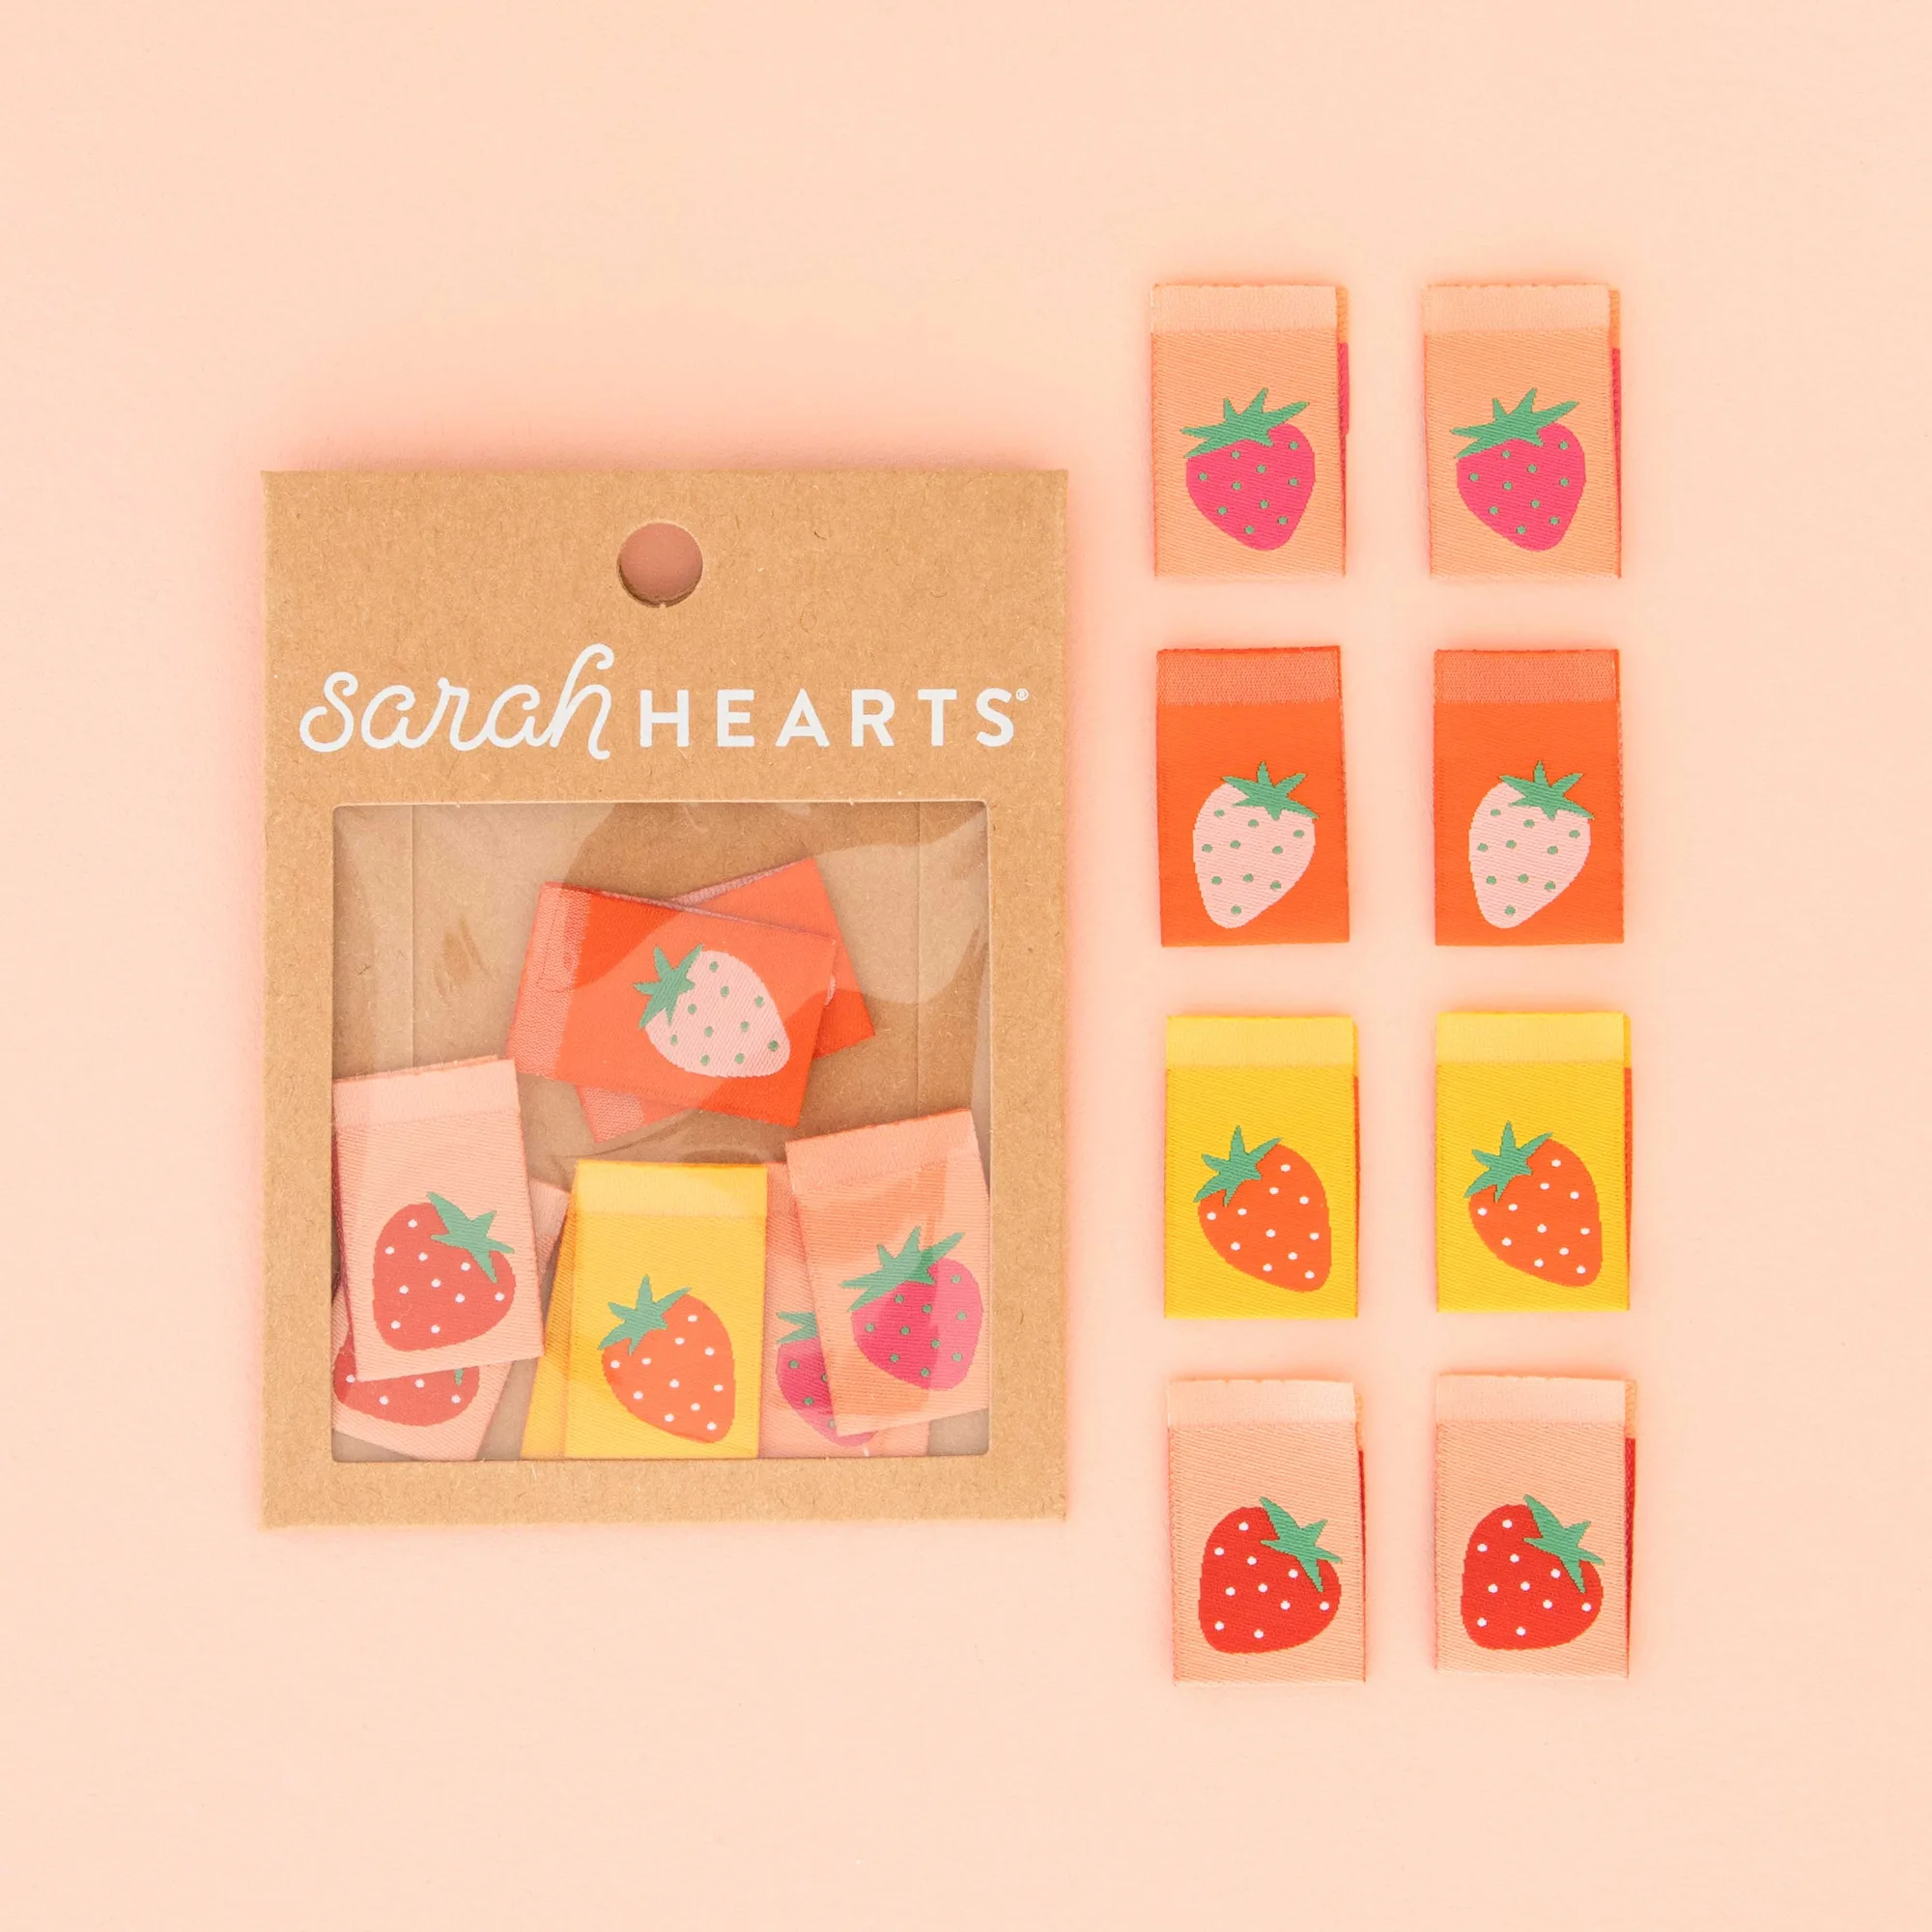
- Strawberry Multipack Woven Sewing Labels: Sold in packs of 8 double-sided woven labels, made from 100% polyester and OEKO-TEX Standard 100 certified. Keeping the multipack together in a flat, labeled envelope means all eight labels stay clean, uncrumpled, and ready to sew into quilts, bags, or garments.
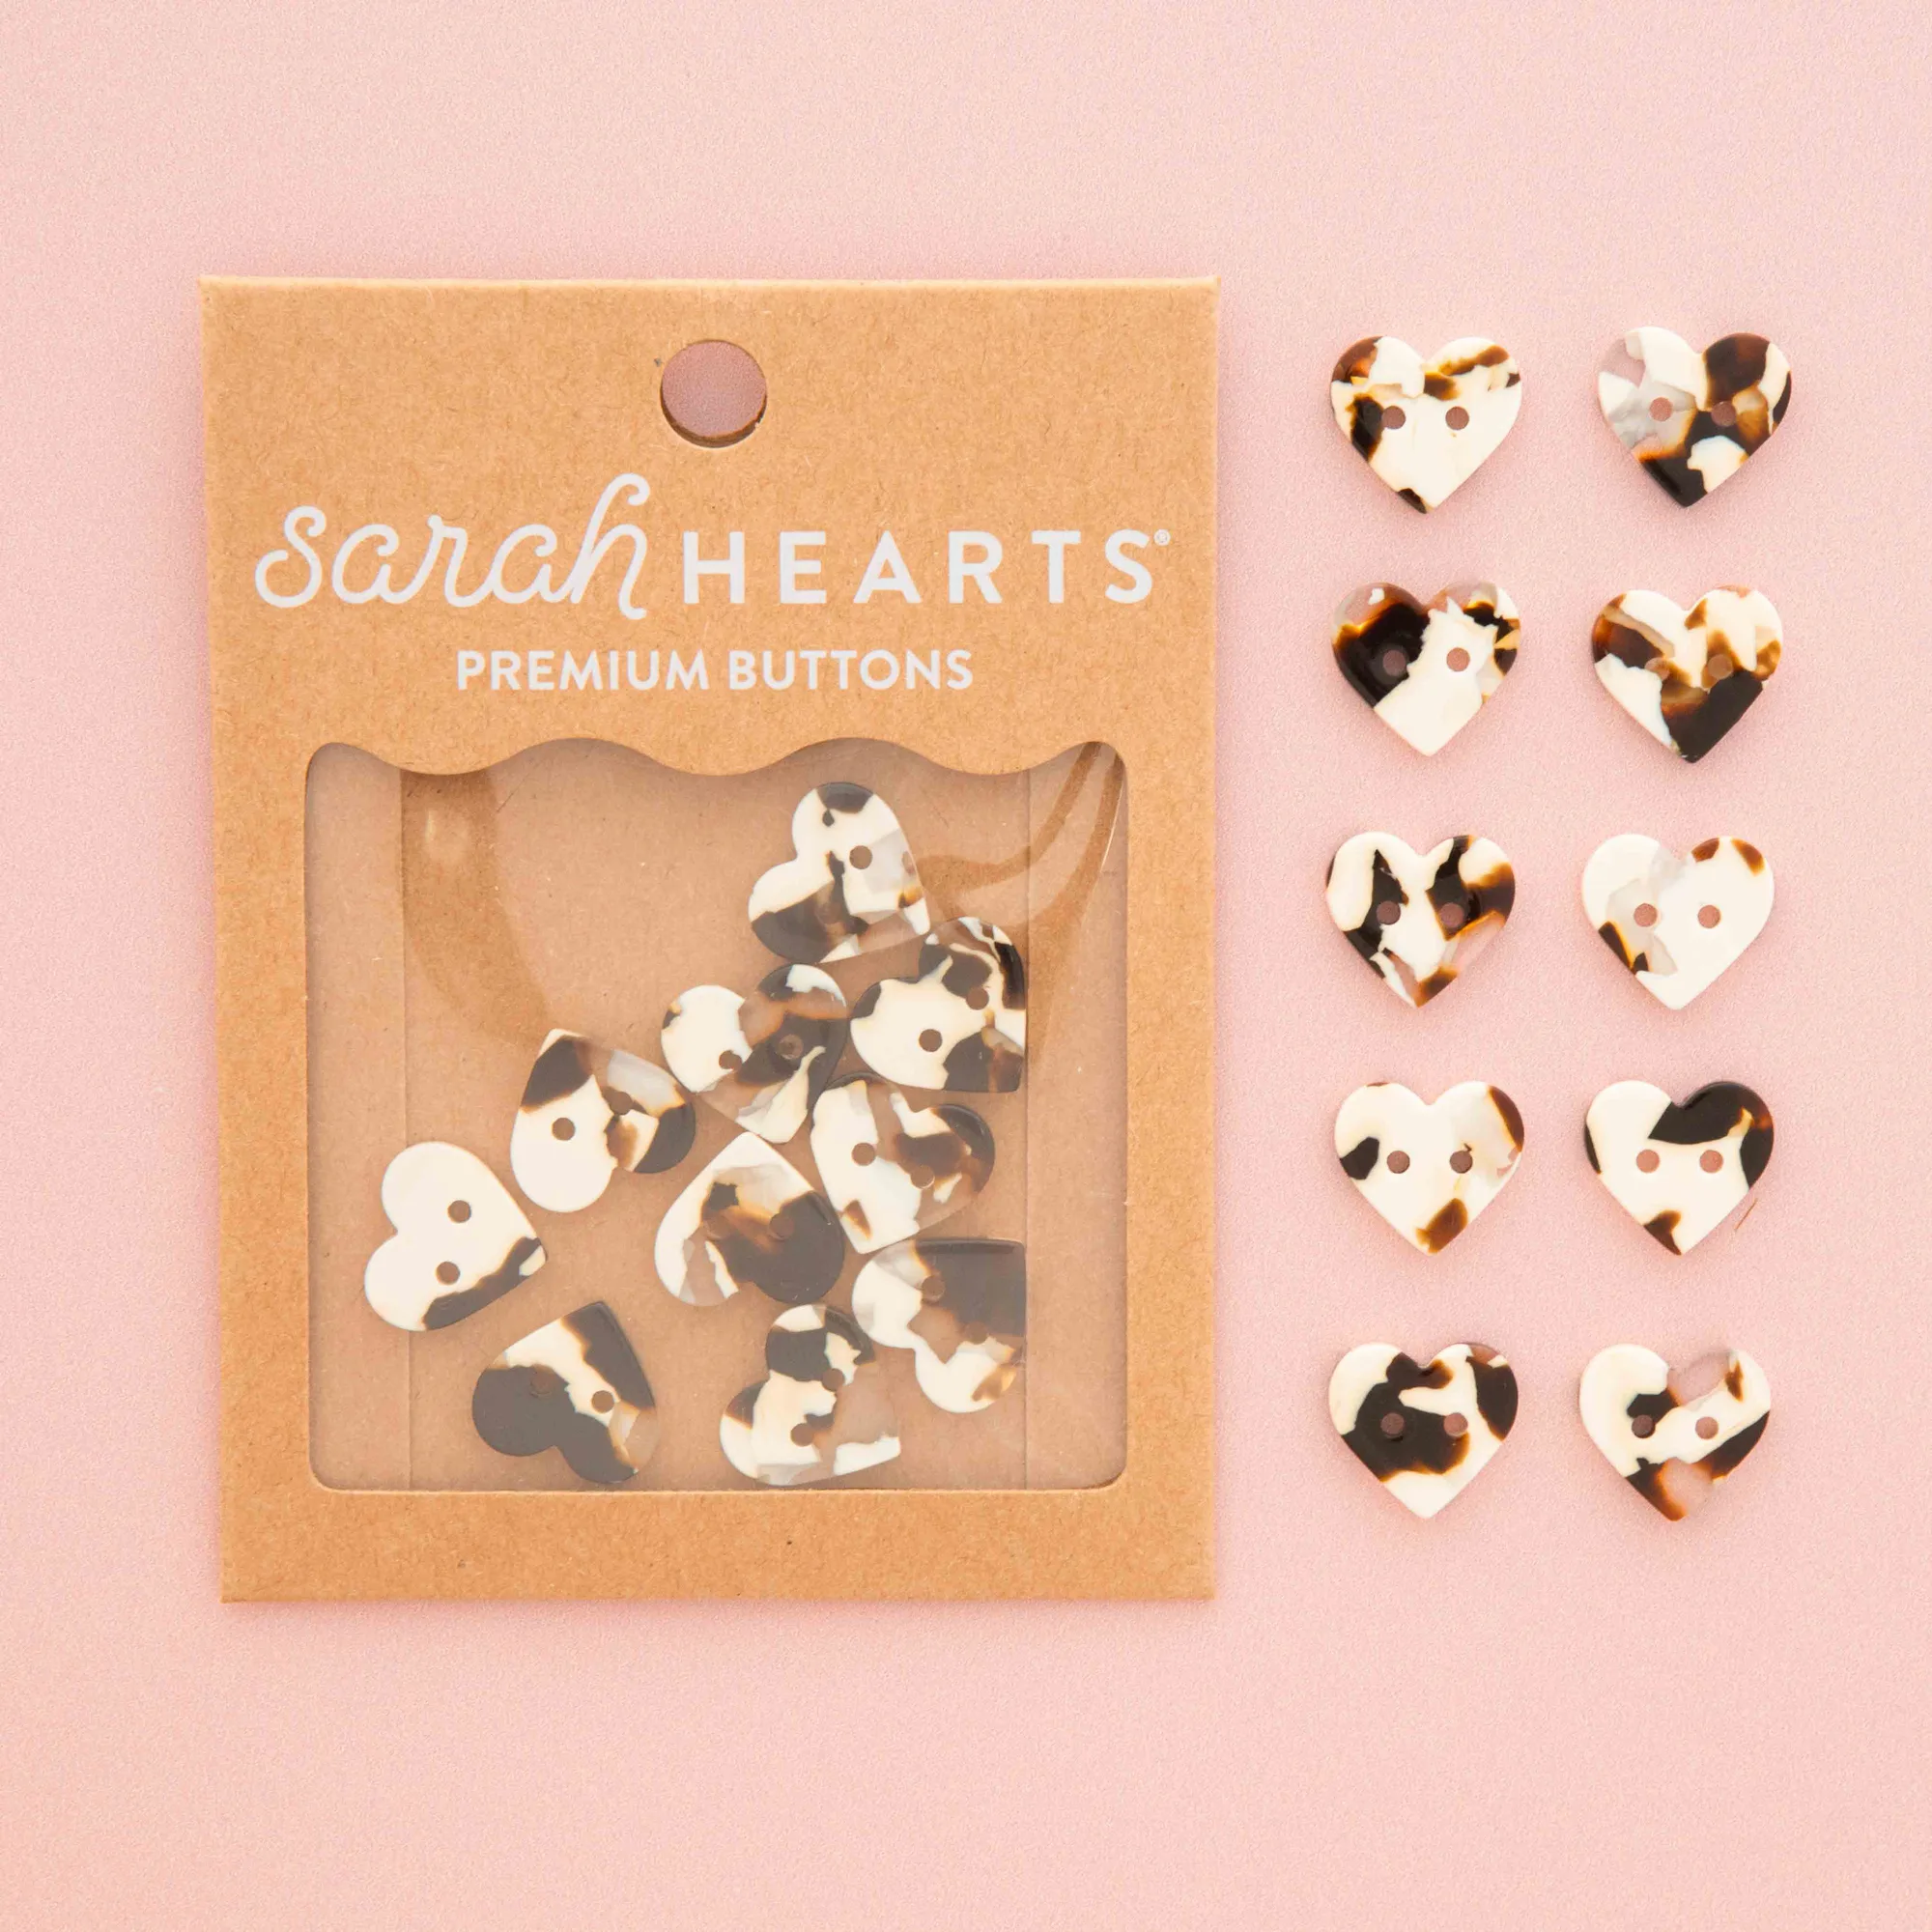
- Small Black + Cream Tortoise Heart Buttons: Made from eco-friendly cellulose acetate, sold in packs of 10, and also available in a larger 1-inch size. A shallow single-layer tray lets you see the speckled heart design at a glance and keeps the small and large sizes from getting mixed together.
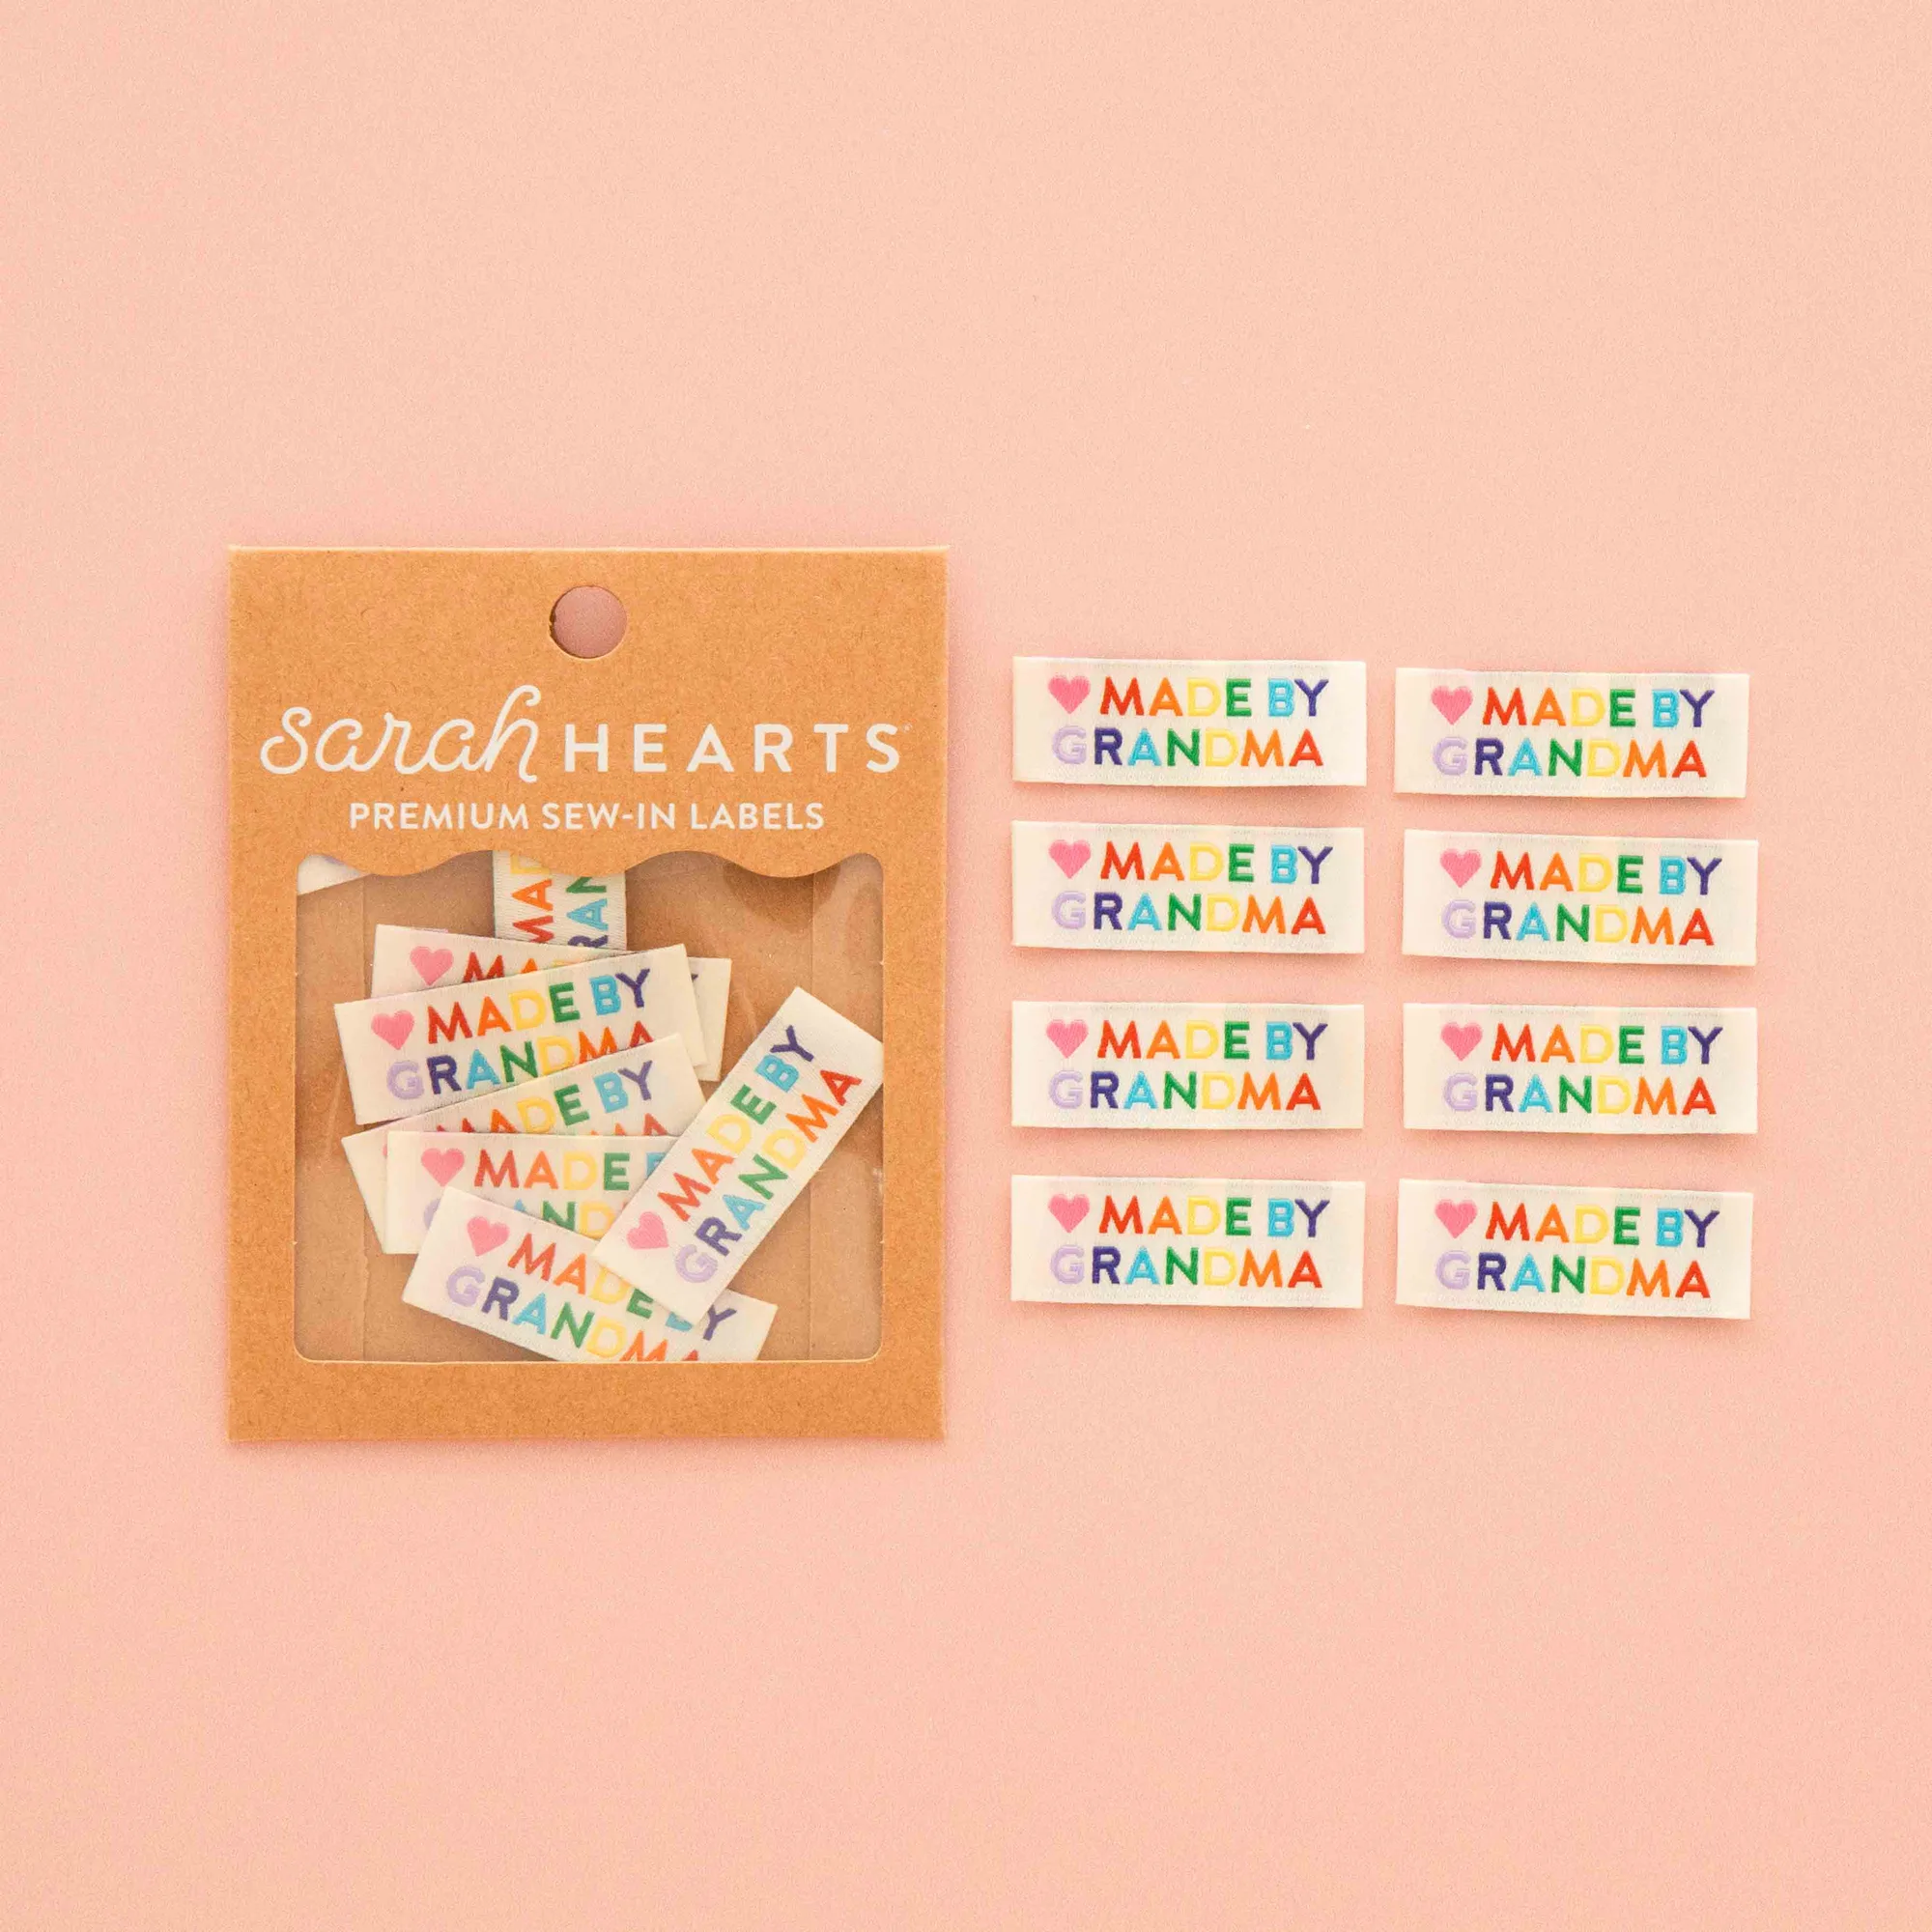
- Made by Grandma Woven Sewing Labels Rainbow Colors: Soft, non-scratchy woven labels that are fully washable and can handle the heat of the dryer, sold in packs of 8. Because they tolerate washing and drying, these can be stored with your everyday labels rather than set aside as delicate items, which simplifies your label storage.
Good sewing notion storage is really about speed: knowing where the buttons are, grabbing the right label without unfolding five packs, and never losing a needle minder mid-project. Sort once, contain by category, label honestly, and reset after each finish, and the system keeps working long after the novelty of a tidy shelf wears off.