Quick Answer
Anchor the wall with one large fine art print, then limit the surrounding pieces to three to five smaller items. Keep 2 to 3 inches between frames, align the group's center at eye level, and repeat one color, shape, or theme so the eye rests instead of jumps.
A gallery wall goes wrong when every piece competes for attention. The fix is not fewer favorites; it is a clearer hierarchy. One fine art print leads, and the smaller pieces support it.
This guide walks through an ordered process you can finish in an afternoon, from measuring the wall to hanging the final frame. Each step includes a checkpoint so you can catch overcrowding before you put more holes in the wall.
Start With the Wall, Not the Art
Measure the width and height of the wall area you want to fill, then note what sits below it, such as a sofa, console, or bed. A gallery wall should relate to the furniture beneath it, not float alone. As a working rule, keep the group's total width within about two-thirds of the furniture width so the arrangement feels grounded.
Check light sources before choosing placement. Strong direct sun can fade prints over time, while a dim hallway makes detailed artwork hard to read. If the wall gets harsh afternoon light, consider a spot that receives indirect light instead.
- Checkpoint: if the wall area is narrower than the furniture below, plan a vertical arrangement rather than a wide one.
- Snap a photo of the empty wall and mark furniture edges on it; this becomes your planning canvas.
Choose One Anchor Print
Pick a single fine art print as the anchor and decide its size first. In a mixed group, the anchor is usually the largest piece and sets the tone for color and subject. Mary Engelbreit fine prints are available in standard frame sizes and with or without the artist's signature, which makes them easy to pair with off-the-shelf frames.
The anchor does not need to be the most colorful piece. It needs to be the clearest statement, so the rest of the wall reads as support rather than noise.
- Checkpoint: if two pieces feel equally dominant, one of them belongs on a different wall.
- Common mistake: buying frames for small pieces before the anchor size is settled.
Build a Scale Mix, Not a Size Pile
A calm wall usually combines one large piece, two medium pieces, and a few small ones. If every frame is the same size, the arrangement looks like a grid; if every frame is small, it looks busy. Vary scale deliberately and keep the total count low, often five to seven pieces for a typical living room wall.
Small prints work best as accents near the anchor, not spread to the outer edges where they get lost. Group them close enough that they read as one cluster.
- Checkpoint: step back six feet. If you cannot name the anchor piece instantly, remove or shrink something.
- Common mistake: adding one more small print to fill a gap instead of increasing spacing.
Set Spacing Before You Hang
Consistent spacing is what separates a styled wall from a cluttered one. Keep 2 to 3 inches between frames in a tight arrangement, or up to 4 inches for a more open, modern look. Measure the gaps with a ruler or a spacer cut from cardboard so they match across the whole group.
Also plan the outer margin. Leave at least 6 to 8 inches between the group's edge and nearby doorframes, corners, or shelving so the arrangement has room to breathe.
- Checkpoint: uneven gaps are the most common reason a gallery wall looks overcrowded, even when the piece count is fine.
- Lay the arrangement on the floor first and photograph it from above to check spacing at a glance.
Pick a Layout Pattern That Fits Your Pieces
Three patterns cover most walls: a centered grid for same-size frames, a loose horizontal row for a long wall, and an organic cluster for mixed sizes. For a fine art print anchor with small prints around it, the organic cluster usually works best because it lets scale vary without forcing a rigid grid.
Sketch the pattern on paper or use removable paper templates taped to the wall. Templates let you test the gallery wall layout before committing to nails.
- Checkpoint: if the pattern requires more than seven pieces to feel balanced, simplify the pattern rather than adding art.
- Common mistake: centering the group on the wall instead of on the furniture below it.
Unify With Color, Frame, or Theme
Overcrowding is often a cohesion problem, not a quantity problem. Tie the group together with one repeated element: matching frame finishes, a shared color from the anchor print, or a single subject theme. Mary Engelbreit's fine prints share a whimsical illustration style, which gives a mixed group a natural through-line.
If you want variety, vary one thing at a time. Different frame colors plus different subjects plus different sizes is usually too many variables for one wall.
- Checkpoint: squint at the wall. If it reads as one shape with a clear anchor, the group is cohesive.
- Common mistake: mixing metal and wood frames in equal amounts, which splits the wall into two competing halves.
Hang at Eye Level and Check the Result
The center of the arrangement should sit around 57 to 60 inches from the floor, which is a common museum-hanging standard. When art hangs above furniture, keep 6 to 10 inches between the bottom of the lowest frame and the furniture top.
Hang the anchor first, then work outward. Step back after each piece and pause before adding the next one. Most overcrowded walls were fine two pieces earlier.
- Checkpoint: if the bottom frame nearly touches a sofa or console, raise the whole group before hanging more.
- Use two hooks per frame for larger pieces so they stay level over time.
Eight Steps to a Calm Gallery Wall
- Measure the wall and furniture: Record the available width and height, then note the furniture below. Aim for the group to span about two-thirds of the furniture width. Checkpoint: if the space is narrow, plan vertically instead of wide.
- Choose the anchor print first: Select one fine art print as the largest piece and settle its size before buying any other frame. Checkpoint: only one piece should feel dominant.
- Mix three scales: Combine one large, two medium, and a few small pieces, keeping the total around five to seven. Checkpoint: step back six feet and confirm the anchor reads instantly.
- Set consistent spacing: Use 2 to 3 inches between frames for a tight look or up to 4 inches for an open one, and keep 6 to 8 inches of margin at the edges. Checkpoint: uneven gaps cause more clutter than extra pieces.
- Pick a layout pattern: Choose a grid, horizontal row, or organic cluster based on your size mix, then test it with paper templates. Checkpoint: if it needs more than seven pieces to balance, simplify the pattern.
- Unify with one repeated element: Repeat a frame finish, a color from the anchor, or a single theme across the group. Checkpoint: squint; the wall should read as one shape.
- Hang at eye level: Center the group 57 to 60 inches from the floor and keep 6 to 10 inches above furniture. Checkpoint: hang the anchor first, then work outward.
Product Facts That Help With Planning
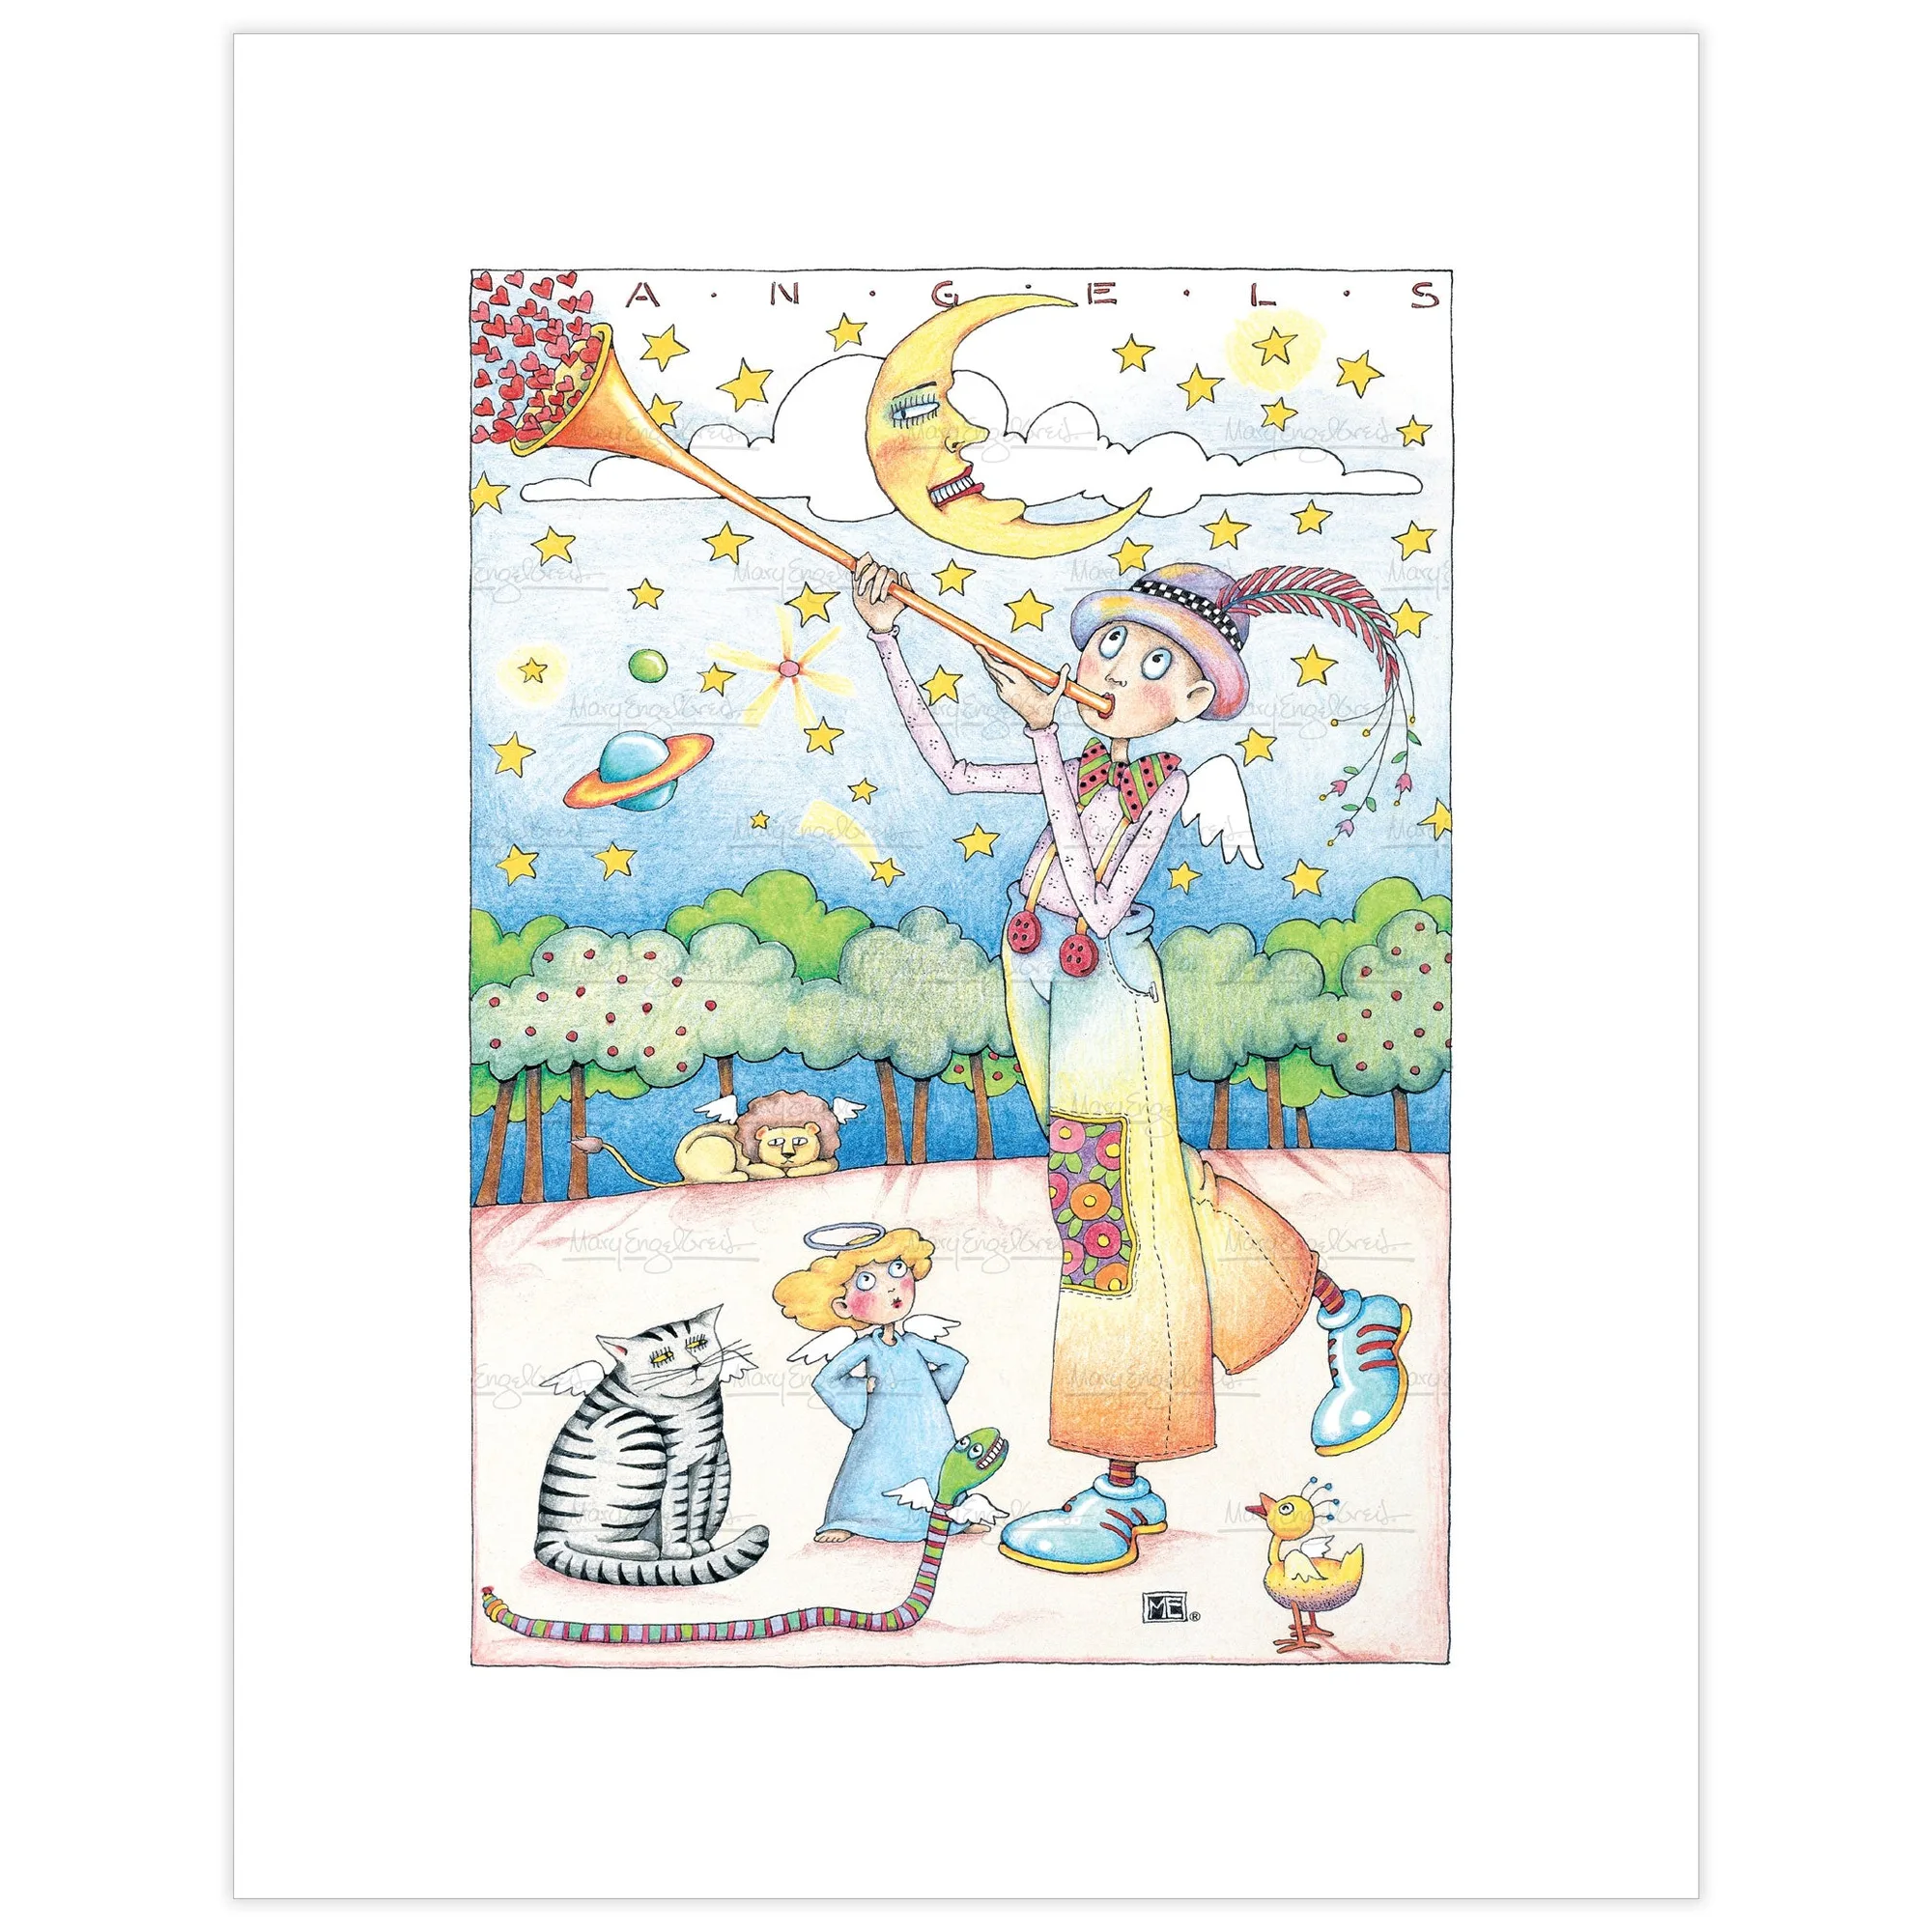
- Angels Fine Art Print: Printed on high-quality, textured paper in standard frame sizes and available with Mary's signature; each print is created to order, so allow up to one week for processing. Standard sizes make it easy to plan frames and spacing before the print arrives, but the made-to-order timeline means you should order the anchor first.
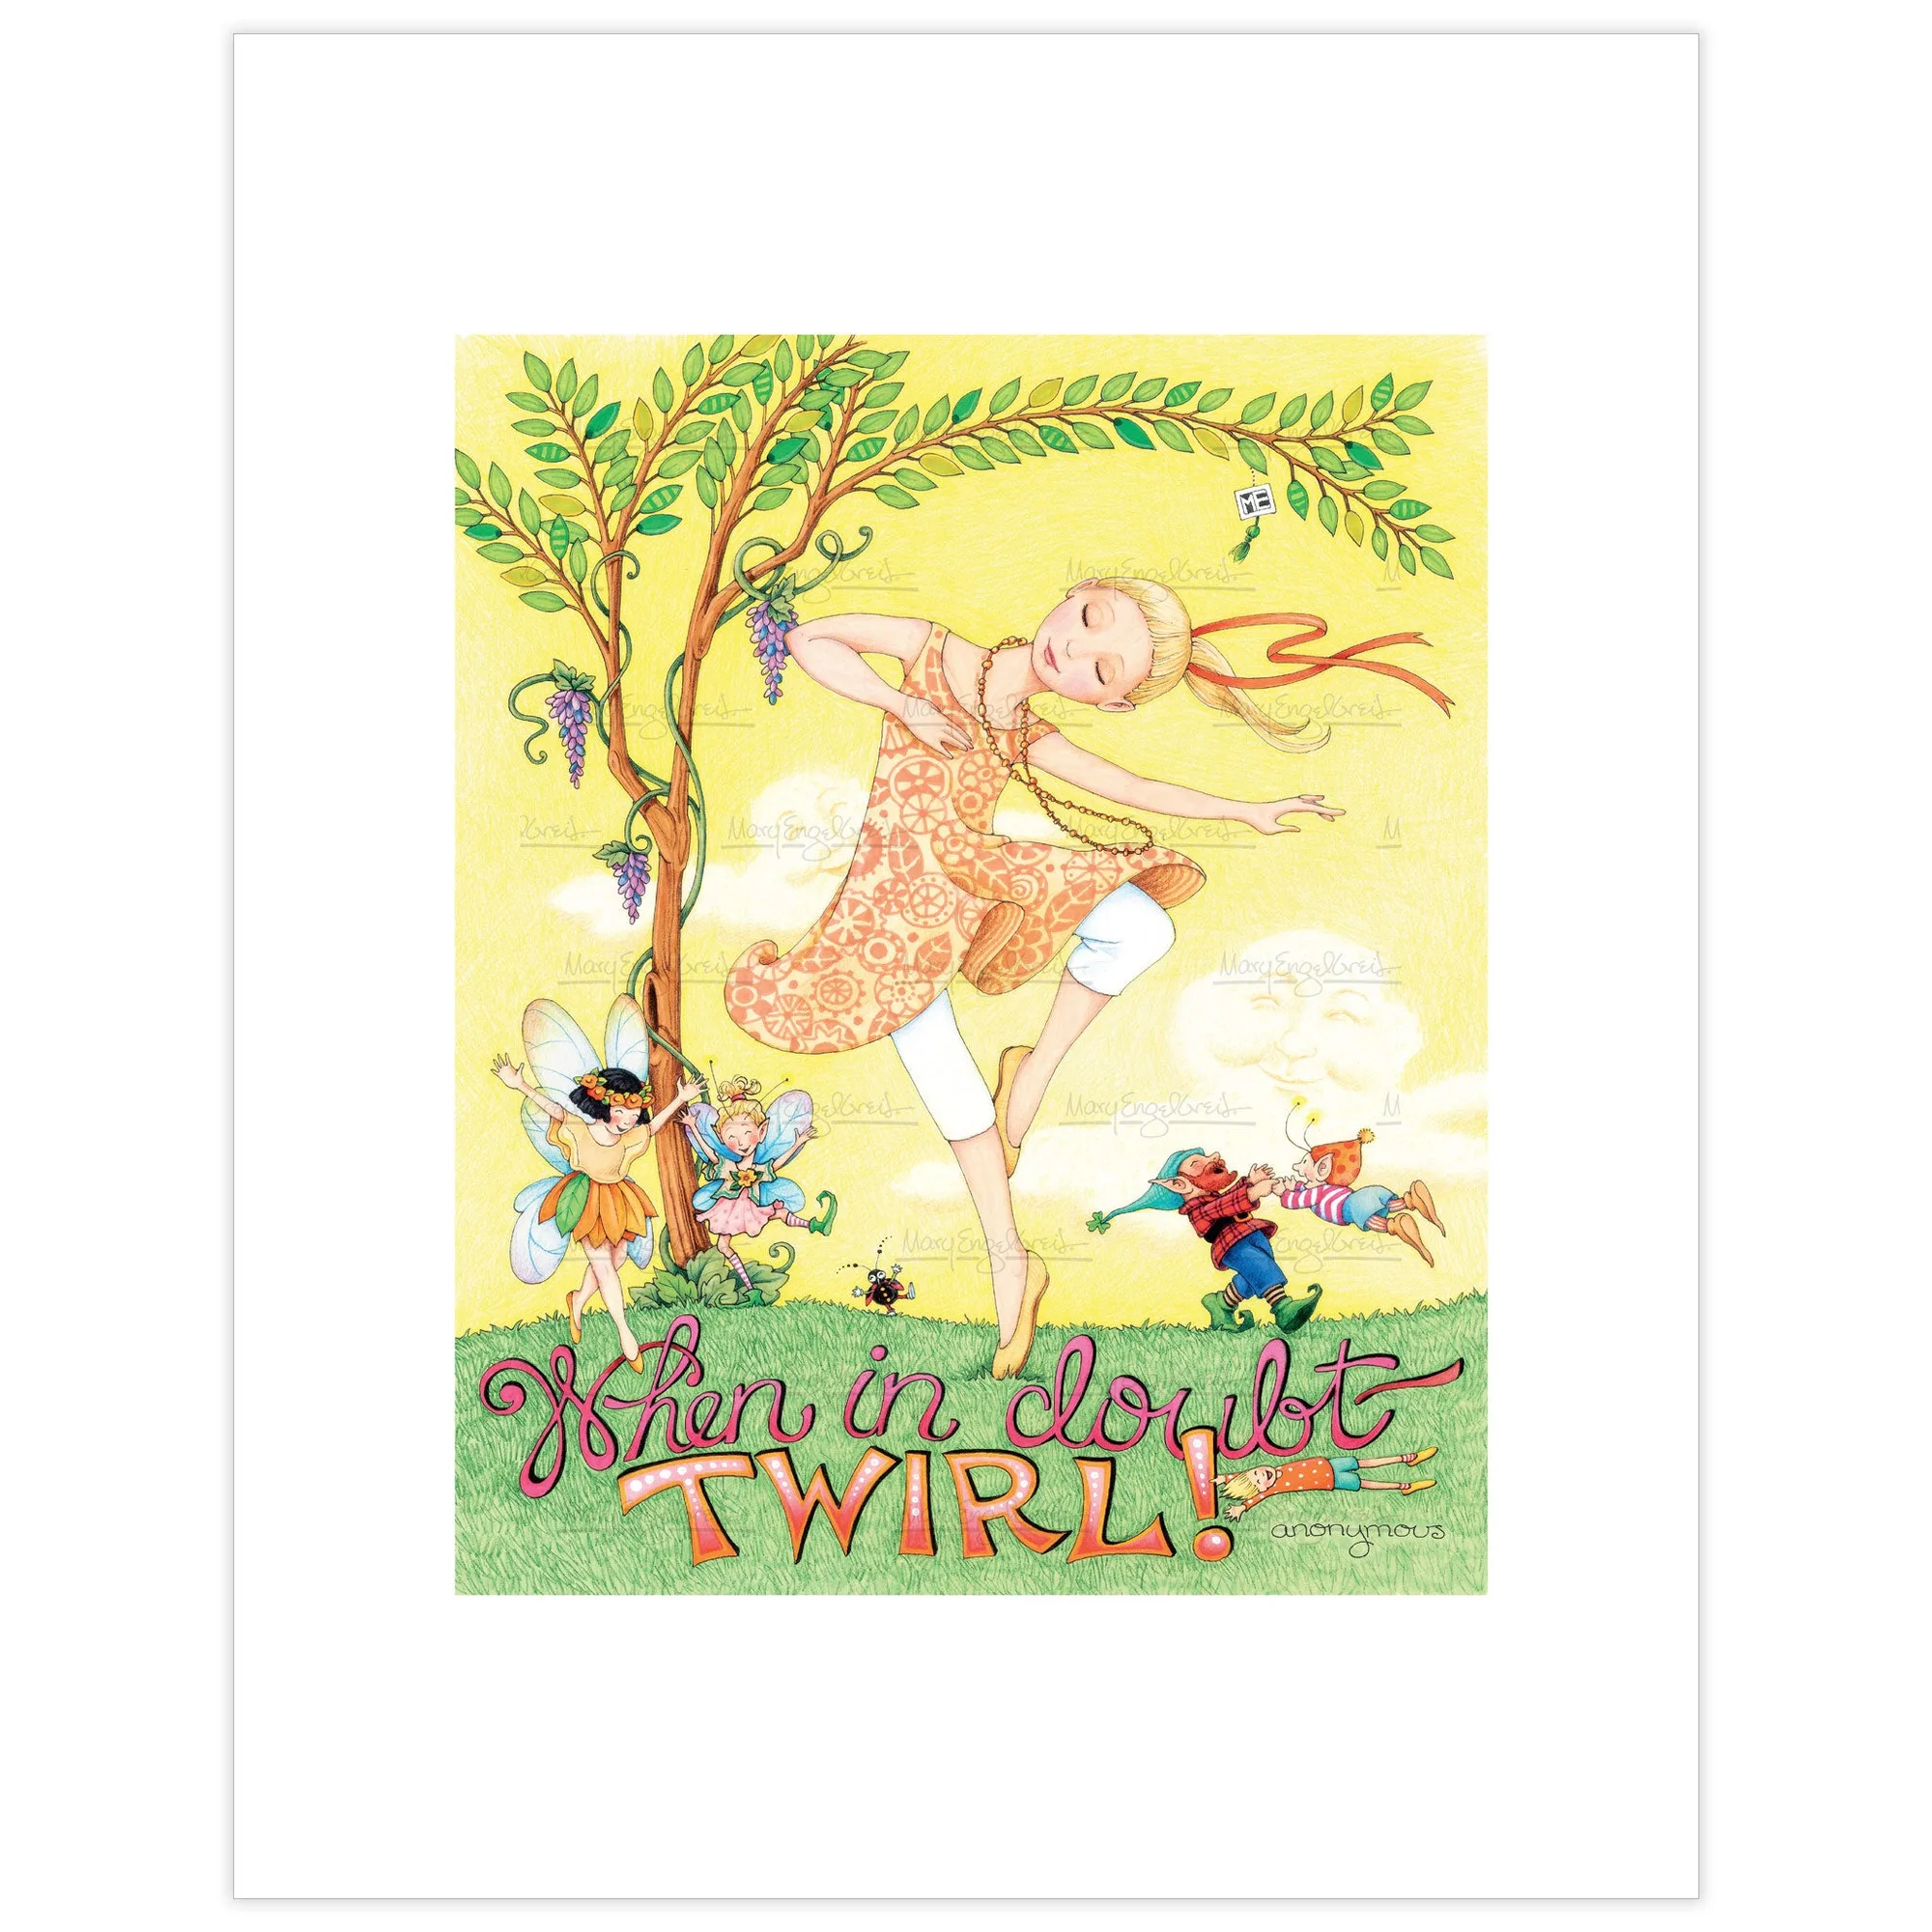
- When In Doubt Twirl Fine Art Print: Reads 'When in doubt—twirl!' and is printed on high-quality, textured paper in standard frame sizes, available with Mary's signature. A text-forward print works well as a secondary piece near an image-based anchor because it adds rhythm without competing on detail.
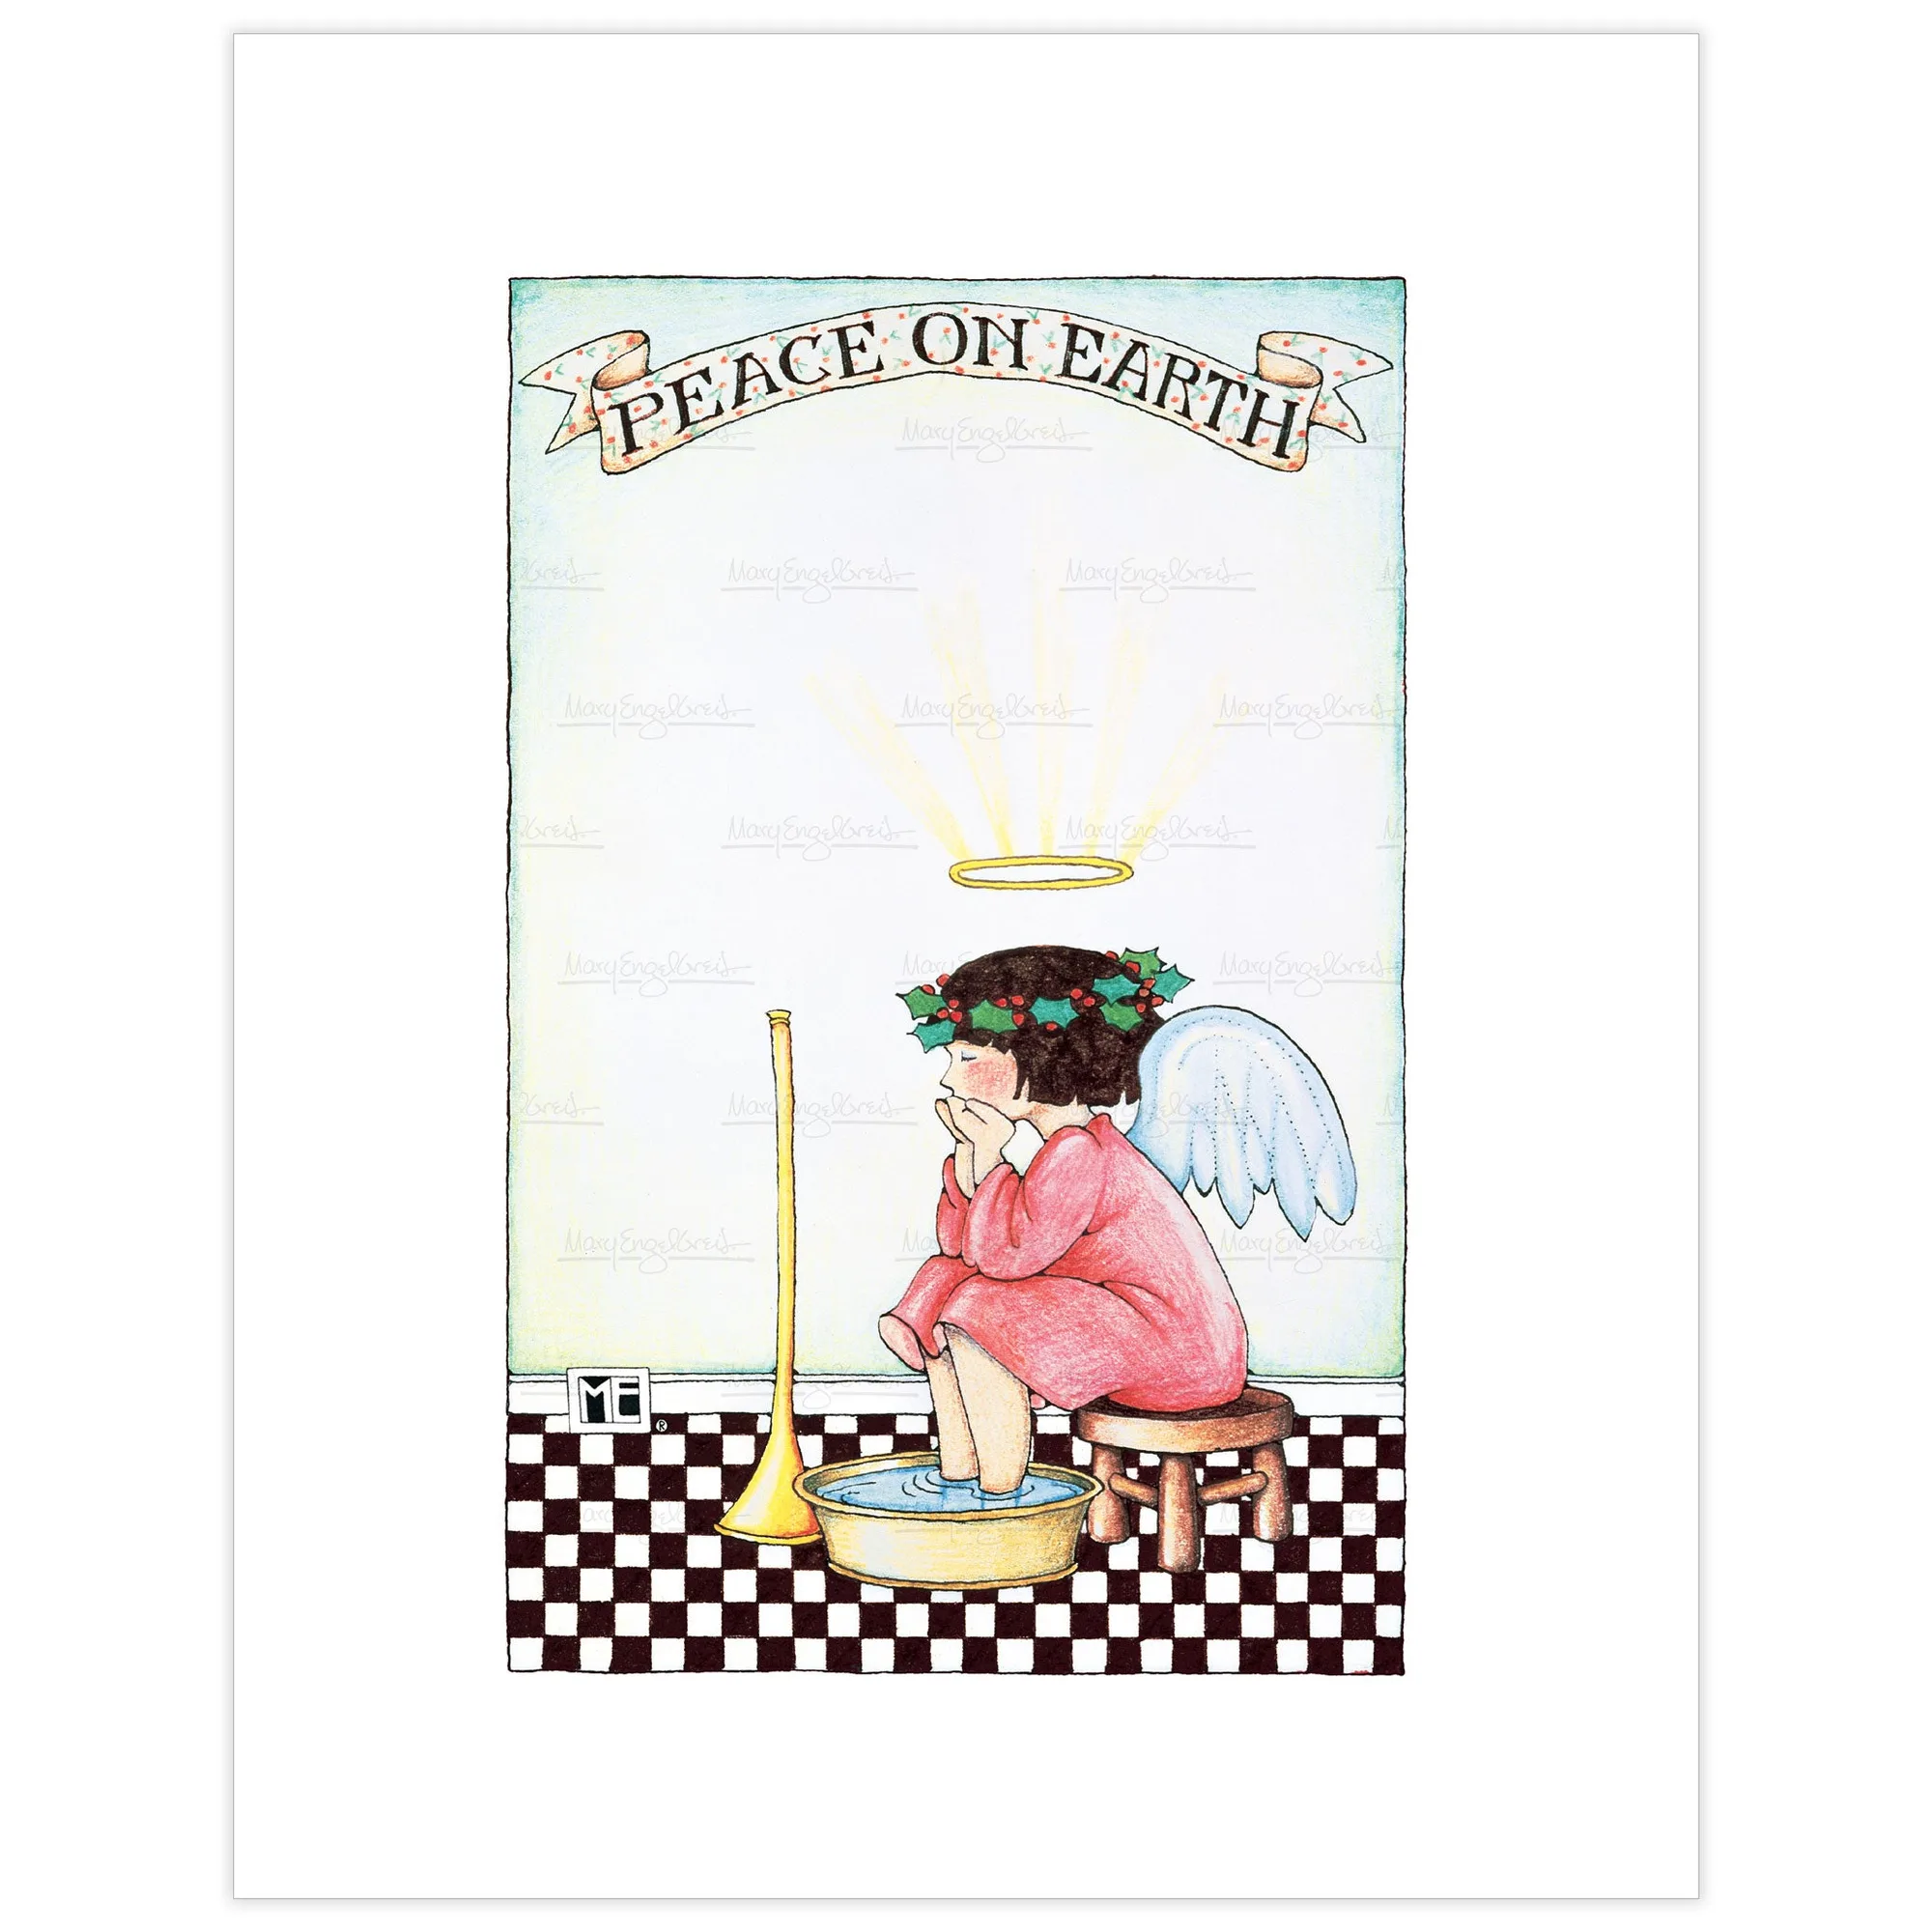
- Peace Angel Fine Art Print: A classic Mary Engelbreit illustration reading 'Peace on Earth,' printed on high-quality, textured paper in standard frame sizes, available with Mary's signature. Its calm subject and simple composition suit a seasonal or year-round anchor spot where you want the wall to feel restful.
A gallery wall works when one fine art print leads and everything else supports it. Measure first, keep spacing consistent, and stop adding pieces while the wall still feels calm.