Quick Answer
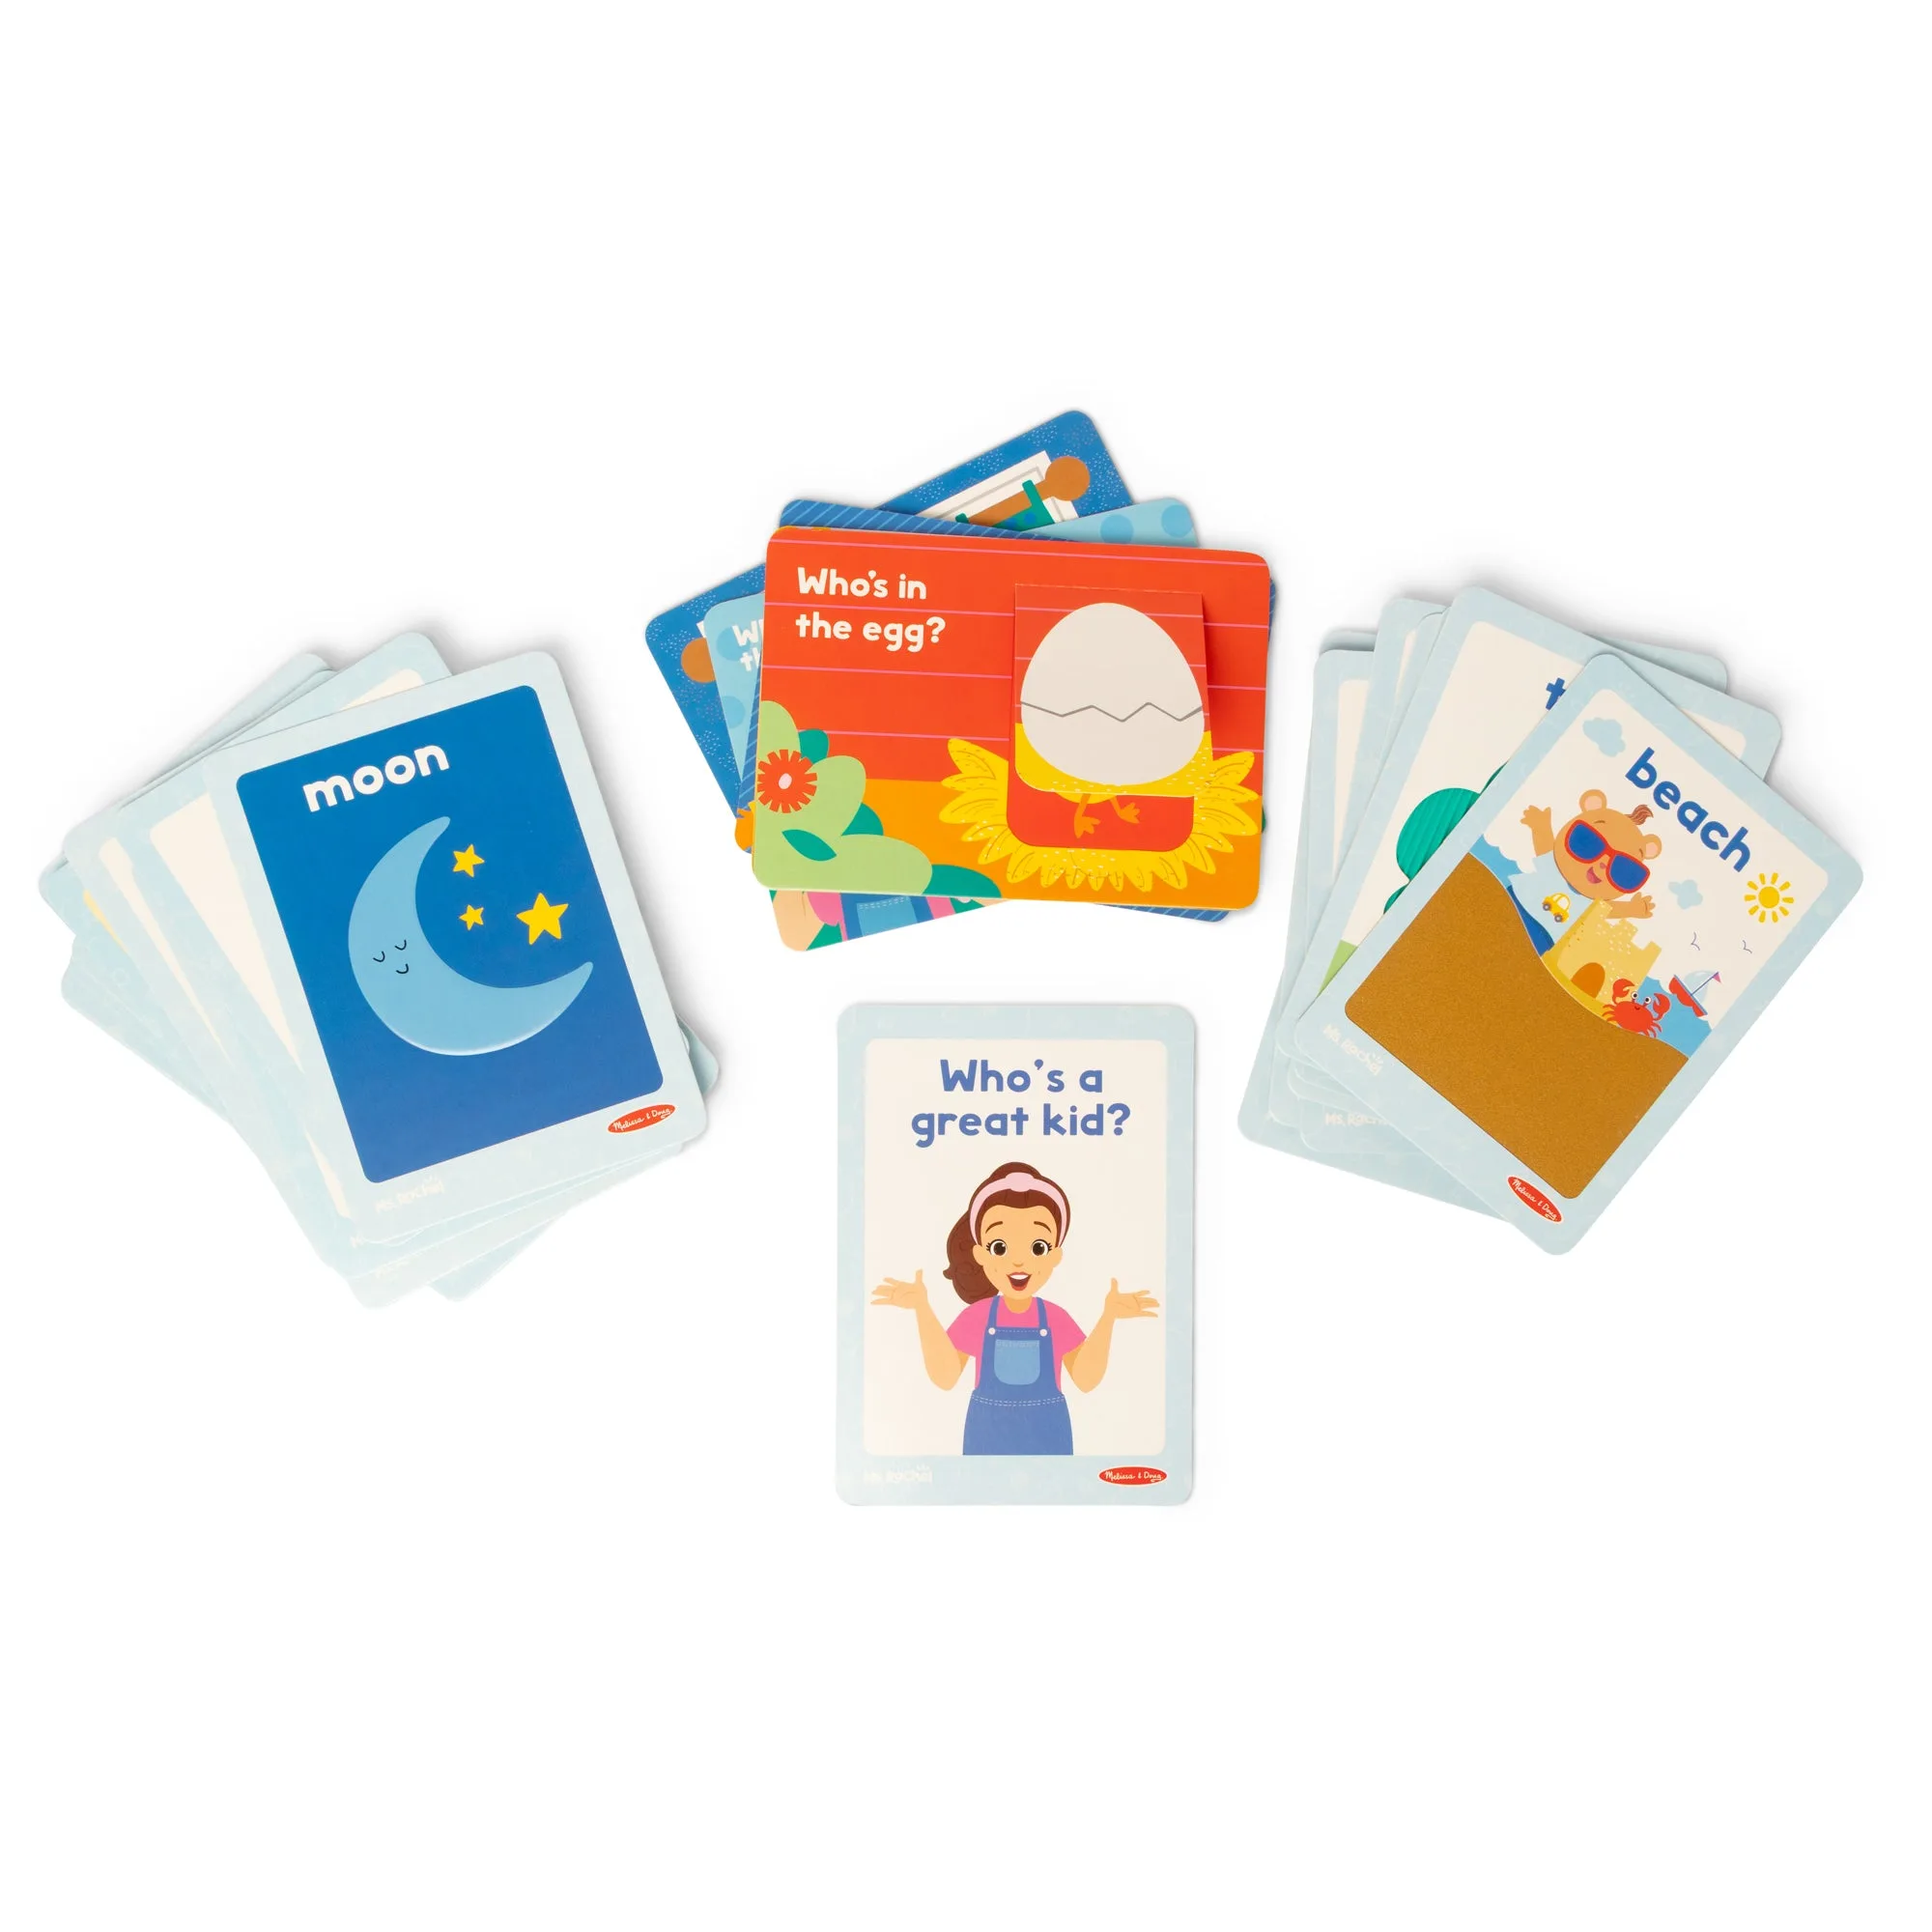
Use sensory cards that pair pictures with textures, flaps, and a mirror to turn word learning into a hands-on game. The Ms. Rachel™ First Words Sensory Cards are designed for exactly this kind of multi-sensory play.
Why Sensory Cards Work for Early Language
Toddlers learn best when they can see, touch, and interact with what they're learning. Sensory cards go beyond flat pictures by adding textures, flaps, and surprises that keep little hands busy and brains engaged. This multi-sensory approach helps children connect a spoken word to a physical experience, making the word stick faster.
The Ms. Rachel™ First Words Sensory Cards include 30 double-sided cards with touchable textures, peek-a-boo flaps, and even a mirror. These features turn a simple flashcard activity into a discovery game, which is especially helpful for toddlers who resist sitting still for traditional word drills.
When to Start and How Long to Practice
Most toddlers are ready for first-word activities around 12 to 18 months, but every child develops at their own pace. Start when your child shows interest in pictures or reaches for objects you name. Keep sessions short — two to five minutes is plenty. The goal is playful exposure, not drilling.
A common mistake is pushing too many new words at once. Stick to one or two cards per session and repeat them over several days. Repetition builds confidence and helps the word move from short-term to long-term memory.
Step-by-Step: Teach First Words with Sensory Cards
- 1. Choose One Card and Name the Object: Pick a single card, such as 'ball' or 'dog.' Hold it up and say the word clearly while pointing to the picture. Then let your child touch the texture or lift the flap. Common mistake: rushing through multiple cards. Stick to one card per session. Repeat the same card for several days before introducing a new one.
- 2. Add a Sound or Gesture: Pair the word with a simple sound effect or hand motion. For example, say 'ball' and then bounce an imaginary ball, or say 'dog' and pant like a dog. This extra cue helps the brain form a stronger memory link. Common mistake: forgetting to pause and let your child imitate you. Wait a few seconds after you model the sound to give your child a chance to try it.
- 3. Use the Mirror Card for Self-Recognition: When you come to the card with a mirror, say 'baby' or your child's name and point to their reflection. Smile and wave. This builds the connection between the word and their own identity. Common mistake: treating the mirror as just a fun distraction. Use it deliberately to teach a name or emotion word. The mirror card is also great for teaching 'happy,' 'sad,' or 'surprised' by making faces together.
- 4. Hide and Find the Card: Place the card under a soft cloth or behind your back. Say the word and ask 'Where is the ball?' Let your child pull off the cloth or reach for it. Celebrate when they find it. Common mistake: making the hiding spot too hard. Keep it easy so your child feels successful. This game teaches object permanence while reinforcing the word.
- 5. End with a Simple Choice: Hold up two cards your child has already seen. Ask 'Do you want the ball or the dog?' Let them point or grab the one they want. Say the word again as they choose. Common mistake: expecting a verbal answer. A point or a reach is a perfectly good response at this stage. Offering choices gives your child a sense of control and encourages active participation.
Product Spotlight
-
Ms. Rachel™ First Words Sensory Cards: The Ms. Rachel™ First Words Sensory Cards include 30 double-sided cards with vibrant illustrations, touchable textures, peek-a-boo flaps, and a mirror. These features let you turn word practice into a hands-on exploration, which holds a toddler's attention longer than standard flashcards.
Ms. Rachel™ First Words Sensory Cards