Quick Answer
Use a braiding foot to guide braid, ribbon, or cord under the needle while you sew a straight or decorative stitch, creating even couched embellishments with minimal fuss.
Why Use a Braiding Foot?
A braiding foot is designed with a front guide that holds your trim in place as it feeds under the needle. This keeps the braid or cord centered and prevents it from shifting, which is especially helpful when working with slippery ribbons or thick decorative cords.
Unlike freehand couching, where you have to manually guide the trim, a braiding foot lets you focus on stitch placement and speed. The result is more consistent spacing and a professional finish, even on curved or straight lines.
Choosing the Right Braiding Foot
Not all braiding feet are the same. Some have a single front guide, while others may have adjustable guides for different trim widths. The BERNINA #21 Braiding Foot features a front guide that feeds braid, ribbon, or cord smoothly and evenly, making it a versatile choice for most couching projects.
Before you start, check the width of your trim against the guide opening. If the trim is too thick or wide, it may not feed smoothly. In that case, you might need a different foot or a smaller trim.
Step-by-Step: Using a Braiding Foot
- Attach the Braiding Foot: Remove your standard presser foot and attach the braiding foot according to your machine's instructions. Ensure it clicks securely into place. Check that the foot is level and the needle aligns with the center of the guide.
- Select Your Stitch: Choose a straight stitch for a classic couched look, or a decorative stitch for added flair. Set a stitch length that suits your trim—longer stitches work well for thicker cords. Test on a scrap piece first to see how the stitch interacts with your trim.
- Thread the Trim Through the Guide: Feed the braid, ribbon, or cord through the front guide from front to back, leaving a tail of about 4-6 inches behind the needle. Lower the presser foot to hold it in place. Make sure the trim lies flat and isn't twisted before you start sewing.
- Position Your Fabric: Place your fabric under the foot, aligning the trim where you want it. Lower the needle into the fabric at the starting point, then lower the presser foot. If you're couching along a curve, pivot the fabric slowly while keeping the trim in the guide.
- Start Sewing Slowly: Begin sewing at a moderate speed, guiding the fabric gently. The foot will feed the trim automatically, so you only need to steer the fabric. Avoid pulling the trim; let the foot do the work to prevent puckering.
- Secure the Ends: When you reach the end, stop with the needle down, raise the presser foot, and pull the trim out slightly. Trim the excess, leaving a small tail to bury or secure with a few hand stitches. For a clean finish, use a needle to pull the tail to the wrong side and knot it.
- Practice and Adjust: Try different trims and stitch combinations to see what works best. Adjust stitch width or length as needed for your project. Keep a sample notebook of your favorite combinations for future reference.
Product Spotlight
-
#21 BERNINA Braiding Foot: The BERNINA #21 Braiding Foot has a front guide that feeds braid, ribbon, or cord smoothly and evenly. This guide keeps your trim centered under the needle, so you get consistent couching without having to manually adjust the braid as you sew.
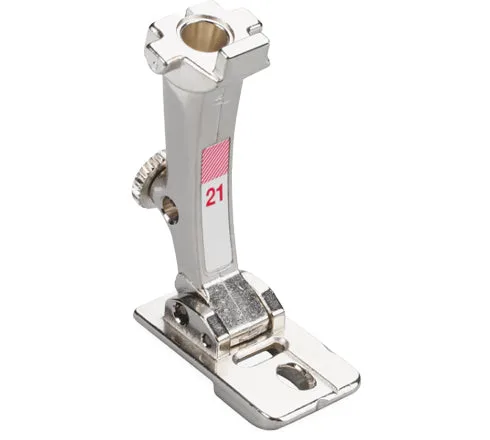
#21 BERNINA Braiding Foot