Quick Answer
Use the Grownsy SniffEase OG adjustable suction nasal aspirator to gently clear your baby's stuffy nose, then follow the 10-in-1 bottle warmer's preset settings to warm milk evenly—never microwave or overheat.
Why This Two-in-One Bundle Saves Time
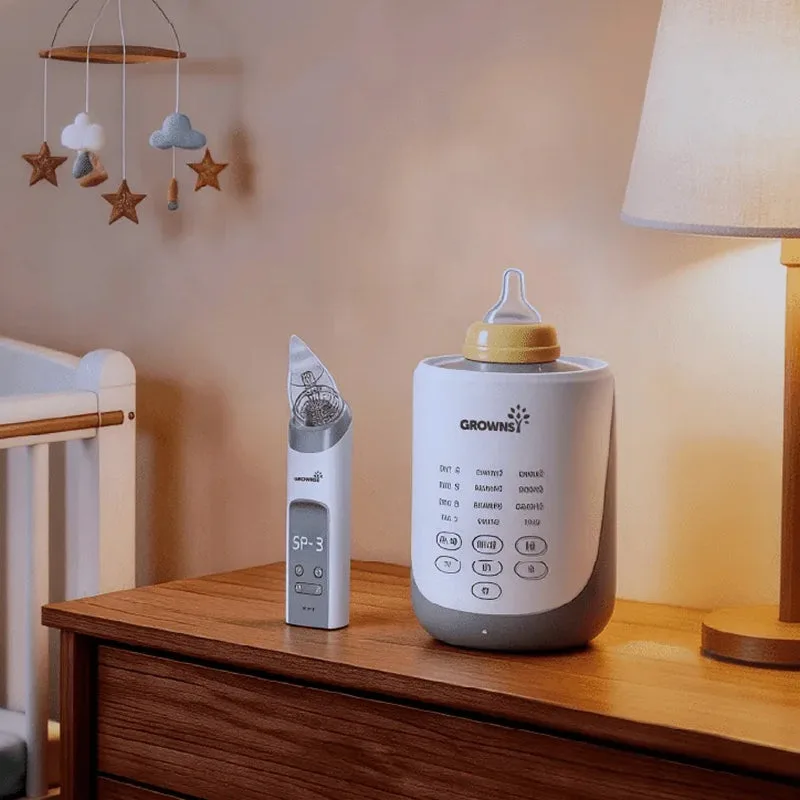
The Grownsy Baby's Sleep Bundle combines a nasal aspirator and a bottle warmer so you can address two common newborn needs without juggling separate devices. The aspirator helps your baby breathe easier during colds, while the warmer ensures milk is at a safe, consistent temperature—both contributing to calmer bedtimes.
Because the bundle is designed for simultaneous use, you can warm a bottle while clearing nasal passages, cutting down on nighttime fussing. Just make sure you understand each device's settings before your baby needs them.
Trade-Offs to Consider
The nasal aspirator uses adjustable suction, which gives you control but requires you to gauge the right level for your baby's age and congestion. Start with the lowest setting and increase only if needed. The bottle warmer's 10-in-1 functionality means multiple presets—read the manual to avoid accidentally using a defrost cycle when you want a quick warm.
Step-by-Step Instructions
- 1. Prepare the nasal aspirator: Wash your hands and the aspirator tip with warm soapy water. Attach the soft silicone tip to the main body. Place a few drops of saline spray in each nostril if your baby is very congested, then wait 30 seconds. Common mistake: Using the aspirator without moistening dry mucus—this can irritate the nasal lining.
- 2. Position your baby and aspirate: Hold your baby in a slightly reclined position. Insert the tip gently into one nostril—do not push deep. Turn on the device and adjust suction to the lowest setting. Slowly move the tip in a circle while keeping a good seal. Repeat for the other nostril. Checkpoint: If your baby cries or struggles, pause and comfort them. Never force the tip or use high suction on a newborn.
- 3. Clean the aspirator after each use: Disassemble the tip and collection chamber. Rinse with warm water and mild soap, then air-dry on a clean towel. Store in a dry place until next use. Common mistake: Leaving moisture inside the chamber can lead to mold growth—always dry completely.
- 4. Set up the 10-in-1 bottle warmer: Place the bottle in the warming chamber and add the recommended amount of water (usually to the fill line). Select the appropriate preset for bottle material (glass or plastic) and milk type (fresh or refrigerated). Press start. Common mistake: Overfilling the water reservoir can cause overflow or uneven heating—stick to the marked line.
- 5. Test milk temperature before feeding: Once the warmer beeps, remove the bottle and shake gently to distribute heat. Squeeze a few drops on the inside of your wrist—it should feel warm, not hot. If it's too hot, let it cool for a minute. Checkpoint: Never microwave breast milk or formula—it creates hot spots that can burn your baby's mouth.
- 6. Clean the warmer after each session: Unplug the unit and wipe the interior with a damp cloth. Descale every 4 weeks using a vinegar-water solution to prevent mineral buildup. Common mistake: Skipping descaling can cause the warmer to heat inconsistently over time.
Product Facts
-
Grownsy SniffEase OG Adjustable Suction NasalAspirator + 10-in-1 Fast Baby Bottle Warmer: Thoughtfully designed for calmer bedtimes and deeper rest. Simultaneously addresses the essential daily needs of clear breathing and precise feeding. You can handle stuffy nose and bottle warming in one routine, reducing middle-of-the-night disruptions.
Grownsy SniffEase OG Adjustable Suction NasalAspirator + 10-in-1 Fast Baby Bottle Warmer