Quick answer
Start by sorting your jelly roll strips by color and pattern, then sew them into pairs, press seams open, and join pairs into rows to create a simple strip quilt top.
Why jelly rolls make quilt tops easy
Jelly roll bundles contain 40 coordinating 2.5-inch wide strips, pre-cut and ready to sew. This eliminates the cutting step and guarantees fabric harmony, so you can focus on layout and piecing. The Blush Blossom Jelly Roll Bundle, for example, offers a soft pink palette that works beautifully for a feminine quilt top.
The main trade-off is that you cannot change the strip width. If your pattern requires narrower or wider strips, you'll need to cut them yourself, which adds time and may reduce the number of strips available.
Choosing a pattern for your jelly roll
Simple strip quilts (sewing strips together side by side) are the fastest way to use a jelly roll. More complex patterns like bargello or log cabin require cutting the strips into smaller pieces, which increases fabric waste and sewing time. For your first jelly roll quilt, stick with a straight strip layout or a simple rail fence pattern.
Step-by-step: Turn a jelly roll into a quilt top
- 1. Sort and plan your layout: Lay out all strips on a flat surface. Group them by color intensity (light, medium, dark) and pattern scale (small florals, dots, large prints). Arrange them in a sequence that creates a pleasing gradient or random scatter. Common mistake: Sewing strips in the order they come out of the bundle. Take time to rearrange for visual balance.
- 2. Sew strips into pairs: Take the first two strips in your layout, right sides together, and sew a 1/4-inch seam along the long edge. Chain-piece all pairs to save thread and time. Press the seam open to reduce bulk. Checkpoint: After pressing, measure the seam allowance. If it's wider or narrower than 1/4 inch, your finished quilt top may not match the expected size.
- 3. Join pairs into rows: Sew the pairs together, maintaining the same 1/4-inch seam allowance. Continue adding strips until you have a full row of strips sewn side by side. Press all seams open. Common mistake: Forgetting to alternate the direction of pressing. Always press seams open or toward the darker fabric to avoid bulky intersections.
- 4. Square up the quilt top: Once all strips are sewn, trim the edges to create straight, even sides. Use a rotary cutter and a long ruler to cut off any uneven edges, ensuring the top is rectangular. Checkpoint: Measure the top's width and length at three points. If they vary by more than 1/2 inch, trim the longest side to match the shortest.
- 5. Add borders (optional): If your quilt top feels too small or you want a framed look, add border strips from your stash or coordinating fabric. Sew the side borders first, then the top and bottom borders. Common mistake: Stretching borders to fit. Always measure the quilt top's center length and cut borders to that measurement, not the edge length.
Product facts
-
Blush Blossom Jelly Roll Bundle: The Blush Blossom Jelly Roll Bundle offers a soft, sweet garden in every strip with a mix of pink hues and floral patterns. Using a coordinated bundle like this one saves you the guesswork of matching fabrics, so your quilt top looks cohesive with minimal effort.
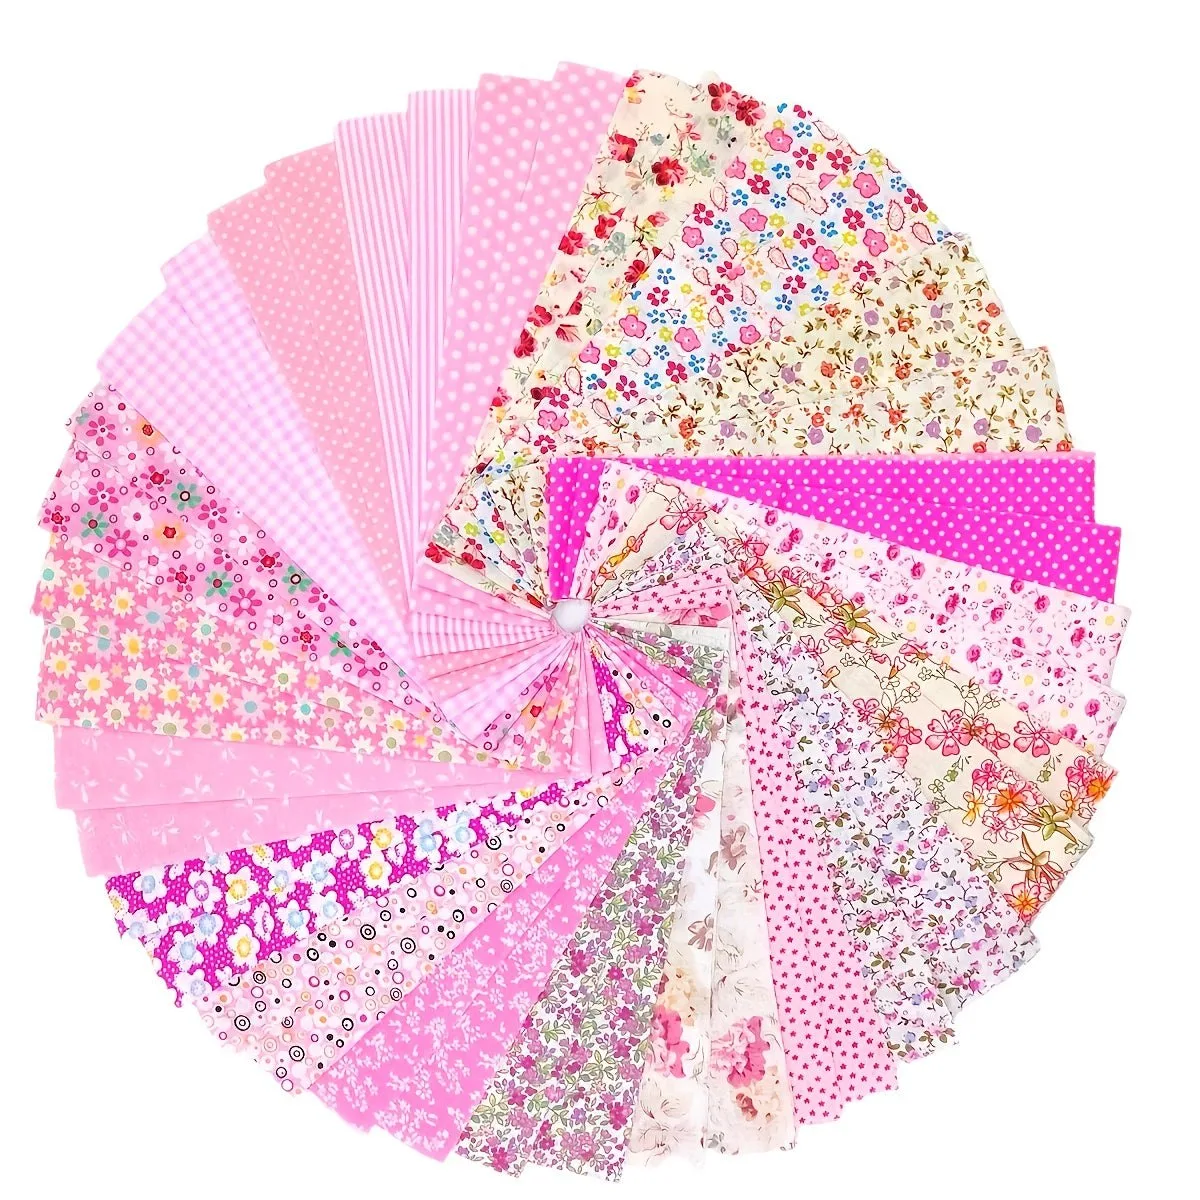
Blush Blossom Jelly Roll Bundle


