Quick answer
Use Safariology life cycle figures as a hands-on anchor for a short, repeatable science routine: observe the stages, sequence them, connect them to a real species, then have your child explain the cycle back to you. One set can carry a full week of homeschool science if you pair it with notebooking and a simple review game.
A life cycle set looks simple: a few sturdy figures showing egg, larva, pupa, and adult. The learning happens when you build a routine around them instead of leaving them on a shelf. Safariology life cycle figures are designed for exactly that kind of repeated, hands-on use, which makes them a practical fit for homeschool science.
This guide walks through a five-step method you can run in 15 to 30 minutes a day, plus the mistakes that turn a good science toy into a dust collector. You can adapt every step for a single child or a mixed-age group.
Why life cycle figures work well for homeschool science
Life cycle toys give children something to hold while they learn an abstract sequence. Instead of memorizing words like larva and pupa from a worksheet, a child picks up each stage, compares sizes and shapes, and physically puts the cycle in order. That physical sequencing builds the same mental model that later shows up in diagrams and tests.
These figures also make review easy. You can shuffle the stages, hand them out, and ask your child to rebuild the cycle without notes. That is a quick, low-prep check for understanding that works for a wide age range.
- Works for visual, tactile, and verbal learners in the same lesson
- Reusable across multiple children and multiple years
- Pairs naturally with notebooking, drawing, and narration
Set up your science shelf before the first lesson
Decide where the figures will live when they are not in use. A small tray or basket on a low shelf lets your child revisit the set independently, which is where a lot of the real learning happens. Keep a notebook, colored pencils, and a magnifying glass nearby so observation does not require a trip to another room.
If you are teaching more than one child, plan a single set per student or rotate turns with a timer. Sharing one set between three kids usually ends in frustration rather than cooperation.
- Label the tray with the species name so your child can find it again
- Store the figures in stage order the first time, then mix them up later
- Keep a small reference book or printed photo of the real animal on the shelf
Match the set to your child's reading and attention level
Younger children do best with a single, familiar species and three or four large stages. Older children can handle more stages, more vocabulary, and comparisons between two species. If your child is still learning to read, you do the labeling and they do the sequencing and narration.
Do not rush into comparisons. A child who can confidently explain one complete cycle will pick up a second one much faster than a child who has only seen two half-finished cycles.
- Ages 4-6: one species, oral narration, drawing
- Ages 7-9: one species plus written labels and a short paragraph
- Ages 10+: two species compared side by side, with a written summary
Run the five-step lesson cycle
The routine below takes about 20 minutes and can be repeated daily for a week with small variations. The repetition is the point: each pass adds a little more vocabulary and independence.
Start by letting your child handle the figures freely for two or three minutes before you say anything. Free exploration first makes the structured part of the lesson feel less like a test.
- Day 1: free exploration and naming the stages
- Day 2: sequencing and narrating without prompts
- Day 3: notebook page with drawings and labels
- Day 4: compare with a real photo or short video
- Day 5: teach-back to a sibling, parent, or stuffed animal audience
Common mistakes to avoid
The biggest mistake is treating the figures as a quiz tool instead of a learning tool. If every interaction ends with a right-or-wrong question, children stop exploring and start guessing. Ask open questions like 'What do you notice about this one?' before you ask 'Which stage is this?'
The second mistake is skipping the real-world connection. A figure only becomes science when your child links it to a living thing. A photo, a garden observation, or a short documentary clip is enough to make that link.
- Do not correct every mispronunciation mid-sentence; note it and revisit later
- Do not introduce a second species until the first cycle is solid
- Do not let the set become a permanent display piece
Five-step routine for a week of life cycle science
- Step 1: Free exploration: Hand over the figures with no instructions for two to three minutes. Let your child turn them, line them up, and ask questions. Watch what they notice before you introduce any vocabulary. Checkpoint: if your child names a stage incorrectly, note it and move on rather than correcting immediately.
- Step 2: Name and sequence: Say each stage name once, then ask your child to put the figures in order. Have them narrate the cycle in their own words, even if the wording is imperfect. Checkpoint: a correct sequence with rough vocabulary is a stronger sign of understanding than a memorized sentence.
- Step 3: Notebook the cycle: Have your child draw the stages in a notebook and label them. Younger children can dictate labels while you write; older children can add one sentence per stage. Checkpoint: date the page so you can see progress when you revisit the same set months later.
- Step 4: Connect to a real species: Show a photo, a short video, or a live observation of the real animal or plant. Ask your child to point out which figure matches what they see and which stage is hardest to spot in nature. Checkpoint: if you cannot find a real reference, use the educational booklet or packaging that came with the set.
- Step 5: Teach it back: Ask your child to teach the cycle to someone else, even a stuffed animal or a younger sibling. Teaching forces them to organize the sequence without your prompts. Checkpoint: if they get stuck, go back to Step 2 rather than pushing forward to a new species.
Product facts that support this method
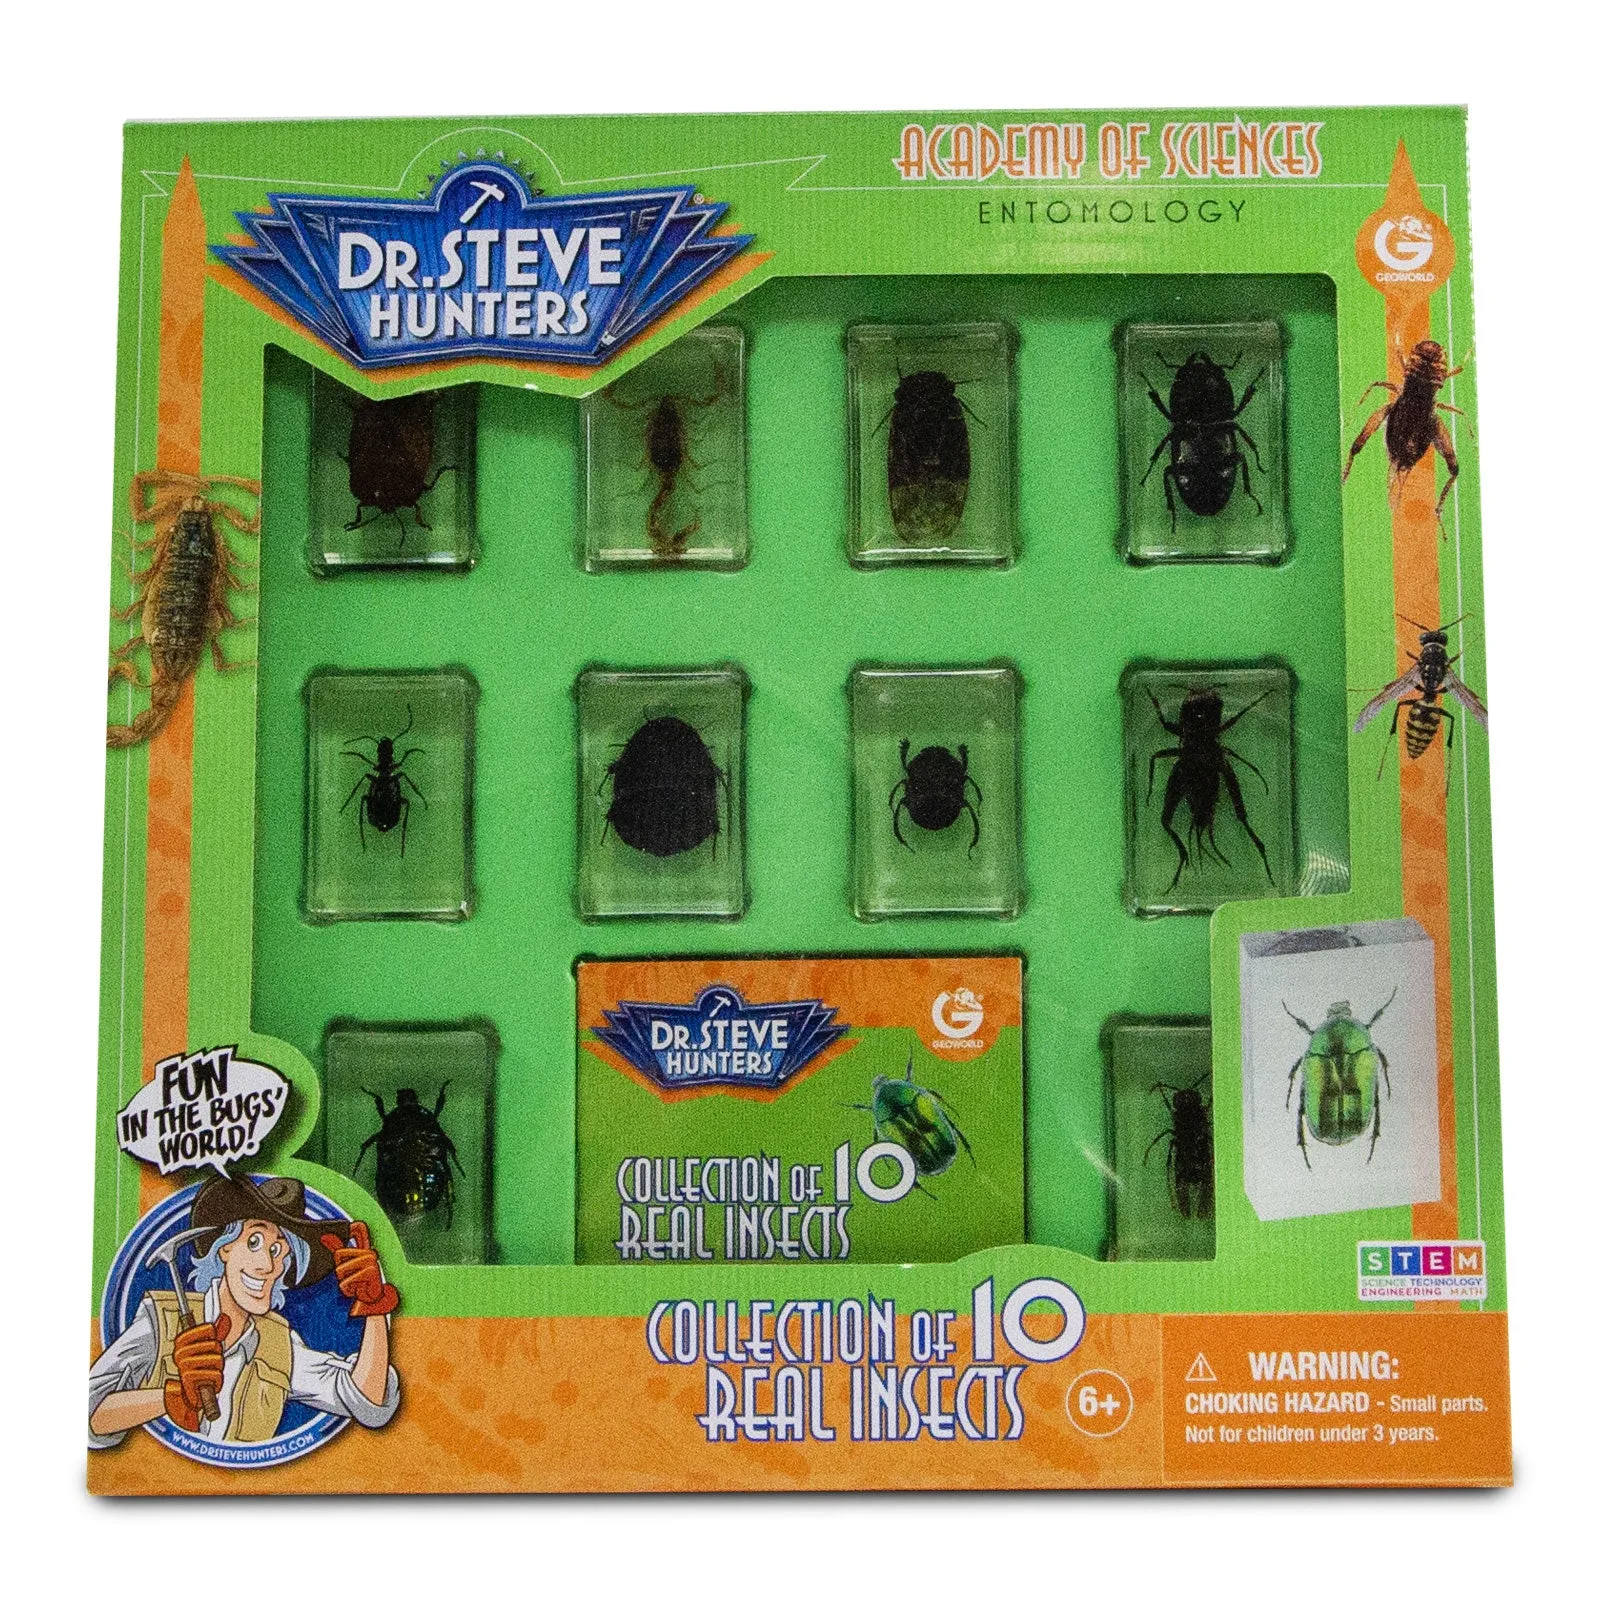
- Dr. Steve Hunters Bug World Collection - 10 Real Insects Toy Set: This set includes 10 different insect specimens preserved in resin, plus a magnifying glass and an educational booklet. It extends the life cycle lesson into real observation, so children can compare a figure's shape with an actual preserved specimen instead of only a drawing.
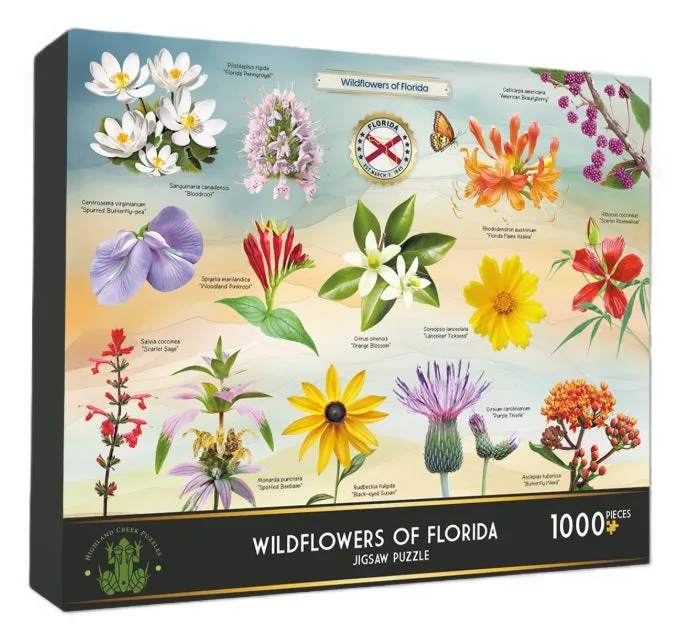
- Wildflowers of Florida Puzzle: The puzzle features detailed artwork of native Florida wildflowers and assembles to approximately 18 x 24 inches, for ages 8 and up. It is a useful companion for plant life cycle units, giving children a hands-on way to study the adult stage of a plant while the figures cover the earlier stages.
Safariology life cycle figures earn their place in a homeschool routine when you build a short, repeatable lesson around them instead of treating them as decoration. Start with one species, run the five steps for a week, and add a second set only when your child can teach the first cycle from memory.