Quick Answer
To wear elven branch hairpins for a boho look, place them in loose, textured hairstyles like half-up twists, messy buns, or braided crowns, securing them at angles that mimic natural growth.
Why Elven Branch Hairpins Work for Boho
Elven branch hairpins bring an organic, nature-inspired element that fits perfectly with boho aesthetics. Their tree-essence symbolism energizes the mind and balances the heart, adding a subtle spiritual layer to your style. The 8cm size is substantial enough to hold hair without being overpowering, and the design looks flattering on any hair color.
A common concern is whether these pins stay secure in fine or slippery hair. Because they are hairpins (not clips with springs), they rely on friction and proper placement. The key is to use them in hair with enough texture—either natural waves or a bit of product—and to insert them at a slight downward angle against the scalp.
Step-by-Step Guide to Styling Elven Branch Hairpins
- Step 1: Prep Your Hair with Texture: Start with day-old hair or add a light texturizing spray to create grip. Brush through to remove tangles, then loosely curl or wave sections if your hair is naturally straight. This gives the pins something to hold onto. Checkpoint: If your hair is freshly washed and slippery, the pins may slide out. Add a bit of dry shampoo or sea salt spray for better hold.
- Step 2: Choose a Base Hairstyle: For a classic boho look, try a half-up twist: gather the top section of hair from temples to crown, twist it loosely, and secure with a small elastic. Alternatively, create a low messy bun or a side braid. The pins work best when hair is already gathered but not too tight. Common mistake: Pulling hair too tight ruins the relaxed boho vibe. Keep the base style loose and slightly undone.
- Step 3: Insert the First Hairpin at an Angle: Take one elven branch hairpin and hold it with the decorative end pointing outward. Insert it into the hair at a 45-degree angle, sliding it along the scalp for about 2-3 cm before letting the prongs catch. The pin should feel snug but not painful. Checkpoint: If the pin feels loose, remove and re-insert at a steeper angle closer to the scalp.
- Step 4: Add the Second Pin for Balance or Accent: Use the second hairpin either symmetrically on the opposite side of the style, or place it slightly below the first to create a cascading branch effect. Avoid placing both pins in exactly the same spot—they should complement the shape of the hairstyle. Common mistake: Placing pins too close together makes them look cluttered. Leave at least 2-3 cm of space between them.
- Step 5: Adjust and Set with Light Hold: Gently tug at a few face-framing strands to soften the look. If desired, spritz with a flexible-hold hairspray to reduce flyaways without stiffening the style. Check the pins in a mirror from all angles to ensure they are secure and evenly placed. Final check: Shake your head gently—if pins shift, they need a deeper anchor. Re-insert at a sharper angle.
Product Details
-
Elven Branch Hairpins: The Elven Branch Hairpins come in a pack of two, each 8cm long, and are described as perfect for bridal or any hair-do. Having two pins lets you create symmetrical or layered placements, and the 8cm length provides enough grip for medium to thick hair without slipping.
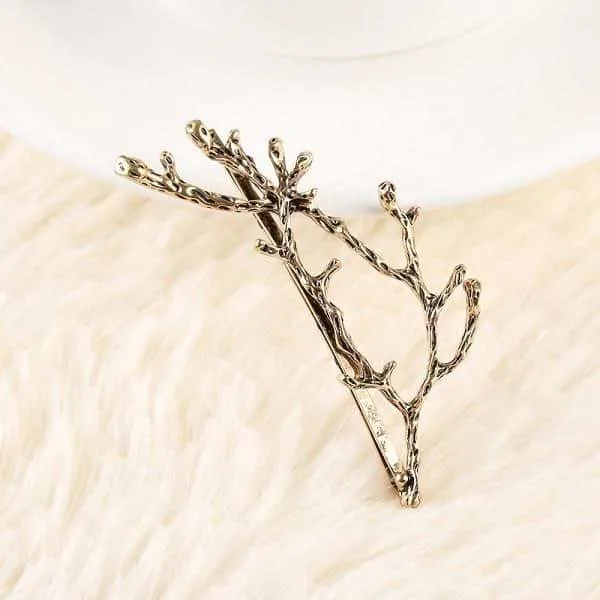
Elven Branch Hairpins