Quick answer
Dressing your LABUBU plush is easiest when you choose a clothes set designed for the vinyl plush format, work over a clean flat surface, and secure each piece without forcing seams. Start with the outfit laid out, then dress the plush from the bottom up. Never pull hard on ears or arms; if a piece resists, you likely have it backwards or on the wrong limb.
Why LABUBU clothes sets are not one-size-fits-all
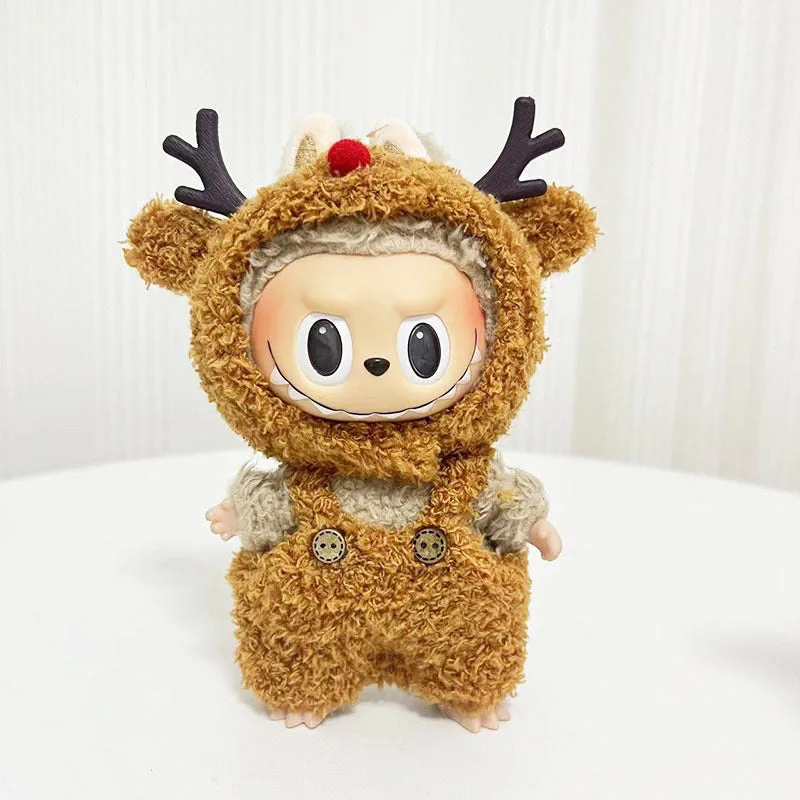
LABUBU plush dolls come in different sizes and proportions, so a clothes set that fits one may not fit another. The POP MART LABUBU The Monsters Plush Doll Clothes Set is made specifically for the Labubu vinyl plush format, which means the armholes, leg openings, and neckline are cut to match that body shape. If you own a different plush, check the measurements or product description before buying. When a listing says 'clothes only,' it means exactly that: no doll, figure, or toy is included, so you need to already have the plush you plan to dress.
Preparing your workspace and the plush
Before you start, clear a flat surface and wash your hands to avoid transferring oils or dirt to the fabric. If your plush has been displayed for a while, give it a gentle brush or a quick lint roll. Untangle any accessories or hair first, because dressing becomes much harder when parts are caught. Lay out the entire clothes set and identify each piece: top, bottom, or any accessories. This prevents mid-dressing confusion and reduces the chance of stretching a seam while you search for the next piece.
Step-by-step: dressing your LABUBU plush
- Step 1: Lay out the clothes set and identify each piece: Empty the package onto a clean surface. Separate tops, bottoms, and accessories. Check for any small parts that could be lost. Common mistake: assuming all pieces are obvious; some sets include reversible or layered items that look similar at first glance. Checkpoint: you should be able to name each piece before you touch the plush.
- Step 2: Dress the lower body first: If the outfit includes pants, a skirt, or a lower piece, slide it onto the plush's legs before the top. Work the fabric up gently, one leg at a time. Common mistake: trying to pull the whole bottom piece over both legs at once, which can stretch the waistband. Checkpoint: the lower piece should sit at the natural waist without rolling or twisting.
- Step 3: Add the top or upper piece: Guide the plush's arms through the sleeves one at a time. If the top has a back closure, fasten it after both arms are through. Common mistake: forcing an arm through a sleeve that is actually meant for the neck or a different limb; if it does not slide easily, stop and re-check orientation. Checkpoint: the neckline should sit comfortably without pulling on the plush's head or ears.
- Step 4: Adjust and secure the fit: Smooth out any bunching, straighten collars, and close any snaps or Velcro. If the outfit includes a hat or accessory, add it last. Common mistake: leaving a closure undone and then wondering why the outfit shifts; secure everything before display. Checkpoint: gently lift the plush; the clothes should stay in place without sagging.
Product facts
- POP MART LABUBU The Monsters Plush Doll Clothes Set - Clothes Only, Doll Not Included: POP MART LABUBU The Monsters Plush Doll Clothes Set - Clothes Only, Doll Not Included is a costume set for the Labubu vinyl plush format, with multiple themed costume options available by style. You can build a wardrobe for a Labubu plush you already own, but you must have the plush separately because no doll is included.