What the Mini Medallion pattern actually asks of you
The Mini Medallion is a small, ruler-driven quilt: a 28" x 32" finished project built from curved medallion units rather than a single large center block. The pattern is written to be used with the QCR Mini Ruler, so the curved shapes come from that tool rather than from templates you trace and cut by hand.
That single fact should shape how you approach the project. Before you cut any fabric, confirm you have the QCR Mini Ruler in hand and that you are comfortable using it to trim curved units. If the ruler is new to you, practice on scrap fabric first; the medallion units are small, and consistent trimming is what keeps them nesting cleanly as the layout grows.
The pattern's supplied information covers size, ruler compatibility and materials. It does not include step-by-step sewing instructions in the product record, so treat this walkthrough as preparation and sequencing guidance, and follow the pattern sheet itself for exact cut sizes, seam allowances and unit assembly.
Mini Medallion pattern at a glance
-
Mini Medallion (Paper): Finished size: 28" x 32" A small wall-or-baby format, so you can plan backing and display space before you start cutting.
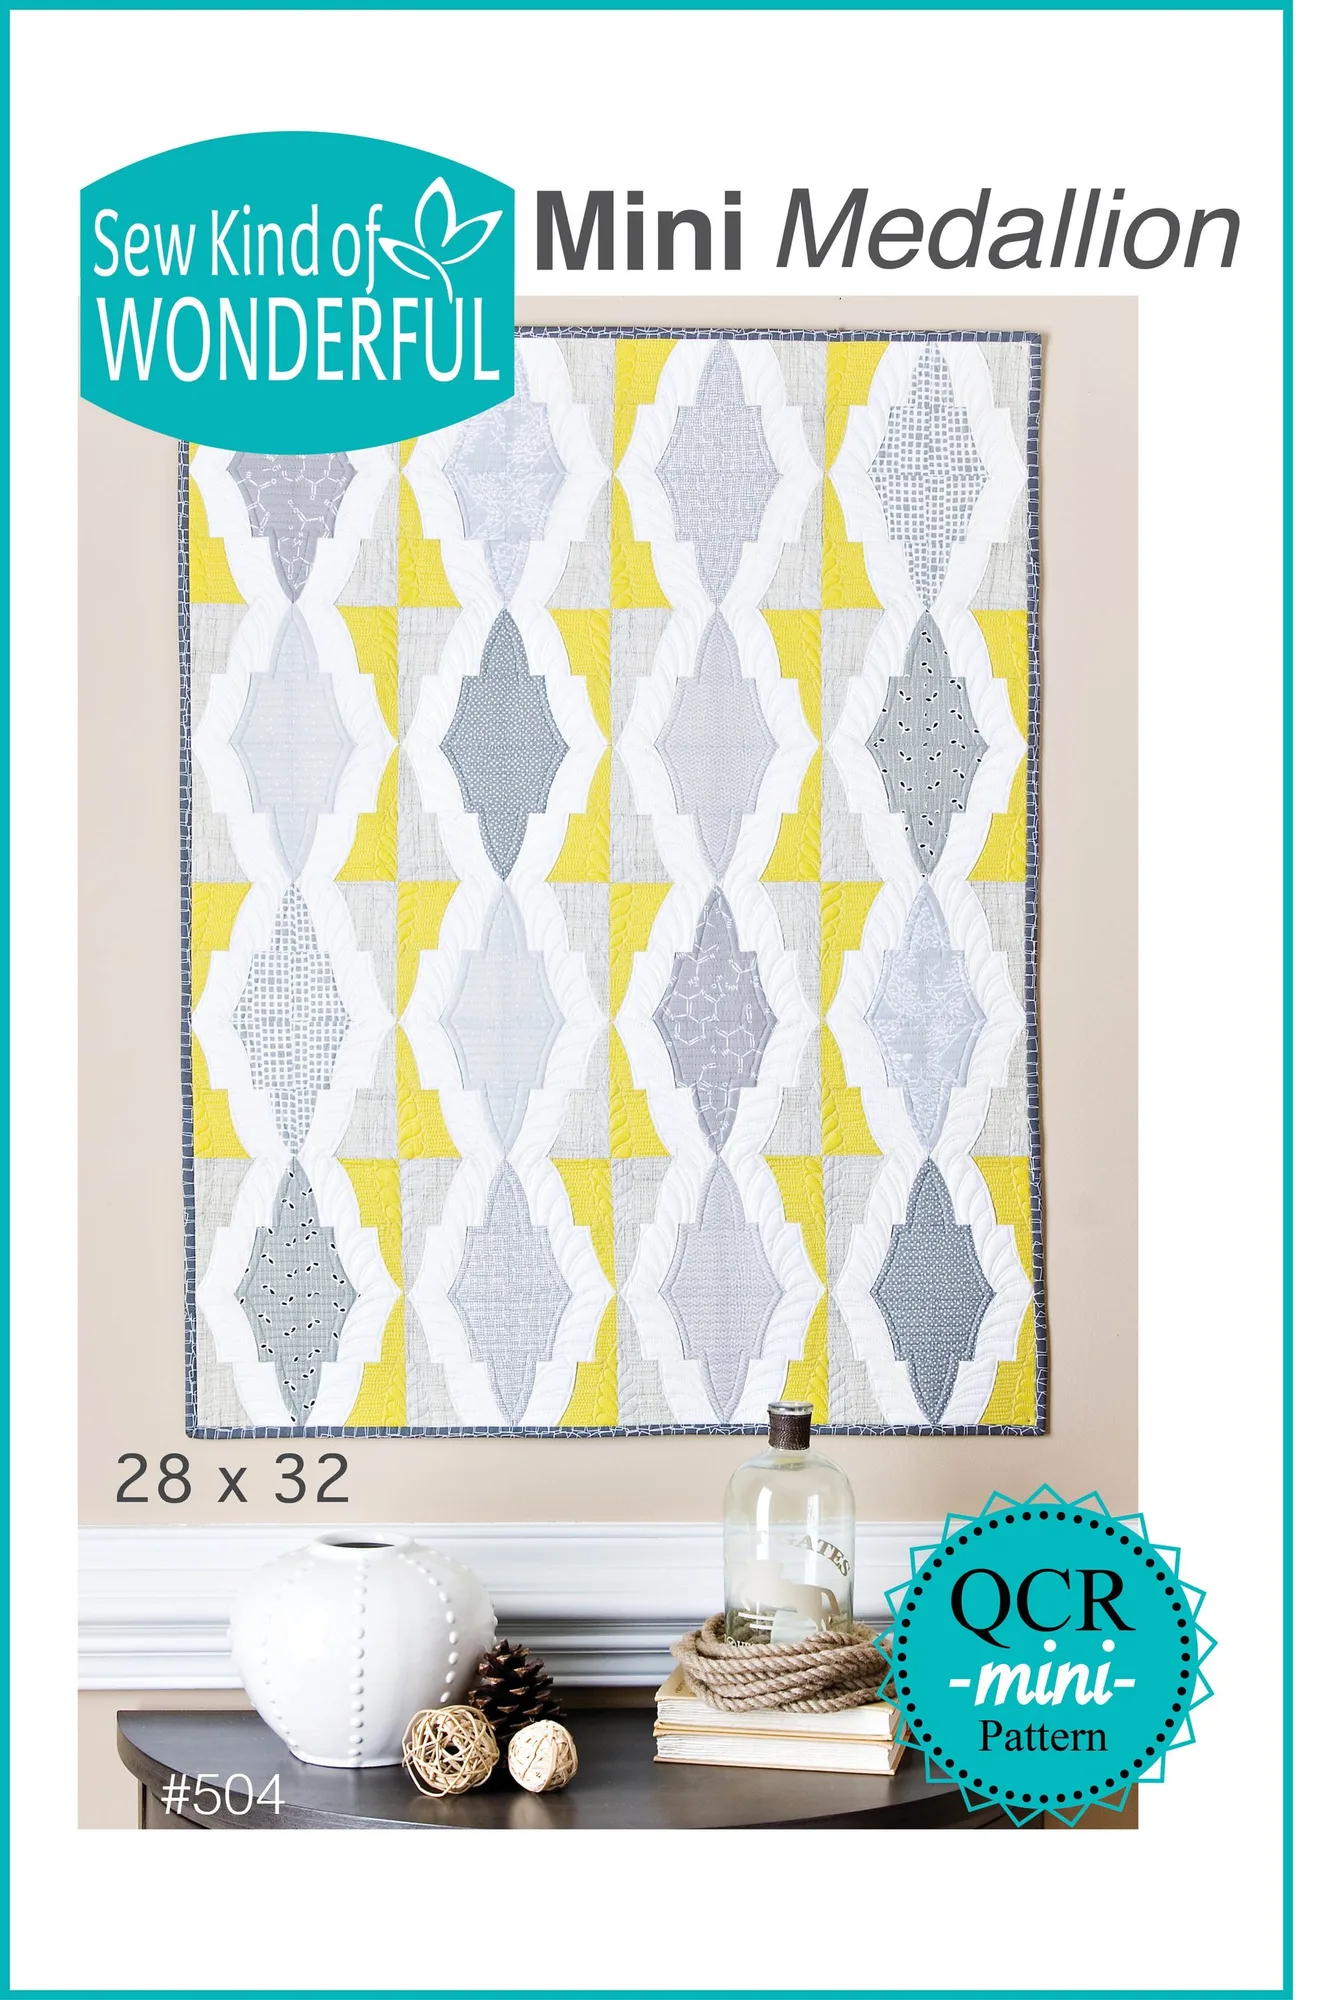
Mini Medallion (Paper)
-
Mini Medallion (Paper): Pattern to be used with the QCR Mini Ruler The ruler is a required tool, not an optional upgrade; the curved units depend on it.
-
Mini Medallion (Paper): (8) fat quarters assorted grays for medallions The medallion shapes carry the design, so the gray assortment is where most of your fabric decisions happen.
-
Mini Medallion (Paper): 3/4 yard white fabric, 1/3 yard citrine fabric, 1/3 yard light tan fabric These are the background and accent quantities the pattern calls for; buy to these amounts rather than guessing.
-
Mini Medallion (Paper): 1 yard backing and 1/3 yard binding Backing and binding are listed separately, so you can shop for them in the same trip.
How to work through the Mini Medallion in order
The pattern sheet governs the exact construction sequence. Use these steps to organize the work around it.
- 1. Gather the ruler and the full materials list: You need the QCR Mini Ruler plus eight assorted gray fat quarters for the medallions, 3/4 yard white, 1/3 yard citrine, 1/3 yard light tan, 1 yard backing and 1/3 yard binding. Check the ruler before you cut anything; without it the curved units can't be trimmed as designed.
- 2. Sort the eight gray fat quarters before cutting: Lay all eight grays out together and look at them as a group. Because they all feed the medallions, any quarter that reads much lighter or darker than the rest will pull the eye. Decide your arrangement now, while the fat quarters are still whole and easy to compare.
- 3. Cut the background and accent fabrics to the listed yardage: The white, citrine and light tan are supplied in specific amounts, so cut from the pattern's cut list rather than improvising. Keep the white separate from the grays on your table; it is the fabric that will make the medallion shapes read clearly.
- 4. Build and trim the curved medallion units: Follow the pattern for unit construction, using the QCR Mini Ruler to trim each curved piece. Trim consistently rather than aggressively; small units show every variation once they are joined.
- 5. Lay out the medallion arrangement before seaming: Spread the trimmed units out in the 28" x 32" layout and step back. This is the cheapest moment to swap a gray or rotate a unit, and the small format means the whole layout fits on a table or floor space.
- 6. Assemble the top, then cut backing and binding: Join the units per the pattern sheet. Cut the 1 yard of backing and 1/3 yard of binding once the top is complete, so you can confirm the finished dimensions match the 28" x 32" size before committing the fabric.
Choosing grays that keep the medallions readable
Eight fat quarters is a generous gray assortment, and the temptation is to use all of them evenly. Resist that. A medallion design depends on value contrast: some shapes need to sit forward and others need to recede, and eight grays of nearly identical value will flatten the whole composition.
A practical approach is to divide the eight into a lighter group and a darker group, then let the white background and the citrine and light tan accents do the separating work. Citrine is a strong, warm accent; used sparingly it draws the eye to specific medallion points. Light tan sits closer to the grays in value, so it blends rather than pops. Decide which of those two jobs you want before you cut.
If your stash leans heavily to one value, this is the point to buy a fat quarter or two rather than substituting from the white or tan yardage. Those fabrics are listed in fixed amounts for the background and accents, and borrowing from them will leave you short.
Where the Mini Medallion fits among small curved projects
- Choose Mini Medallion if: You want a compact 28" x 32" medallion project, you already own or plan to buy the QCR Mini Ruler, and you enjoy working with an assortment of gray prints as the focal fabric.
- Consider a different small-curve pattern if: You want a project that doesn't depend on the QCR Mini Ruler, or you'd rather build a design around a single feature fabric instead of eight fat quarters.
- Plan your fabric shopping around the ruler: The QCR Mini Ruler is listed as part of the pattern's materials, so budget for it alongside the fabric. It is the one item you cannot substitute.
What to confirm on the pattern sheet before you cut
The supplied product information gives you size, ruler compatibility and fabric quantities, but not cut dimensions, seam allowances or unit-by-unit assembly instructions. Those live on the pattern itself. Read the sheet end to end before the rotary cutter comes out, and note any pressing directions as you go.
Two things are worth verifying early: that your QCR Mini Ruler is the size the pattern expects, and that your cut pieces match the pattern's listed shapes before you sew. Catching a trimming error on the first unit is far easier than discovering it after the layout is half joined.
At USD 6.60, the pattern is a modest investment compared with the fabric and ruler it requires, so it pays to read it carefully first. If any step on the sheet is unclear, pause and resolve it before cutting into the gray fat quarters; those eight quarters are the hardest part of the materials list to replace.