Quick Answer
Start with a simple basecoat and wash system to bring out the detail on unarmored cavalry, then layer highlights on the horses and riders for a natural, weathered look.
Why Unarmored Cavalry Needs a Different Approach
Unarmored cavalry miniatures rely on fabric, skin, and horse muscle to read on the tabletop. Without metal plates to catch the eye, your paint job needs strong contrast and careful shading to make the models pop.
The Dark Ages Unarmored Cavalry set gives you plenty of freedom with head options and weapon choices, but the painting principles stay the same: build up from dark to light, use washes for depth, and finish with a matte varnish to protect your work.
Step-by-Step Painting Guide
- Assemble and Prime: Clean mold lines carefully, then glue the rider to the horse before priming. Use a dark primer like black or dark brown to create natural shadows and make missed spots less noticeable. Check all joints for gaps before priming; a quick dab of filler can save you from visible seams later.
- Basecoat the Horse: Paint the horse with a mid-tone brown or gray, leaving the primer in recessed areas. This gives you a solid foundation for shading. Thin your paint slightly to avoid obscuring the muscle detail on the horse's legs and flanks.
- Wash and Layer: Apply a dark wash (like Nuln Oil or Agrax Earthshade) over the entire horse, then go back with the base color to highlight the raised muscle groups. This creates depth without overcomplicating the process. Don't let the wash pool on flat surfaces; wick away excess with a clean brush to avoid blotches.
- Paint the Rider: Basecoat the rider's skin, tunic, and shield separately. Use a lighter flesh tone and a contrasting tunic color to make the rider stand out from the horse. Keep the rider's palette simple; too many colors can make the model look busy and reduce readability.
- Highlight and Detail: Add edge highlights to the shield, spear, or sword, and give the horse a final drybrush of a lighter tone. Paint the eyes and any leather straps to add realism. Use a fine detail brush for the eyes and straps; a steady hand makes a big difference.
- Varnish and Base: Spray or brush on a matte varnish to protect the paint job, then texture the base with sand or static grass. This finishes the model and makes it tabletop-ready. Matte varnish is essential to prevent chipping during handling; gloss varnish on the shield can add a nice contrast.
Product Facts
-
Dark Ages Unarmored Cavalry: This hard plastic set allows you to build up to 12 Late Roman/Dark Ages Warriors with either spear or sword and shield. You can paint a whole unit in one sitting, so a consistent step-by-step method saves time and keeps the army looking cohesive.
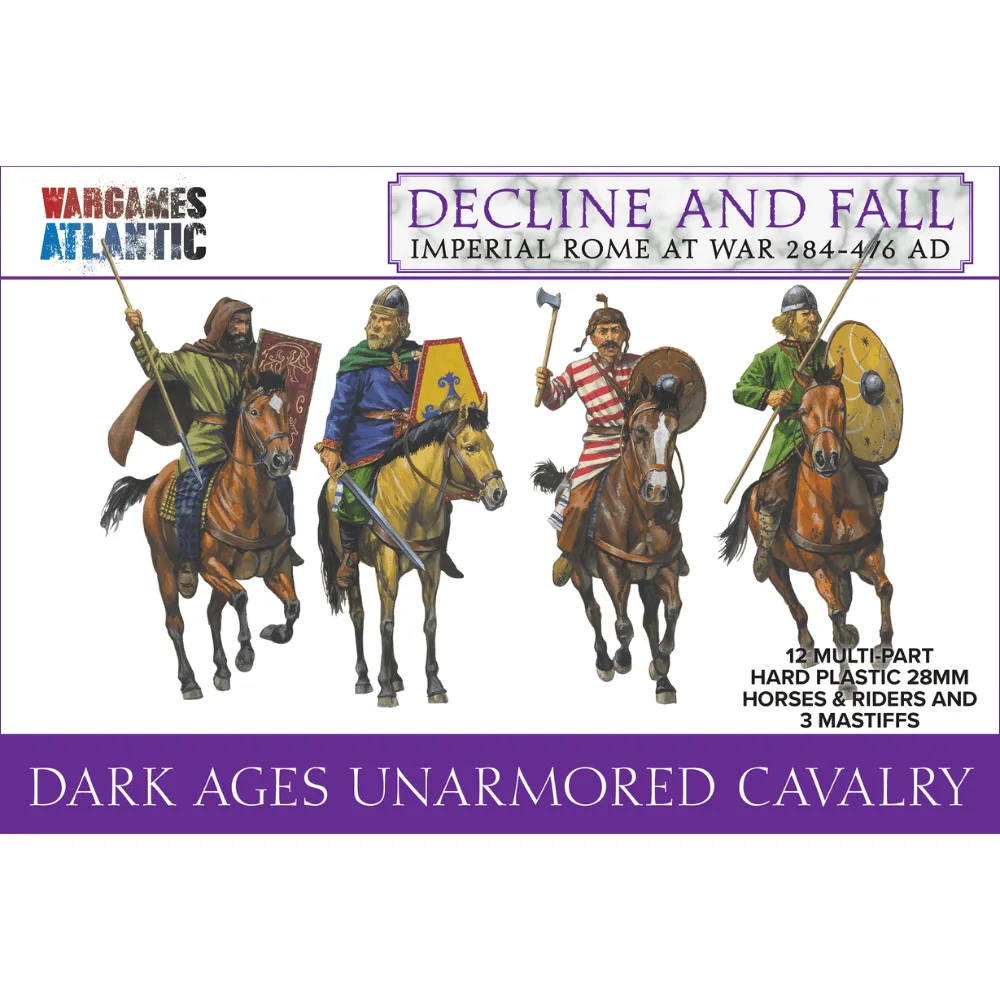
Dark Ages Unarmored Cavalry