Quick Answer
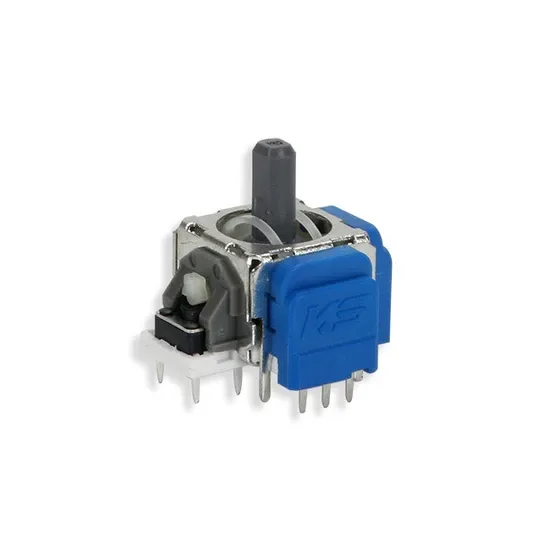
If cleaning and calibration don't stop your PS5 controller from drifting, the analog assembly is likely worn and should be replaced. A drop-in assembly like the TMR Joystick Assembly for Sony PS5 Controllers is a direct replacement, but it requires soldering, so if you're not comfortable with that, consider a repair service instead.
Symptom vs. Cause: What Drift Actually Tells You
Drift shows up as cursor movement or camera creep when you're not touching the stick. That's the symptom. The cause is usually wear inside the analog assembly's resistive tracks or a loose connection, not the plastic thumbstick cap itself. Before you assume the worst, rule out software: update the controller firmware, run the built-in calibration in the PS5 settings, and test with a different game. If drift persists across games and after calibration, the issue is physical.
Stop Here If You Don't Solder
Replacing the analog assembly means desoldering the old unit and soldering the new one into the controller board. That's not a plug-and-play swap. If you don't have a temperature-controlled iron, flux, and some desoldering wick or a pump, this is the point to choose another option: a professional repair service or a replacement controller. Attempting it without the right tools risks lifted pads and a dead board.
What You Need for the Replacement
If you're proceeding, gather a soldering iron with a fine tip, lead-free solder, flux, desoldering wick or a solder sucker, isopropyl alcohol, and a plastic pry tool. The TMR Joystick Assembly for Sony PS5 Controllers is a direct replacement, so you de-solder your original joystick and solder the new one in. Its TMR design is intended to improve responsiveness and precision compared to the original component. Work in a well-ventilated area and take your time on the solder joints; they're small and close together.
After the Swap: Test Before You Reassemble
Once the new assembly is soldered in, don't close the controller yet. Connect it and run the calibration routine, then test in a game that shows stick input clearly. If drift is gone and the stick centers correctly, finish reassembly. If it's still off, recheck your solder joints for bridges or cold connections before assuming the part is faulty.
Drift Diagnosis Flowchart
- Drift only in one game or after a firmware update: Update the controller firmware and run the PS5's calibration tool. Test again in a different game. If drift disappears, it was software or calibration, not the assembly.
- Drift in all games, calibration doesn't help, and you can solder: Replace the analog assembly with a direct-fit part like the TMR Joystick Assembly. Desolder the old unit, solder the new one, then calibrate. This is the fix when the assembly itself is worn.
- Drift in all games but you don't solder: Don't force it. A lifted pad turns a part swap into a board replacement. Use a repair service or replace the controller. Stop here and choose another option if soldering isn't in your skill set.
Parts Mentioned
- TMR Joystick Assembly for Sony PS5 Controllers: TMR Joystick Assembly (K Silver Model) for PlayStation 5 Controllers; direct replacement requiring de-soldering and soldering; includes 1x joystick. This is the part that addresses the worn analog assembly causing drift, and the soldering requirement tells you whether this is a DIY job or a service call.