Quick answer
Preventing rotary cutter cuts comes down to eight repeatable habits: keep the blade retracted when not cutting, always cut away from your body, use a fresh blade, pair it with a non-slip ruler, keep fingers clear of the blade path, cut on a proper mat, close the blade before setting the cutter down, and store it safely. These habits matter more than any single technique because most rotary cutting injuries happen during the moments between cuts.
A rotary cutter is one of the most efficient tools in quilting, but it is also one of the easiest ways to cut yourself. The blade is sharp by design, and the tool only works when you commit to a smooth, deliberate motion. That combination rewards good habits and punishes rushed ones.
The eight habits below are ordered from the moment you pick up the cutter to the moment you put it away. Each one includes a common mistake to watch for, so you can build a routine that keeps your hands intact without slowing your cutting down.
Why rotary cutter safety is a habit, not a technique
Most rotary cutting injuries do not happen because someone does not know how to cut. They happen because of a brief lapse: a blade left open on the table, a hand that drifts into the path, a dull blade that forces extra pressure. A technique you learn once will not protect you; a habit you repeat every time will.
That is why the steps below focus on checkpoints rather than complicated moves. You do not need a special grip or a different cutter. You need a consistent sequence that makes the safe choice the automatic one, even when you are tired or trying to finish one last strip.
- Treat every rotary cutter as sharp, even a blade you have used for weeks.
- Build the habits in order so they become one continuous motion.
Step 1: Check the blade and lock it open only when cutting
Before each cutting session, look at the blade. A dull or nicked blade is a safety problem because it makes you push harder, and extra pressure is what turns a slip into a cut. If the blade drags or leaves threads uncut, replace it rather than forcing it through the fabric.
Keep the blade retracted or the cutter closed whenever you are not actively cutting. The most common mistake is leaving the blade open between cuts while you reposition fabric. That is exactly when a hand brushes the edge.
- Checkpoint: if you have to push, stop and change the blade.
- Make retracting the blade part of the motion of finishing a cut.
Step 2: Set up your cutting station before you pick up the cutter
A stable setup prevents the small shifts that cause injuries. Put your cutting mat on a surface that does not wobble, and make sure the mat itself lies flat. If the mat slides, your fabric slides, and your hand follows.
Arrange your ruler, fabric, and cutter so you are not reaching across the blade to grab something. The common mistake here is cutting in a cramped space where your non-cutting hand has nowhere safe to rest.
- Keep your cutting area clear of pins, scissors, and clutter.
- Stand or sit so your cutting arm can move freely without stretching.
Step 3: Position your body and hands away from the blade path
Always cut away from your body and keep your non-cutting hand behind the ruler, not in front of it. Your cutting hand controls the cutter; your other hand should only hold the ruler steady. If your fingers are anywhere the blade could travel, move them.
The common mistake is letting your ruler hand creep forward as you cut. A non-slip ruler helps because it stays put, so you do not need to press down near the blade edge to keep it from shifting.
- Checkpoint: your fingers should never be in line with the blade.
- If you cannot see the blade path clearly, stop and reposition.
Step 4: Use a non-slip ruler and cut with steady pressure
A ruler that slips is one of the leading causes of rotary cutting injuries. Non-slip rulers grip the fabric so you can hold them with light pressure and keep your hand away from the edge. Pressing hard on a slippery ruler is both tiring and dangerous.
Cut with one smooth stroke rather than sawing back and forth. Multiple passes increase the chance that the blade jumps the ruler or that your hand shifts. If the fabric is too thick for one pass, cut fewer layers instead of forcing the blade.
- For narrow strips and sashing, a slim ruler gives you more control.
- Checkpoint: if the ruler moves, stop and reset before continuing.
Step 5: Change blades carefully and dispose of old ones safely
Blade changes are a high-risk moment because you are handling the sharp edge directly. Follow the instructions for your specific cutter, keep your fingers away from the edge, and work on a flat surface. Never leave a loose blade sitting on the table.
Dispose of used blades in a rigid container, not a trash bag where someone could reach in. The common mistake is setting a used blade down 'just for a second' while you find the new one. That second is when cuts happen.
- Keep replacement blades in their packaging until you are ready to install them.
- Checkpoint: count blades in and blades out so none are left loose.
Step 6: Close the blade before you set the cutter down
Make it a rule: the cutter is either in your hand with the blade open, or it is on the table with the blade closed. There is no in-between. This single habit prevents the most common rotary cutter injury, which is reaching across an open blade you forgot was there.
If your cutter has a blade guard or locking mechanism, use it every time. The common mistake is relying on memory instead of the lock. Memory fails when you are interrupted; a lock does not.
- Say it out loud when you set the cutter down if you are learning the habit.
- Checkpoint: blade closed before the cutter leaves your hand.
Step 7: Store cutters and blades out of reach
Store rotary cutters closed, in a drawer or case where they cannot be knocked onto the floor. Loose blades should be kept in their original packaging or a dedicated blade container. This matters even more in homes with children or pets.
The common mistake is leaving a cutter on the ironing board or cutting table because you plan to come back later. If you would not leave a knife there, do not leave a rotary cutter there either.
- Keep a small rigid container near your cutting station for used blades.
- Checkpoint: no open blade is ever left unattended.
Step 8: Slow down and take breaks
Fatigue and rushing are behind many rotary cutting injuries. When you are tired, your grip loosens, your ruler hand drifts, and you stop checking the blade. A short break resets all three.
If you feel yourself speeding up to finish a project, that is the moment to slow down. The common mistake is treating the last few cuts as less important than the first few. They are exactly as important.
- Stand up and stretch every 20 to 30 minutes of cutting.
- Checkpoint: if you cannot cut smoothly, stop for the day.
The 8 habits at a glance
- Check the blade and keep it closed when not cutting: Inspect the blade before each session and replace it if it drags. Retract or close the blade every time you pause. Checkpoint: if you have to push, the blade is dull.
- Set up a stable cutting station: Use a flat, non-wobbling surface and a mat that does not slide. Clear clutter from your cutting area. Checkpoint: nothing should shift when you press down.
- Position your body and hands away from the blade path: Cut away from your body and keep your non-cutting hand behind the ruler. Never let fingers line up with the blade. Checkpoint: if you cannot see the blade path, stop.
- Use a non-slip ruler and steady pressure: Let the ruler grip the fabric so you can hold it lightly. Cut in one smooth stroke instead of sawing. Checkpoint: if the ruler moves, reset before continuing.
- Change and dispose of blades carefully: Follow your cutter's instructions, keep fingers clear, and put used blades in a rigid container. Checkpoint: no loose blades left on the table.
- Close the blade before setting the cutter down: Make it a rule: blade open only in your hand during a cut. Use the guard or lock every time. Checkpoint: blade closed before the cutter leaves your hand.
- Store cutters and blades out of reach: Keep cutters closed in a drawer or case and blades in packaging or a dedicated container. Checkpoint: no open blade left unattended.
Tools that support safer rotary cutting
- OLFA Rotary Blade 60mm: OLFA 60mm replacement blades are made from high-carbon steel for long-lasting sharpness and fit OLFA 60mm rotary cutters. A sharp blade lets you cut with light pressure, which reduces the force that turns a slip into a cut.
- Creative Grids Quilt Ruler 1-1/2in x 12-1/2in Rectangle – CGR112: This ruler has a non-slip surface and is sized for cutting narrow 1-1/2 inch strips, sashing, and borders. A ruler that stays put means you can keep your hand back from the blade path instead of pressing down near the edge.
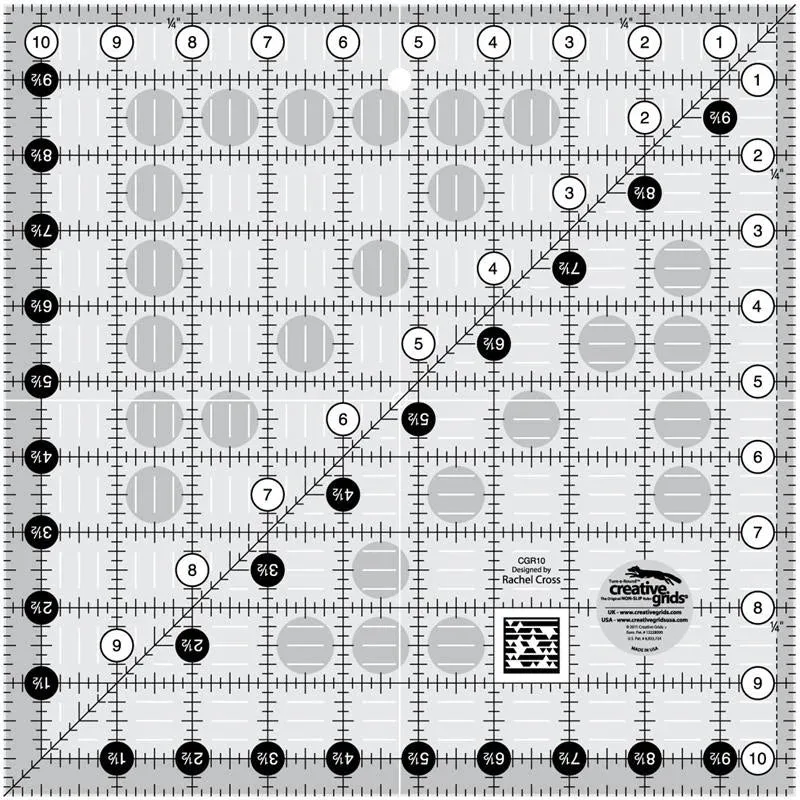
- Creative Grids Quilt Ruler 10-1/2in x 10-1/2in Square – CGR10: This large square ruler has a non-slip surface and marked grid and diagonal lines, and it is sized for layer cake squares and large blocks. Squaring up large blocks with a stable ruler reduces the repositioning that often leads to hand placement mistakes.
Rotary cutter safety is not about being afraid of the tool. It is about building a sequence that keeps the blade closed, your hands clear, and your setup stable. Practice these eight habits until they are automatic, and you can cut fabric quickly without cutting yourself.