Quick Answer
Replace the O-rings on your SeaLife SportDiver housing whenever they show signs of wear or after about 100 dives. The O-Ring Set for SportDiver & SportDiver S includes both the main seal and vacuum check port O-rings, so you can refresh both at once.
Why O-Ring Condition Matters
O-rings are the primary barrier between your camera and water. A damaged or dirty O-ring can cause leaks that ruin your gear. Regular inspection and replacement are essential for reliable underwater performance.
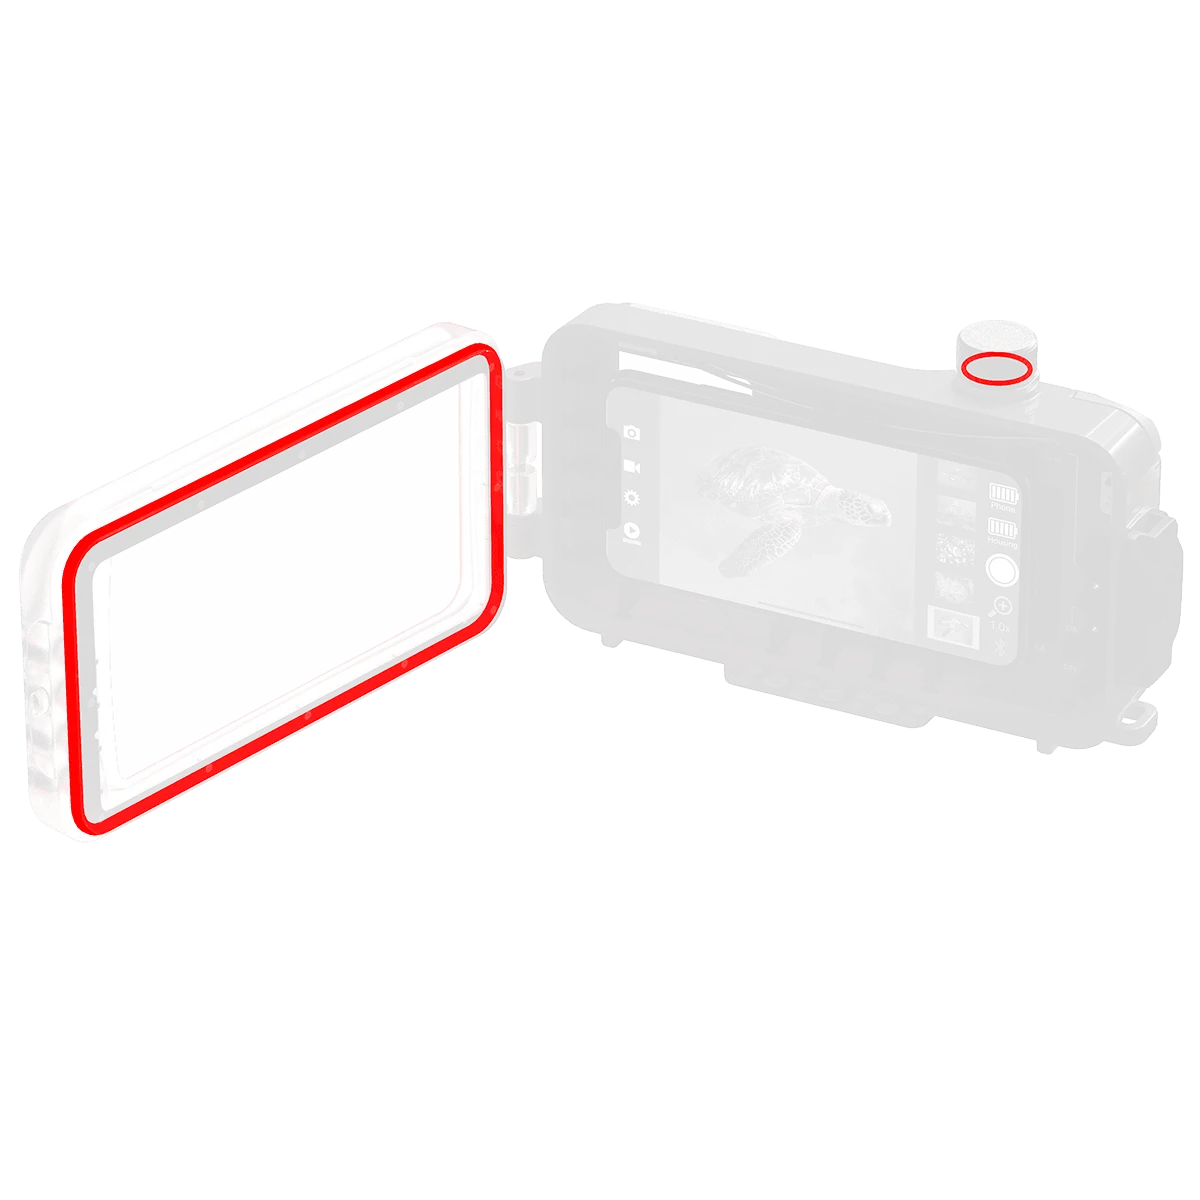
The SportDiver housing uses two O-rings: the main seal that closes the housing and a smaller O-ring for the vacuum check port. Both need attention during maintenance.
When to Replace O-Rings
Replace O-rings at least once a year or after every 100 dives, whichever comes first. Also replace them immediately if you see cuts, nicks, or flat spots, or if the O-ring feels stiff or brittle.
If you notice any debris or sand stuck to the O-ring, clean it thoroughly. If it doesn't return to its original shape after cleaning, replace it.
Step-by-Step O-Ring Replacement
- Gather Supplies: You'll need the replacement O-ring set, a soft lint-free cloth, isopropyl alcohol, and silicone grease (if recommended by SeaLife). Check the O-ring size and type before starting to ensure a proper fit.
- Remove Old O-Rings: Open the housing and carefully remove the old main seal and vacuum check port O-ring. Use a plastic pick or your fingers—avoid metal tools that could scratch the groove. Do not stretch the O-ring excessively during removal; this can cause permanent deformation.
- Clean the Grooves: Wipe the O-ring grooves with a lint-free cloth dampened with isopropyl alcohol to remove dirt, sand, and old grease. Let them dry completely. Residue left in the groove can prevent the new O-ring from seating properly.
- Install New O-Rings: Place the new main seal O-ring into its groove, ensuring it sits evenly without twists. Then install the vacuum check port O-ring in its designated spot. Run your finger around the O-ring to check for any twists or bunching before closing the housing.
- Lubricate (If Needed): Apply a thin layer of silicone grease to the O-rings if recommended by SeaLife. Avoid over-lubricating, as excess grease can attract debris. Use only silicone-based grease; petroleum-based products can damage the O-ring material.
- Test the Seal: Close the housing and perform a vacuum test if your SportDiver model supports it. This verifies the O-rings are seated correctly before you hit the water. If the vacuum doesn't hold, reopen and re-seat the O-rings—never dive with a failed vacuum test.
Product Facts
-
O-Ring Set for SeaLife SportDiver & SportDiver S Housing: This O-ring set contains one main seal O-ring and one vacuum check port O-ring for the SportDiver and SportDiver S housings. Having both O-rings on hand lets you replace the critical seals in one session, so you don't have to postpone a dive due to a missing part.
O-Ring Set for SeaLife SportDiver & SportDiver S Housing