Quick answer
Self-adhesive binding tape is a strip of fabric with a sticky backing that you press onto a seam or edge before sewing. It holds the binding in place so you can stitch a clean, even finish without pins. For bag makers, it works best on straight or gently curved edges, and it is not a replacement for structural stabilizer.
Binding tape is one of those supplies that seems simple until you are standing at your machine with a curved seam and a handful of pins. Self-adhesive binding tape removes the pinning step, but it also raises practical questions: does the adhesive gum up your needle, can you reposition it, and where does it actually belong in a bag build?
This FAQ answers the questions bag makers ask most often about self-adhesive binding tape. The answers are based on how the material behaves in real projects, with honest notes on where it helps and where a different approach works better.
How does binding tape work?
Binding tape is a narrow strip of fabric, usually cut on the bias or crossgrain so it can curve around edges. You wrap it over the raw edge of a seam or bag panel and stitch it down, enclosing the fabric inside. The tape protects the edge from fraying and gives the inside of a bag a clean, professional look.
Self-adhesive binding tape adds a light sticky backing to that strip. You peel off a release paper, press the tape onto the fabric, and the adhesive holds it in place while you sew. The adhesive is a positioning aid, not a permanent bond. The stitches are what actually secure the binding, so you still need to sew the full length.
- Press the tape down firmly with your fingers or a roller before sewing; light pressure alone may not hold on textured fabrics.
- Sew sooner rather than later. Adhesive that sits for days can attract lint or lose tack.
What is the difference between self-adhesive binding tape and regular binding tape?
Regular binding tape is just fabric, often sold as bias tape or pre-folded strips. You pin or clip it in place, then sew. It is usually cheaper and comes in a wider range of colors and fiber contents. Self-adhesive binding tape costs a little more because of the adhesive backing and release paper.
The tradeoff is time and control. With self-adhesive tape, you skip the pinning and clipping step, which matters most on long straight edges, narrow seam allowances, and small pieces where clips get in the way. On very stretchy or very fuzzy fabrics, the adhesive may not grip well, and regular tape with clips can be more reliable.
- Choose self-adhesive tape for long straight seams, small curved pieces, and repetitive production runs.
- Choose regular tape for highly textured fabrics, delicate sheers, or when you need to reposition the binding many times.
Where should I use binding tape on bags?
The most common use is finishing the raw edges of seam allowances inside a bag, especially on the side seams and the bottom seam. It hides the raw fabric, prevents fraying, and makes the interior look finished. It also works well along the top edge of an open pocket or the inside edge of a zipper opening.
You can also use binding tape on the outside of a bag as a design detail. A contrasting strip along a front panel or around a flap edge adds a crisp line. For structural edges that bear weight, such as the top edge of a tote or the base of a bag, binding tape alone is not enough. Pair it with interfacing or a separate stabilizer so the edge keeps its shape.
- Bind seam allowances after you have trimmed them to an even width; uneven edges show through the tape.
- On curved edges, use a narrower tape or cut your own bias strips so the tape can follow the curve without puckering.
Will the adhesive gum up my needle or machine?
Most self-adhesive binding tapes use a light, repositionable adhesive that does not transfer heavily to the needle. In normal use, you may see a small amount of sticky residue on the needle after a long session. If you notice skipping stitches or a tacky feel, change the needle and wipe the machine bed with a small amount of isopropyl alcohol on a cloth.
If you are concerned about residue, sew with a fresh needle and avoid pressing the tape with a hot iron before sewing. Heat can make some adhesives migrate. Test on a scrap of your actual fabric first, especially on coated or waterproof fabrics where adhesive can be harder to remove.
- Keep a scrap of your bag fabric nearby and test the tape before committing to the real piece.
- If residue appears, clean the needle area after the project rather than mid-seam.
Can I reposition self-adhesive binding tape?
Yes, most self-adhesive binding tapes are repositionable for a short time. You can lift the tape and press it again if you misalign it, as long as the adhesive has not picked up lint or stretched. Once you press it down firmly and let it sit, the bond becomes stronger and lifting it can distort the tape or leave residue.
For the cleanest result, place the tape lightly, check the alignment along the whole edge, then press it down firmly before sewing. If you need to reposition more than once or twice, peel the tape off and start with a fresh strip. Reusing a stretched strip usually leads to wavy binding.
- Work in short sections on long edges so you can adjust as you go.
- If the tape loses tack, a tiny dot of fabric glue at the ends can hold it while you sew.
What width and material should I choose for bag making?
For most bag seam allowances, a 1-inch wide binding tape is a practical default. It wraps comfortably around a standard seam allowance and gives you enough width to stitch down without the tape slipping off the edge. Narrower tapes work for tight curves and small wallet pieces, while wider tapes suit large tote edges and decorative bands.
Material matters too. Nylon ripstop binding is lightweight, durable, and resists fraying, which makes it a good match for outdoor gear and bags that see heavy use. Polyester ripstop is similar but often has a slightly different hand and color range. Cotton binding is softer and easier to press, but it frays more and is less abrasion resistant.
- Match the tape weight to your bag fabric: lightweight tape for lightweight fabrics, heavier tape for canvas and outdoor gear.
- If you are binding a curved edge, cut your own bias strips from matching fabric instead of forcing a straight-cut tape around the curve.
How do I sew binding tape without puckers or skipped stitches?
Start with a fresh needle sized for your fabric, and use a slightly longer stitch length than you would for a standard seam. A longer stitch gives the tape room to flex without puckering. Sew slowly around curves and let the machine feed the tape rather than pulling it, which stretches the tape and causes waves.
If you are binding a seam allowance, sew from the front side so you can see your stitch line and keep it even. On the back, check that the tape covers the raw edge. If it does not, you can stitch a second line or trim the seam allowance narrower and try again. Pressing the finished binding with a cool iron helps it lie flat.
- Use a walking foot or a teflon foot if the adhesive drags against your presser foot.
- Test your stitch length and tension on a scrap first; adhesive-backed fabric can behave differently than plain fabric.
Quick checks before you bind
Test the adhesive on your fabric
Press a short strip onto a scrap of your actual bag fabric, let it sit for a few minutes, then peel it back. If it leaves residue or lifts the fabric weave, use regular binding tape with clips instead. No residue and no distortion means you are good to sew.
Trim the seam allowance evenly first
Binding hides raw edges, but it does not hide lumpy or uneven ones. Trim the seam allowance to a consistent width before you apply the tape, especially on curved seams. Even edges make even binding.
Match tape width to the edge
A 1-inch tape is a reliable default for standard bag seam allowances. For tight curves or small wallet pieces, go narrower or cut bias strips so the tape can follow the shape. If the tape fights the curve, change the tape, not your technique.
Sew with a fresh needle and a longer stitch
Adhesive-backed tape can drag slightly against the presser foot. A fresh needle and a slightly longer stitch length reduce skipped stitches and puckering. Slow and steady beats fast and wavy.
Products that fit this FAQ
- Hex Nylon Ripstop Self Adhesive 1" Binding (10 Yard Roll): 1 quantity = 10 yard roll, 1 inch wide, nylon ripstop 200D, 0.24mm thick, with adhesive backing. A 10-yard roll in a 1-inch width covers a lot of seam allowances, and the nylon ripstop is durable and fray resistant, which suits bags and outdoor gear.
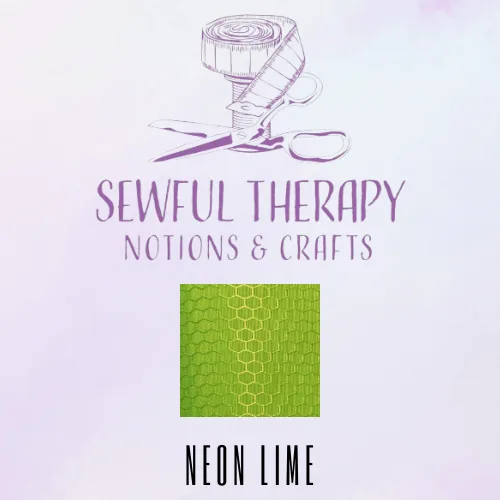
- Adhesive Hex Polyester Ripstop 420D (HALF Yard) Neon Lime: Adhesive polyester ripstop 420D fabric, available by the half yard, described as durable, ultrathin, and water resistant. If you prefer to cut your own binding strips, this adhesive-backed ripstop lets you match the tape to your bag fabric and get a water-resistant finish.
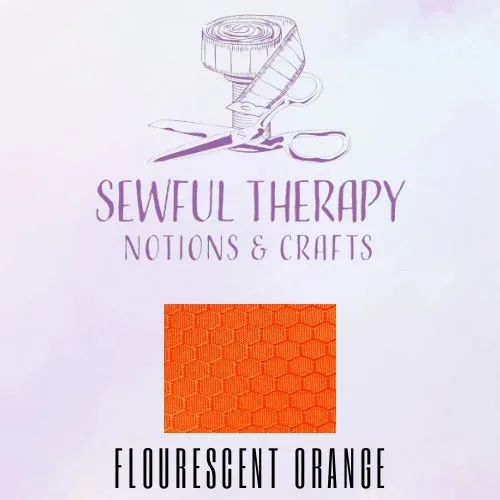
- Adhesive Hex Polyester Ripstop 420D (HALF Yard) Fluorescent Orange: Adhesive polyester ripstop 420D fabric, available by the half yard, described as durable, ultrathin, and water resistant. A high-visibility option for binding that doubles as a safety or design accent on outdoor bags and gear.
- SewSquish Cloud (HY) - SILVER GRAY #52: Sold in half yard cuts, approximately 18 by 56 to 57 inches, 2mm thick sandwich 3D air mesh, 100% polyester. Not a binding tape, but useful as a padded strap or back panel layer under a bound edge where you want cushioning without bulk.
Self-adhesive binding tape is a practical shortcut for clean bag interiors and crisp edge finishes, as long as you treat the adhesive as a positioning aid and not a permanent bond. Test it on your fabric, trim your edges evenly, and sew with a fresh needle. If you want a durable, fray-resistant option for bags and outdoor gear, the Hex Nylon Ripstop Self Adhesive 1" Binding is a solid place to start.