Quick answer
Start with a clean, dry surface and decide your layout before peeling any backing. Put larger stickers first, keep edges at least a quarter inch from curves or seams, and avoid spots that rub against pockets, lids, or cooler handles. The goal is a layout that looks intentional and survives daily use.
Why placement matters more than sticker count
A sticker that sits on a flat, low-wear area can last for years, while the same sticker on a high-friction edge may peel within weeks. Laptops, water bottles, and coolers each have different wear patterns: laptop lids flex and slide into bags, bottles get gripped and washed, and coolers get dragged, stacked, and exposed to sun. Match the sticker to the surface, not just the color scheme.
Before you commit, run a dry layout. Place stickers on the surface without peeling the backing, step back, and check the balance. This saves you from the most common mistake: sticking the first sticker in the center and then running out of room for the rest.
Surface prep that prevents peeling
Clean the surface with mild soap and water, then wipe it with isopropyl alcohol if the manufacturer allows it. Let it dry completely. Dust, oil, and moisture are the main reasons stickers lift at the corners. For coolers, pay extra attention to textured or rotomolded surfaces; stickers adhere best to smooth, hard plastic.
Room temperature helps too. Applying stickers in a cold garage or a hot car can make the adhesive less forgiving. If you are working outside, bring the item indoors for an hour before and after applying.
Layout patterns that look intentional
Three layouts work well on almost any gear: a single hero sticker placed off-center, a tight cluster of three to five stickers, or a border along one edge. Pick one pattern and repeat it across your laptop, bottle, and cooler so the set feels related without being identical.
Leave breathing room. Crowding stickers edge-to-edge makes every peel more noticeable and leaves no room to add new ones later. If you are using a sticker sheet, cut individual stickers with a small border of backing paper so you can reposition them during the dry layout.
Where not to put stickers
Skip laptop trackpads, palm rests, screen bezels, and vents. On bottles, avoid the threads, the very bottom, and any area that contacts a bottle cage or cup holder. On coolers, keep stickers away from lid gaskets, drain plugs, and handle hinges, where movement will work the edges loose.
Also avoid surfaces that get repeated abrasion: the side of a laptop that slides into a sleeve, the base of a water bottle, and the bottom of a cooler. These are the first places stickers fail.
Step-by-step sticker placement
- Clean and dry the surface: Wash with mild soap, rinse, and let it air dry. If the material allows, wipe with isopropyl alcohol and wait a full minute. Checkpoint: the surface should feel completely dry and free of oily residue before you peel anything.
- Plan the layout with backing on: Arrange stickers on the item without removing the backing. Try a hero, cluster, or edge pattern and photograph the arrangement. Common mistake: starting with the largest sticker in the exact center, which leaves no room for balance.
- Place the largest sticker first: Peel only the largest sticker and press it down from the center outward, smoothing out air bubbles with your thumb or a soft cloth. Checkpoint: edges should sit flat with no lifted corners before you add smaller stickers.
- Fill in with smaller stickers: Add smaller stickers around the anchor, keeping at least a quarter inch of space between edges and away from curves, seams, and high-wear zones. Common mistake: crowding stickers so tightly that one peel damages a neighbor.
- Press and cure: Go over every sticker once more with firm pressure, then let the item sit at room temperature for a few hours before heavy use or washing. Next step: wait 24 hours before putting the item in a bag, bottle cage, or cooler stack.
Product facts
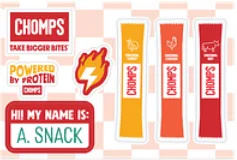
- STKR - Sheet OG Sticks TBB: STKR - Sheet OG Sticks TBB is a sticker sheet featuring the OG Sticks design, intended for personalizing laptops, water bottles, notebooks, and more. A sheet gives you multiple stickers to test layouts on different items before committing to a final arrangement.