Quick answer
Set up the soup maker as a station with a few real, child-safe ingredients and a simple order card, then let your child stir, pour, and serve in repeats. The Tender Leaf Toys Fruity Blender works as a smoothie side station, and the Little Garden Designer supplies vegetable pieces that make pretend soup recipes feel concrete. Keep sessions to 10-15 minutes and follow your child's lead.
Little Garden Designer
A soup maker play kitchen works best when it has a job to do, not just a pot to stir. Give your child a station, a few ingredients, and a customer, and the play starts running itself.
This guide walks through setting up a wooden toy soup maker session step by step, with pretend soup recipes and play kitchen ideas that use pieces you likely already own. It also covers the mistakes that turn soup play into a mess or a power struggle, and how to keep it fresh across many afternoons.
Set up the soup station before your child arrives
Pick one low surface and clear everything else off it. Put the soup maker in the center, then place a small basket of ingredients to the left and a stack of bowls to the right. This left-to-right flow matches how children naturally scoop, stir, and serve, and it prevents the mid-play scramble that ends sessions early.
Add one order card with a picture or a single word, such as carrot or tomato. A visual order gives the play a purpose and gives you a natural way to ask questions without directing the whole game. If your child is new to pretend cooking for kids, start with just two ingredients so the choice stays simple.
- Keep the station at child height so they can reach without climbing.
- Use a tray or mat under the soup maker to catch stray pieces.
- Rotate ingredients weekly so the station feels new without adding clutter.
Choose pretend soup recipes that match your child's age
For toddlers, a recipe is one ingredient and one action: put the carrot in, stir, pour. For preschoolers, add a sequence of two or three ingredients and a topping. For early school-age children, add a menu, prices, or a takeaway window. The recipe should stretch attention slightly, not test it.
Write or draw each recipe on a card and let your child choose. Choice is what keeps pretend cooking for kids interesting after the first few rounds. If your child invents a recipe you did not plan, follow it. The card is a starting point, not a script.
- Recipe card 1: one ingredient, stir, serve.
- Recipe card 2: two ingredients, stir, add a topping, serve.
- Recipe card 3: three ingredients, stir, pour, take an order from a customer.
Run the stir-and-serve routine in four repeatable steps
The routine is scoop, stir, pour, serve. Say each word as your child does it, then pause and let them say it back. Repetition is where the language learning happens, and a short routine gives you a reliable structure to return to when play drifts.
After serving, ask one open question: who is this soup for, or what does it need? Then wait. Silence gives your child room to answer. If they hand you the bowl, accept it and take a pretend bite before handing it back.
- Scoop: pick one ingredient from the basket.
- Stir: use a wooden spoon or the stirrer that came with the set.
- Pour: fill one bowl, not the whole table.
- Serve: hand it to a customer, a doll, or you.
Add a second station for variety
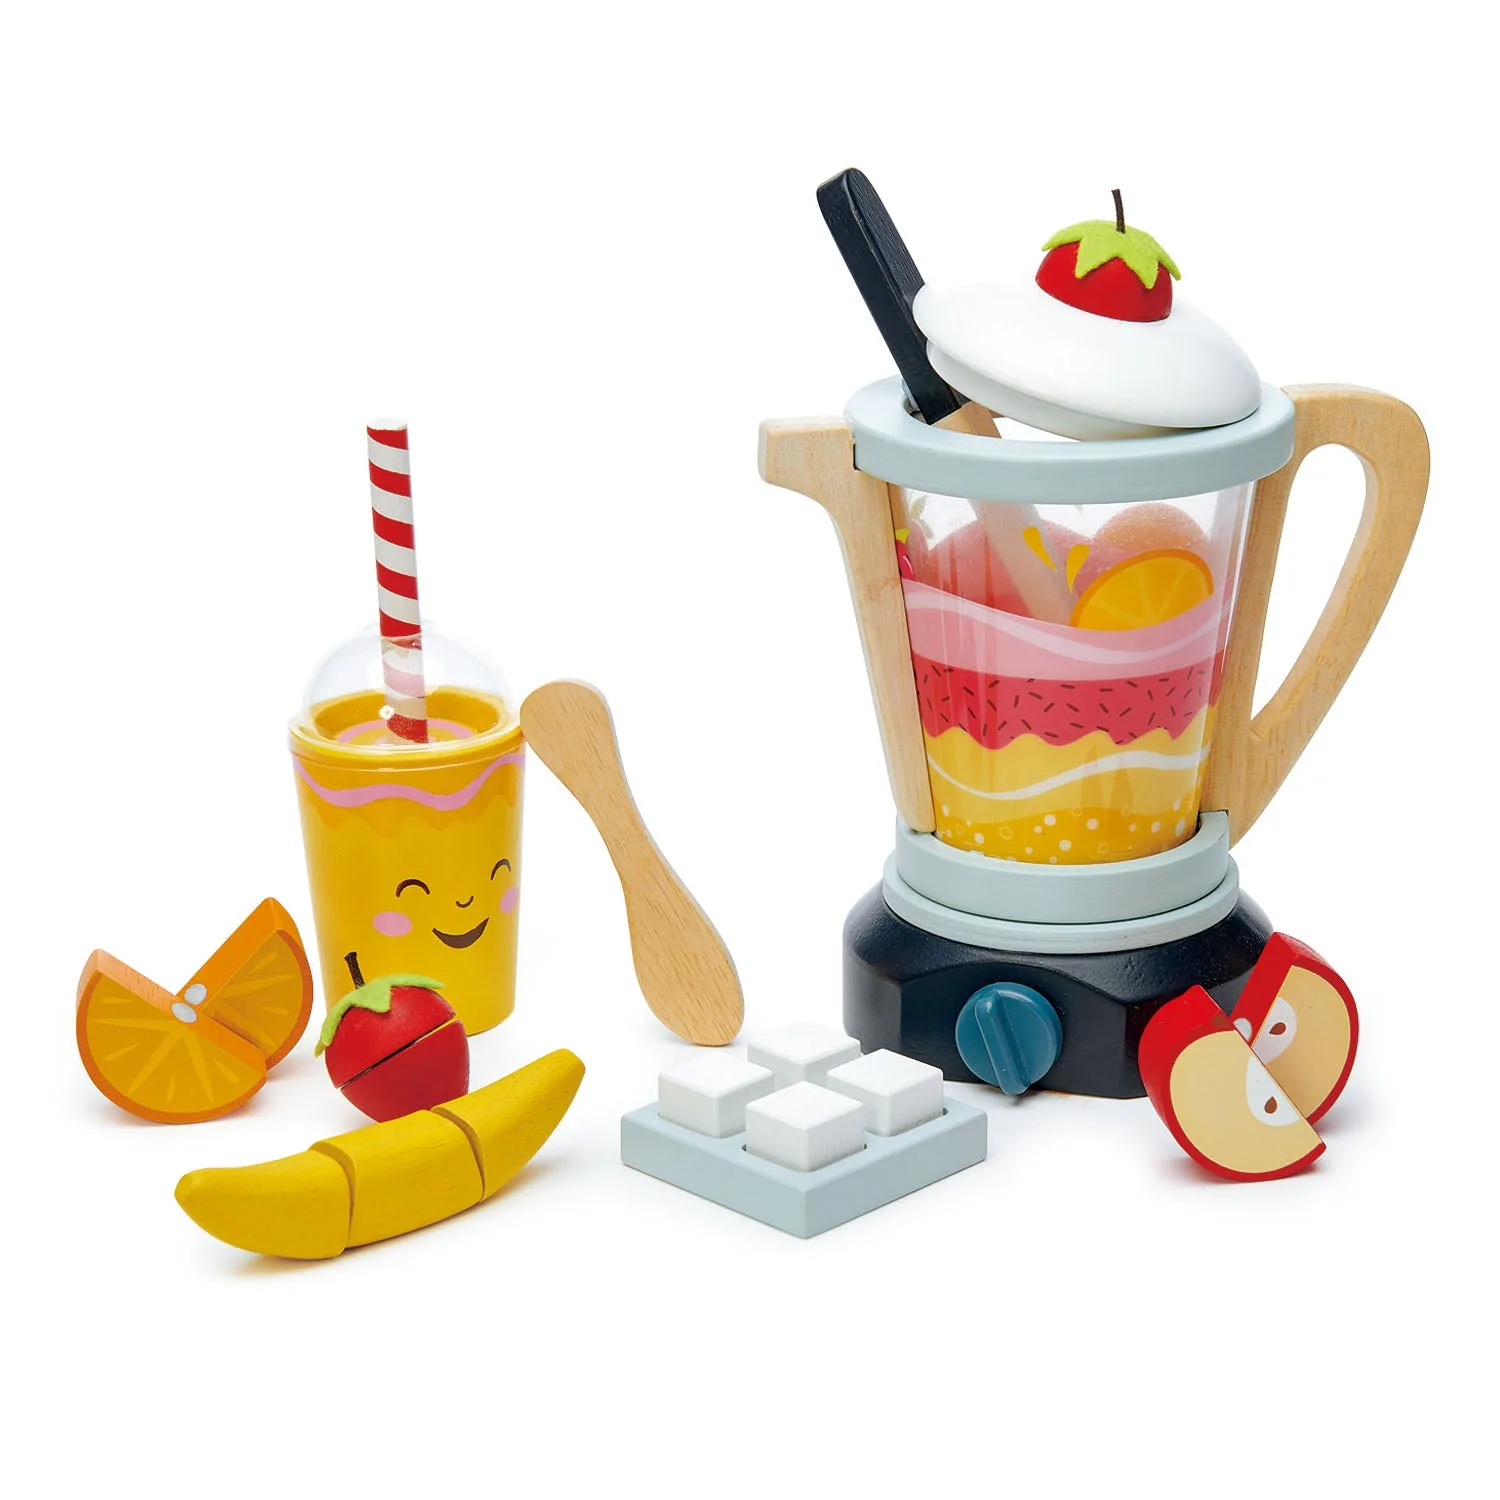
When soup play starts to fade, add a smoothie counter beside it. The Fruity Blender comes with a take-away beaker, stripy straw, and wooden stirrer, and the fruit can be cut with the wooden knife before it goes in. That gives you a second set of actions without buying a whole new kitchen.
A doctor's station is another option for a different kind of pretend play. The Doctor's Bag includes a stethoscope, syringe, thermometer, and other tools, so a child can check on the soup customer after a big meal. Rotating one extra station keeps the play kitchen ideas feeling fresh.
- Use a small tray to define each station so pieces do not merge.
- Store each station's pieces in its own bag or bin for fast setup.
- Introduce one new station at a time so the play does not scatter.
Keep the ingredients safe and the cleanup quick
Use only pieces that are large enough to be safe for your child's age, and check them for cracks or loose paint before each session. A wooden toy soup maker and its ingredients should be wiped with a damp cloth and dried immediately, not soaked, because moisture can affect wood over time.
Cleanup is part of the play. Give your child a job, such as returning all the vegetables to the basket or stacking the bowls. A five-minute reset protects the station for tomorrow and teaches the routine of putting things away.
- Inspect pieces for damage before play.
- Wipe, do not soak, wooden pieces.
- Make the reset a game with a countdown.
Soup maker play kitchen steps
- Clear one low surface and set the soup maker in the center: Place a basket of ingredients on the left and bowls on the right so the flow is scoop, stir, pour, serve. Checkpoint: your child can reach every piece without climbing.
- Choose a recipe card with one to three ingredients: Match the number of ingredients to your child's attention span, and let them pick the card. Checkpoint: the recipe stretches attention slightly, not to the point of frustration.
- Run the routine and name each action: Say scoop, stir, pour, serve as your child does each one, then pause for them to repeat. Checkpoint: your child says at least one action word back to you.
- Ask one open question after serving: Try who is this for, or what does it need, then wait without filling the silence. Checkpoint: your child answers in a word, a gesture, or a new idea.
- Add a second station when interest dips: Set up the Fruity Blender as a smoothie counter, or the Doctor's Bag as a checkup station. Checkpoint: the new station has its own tray so pieces do not merge.
- Reset together in under five minutes: Give your child a specific job, such as returning vegetables to the basket or stacking bowls. Checkpoint: the station is ready for the next session without adult-only cleanup.
Tender Leaf pieces that fit this play
- Fruity Blender: Includes a take-away style beaker, stripy straw, and wooden stirrer, and the fruit can be cut with the wooden knife before going into the blender. Gives you a second station with cutting and pouring actions, so the play extends beyond the soup pot.
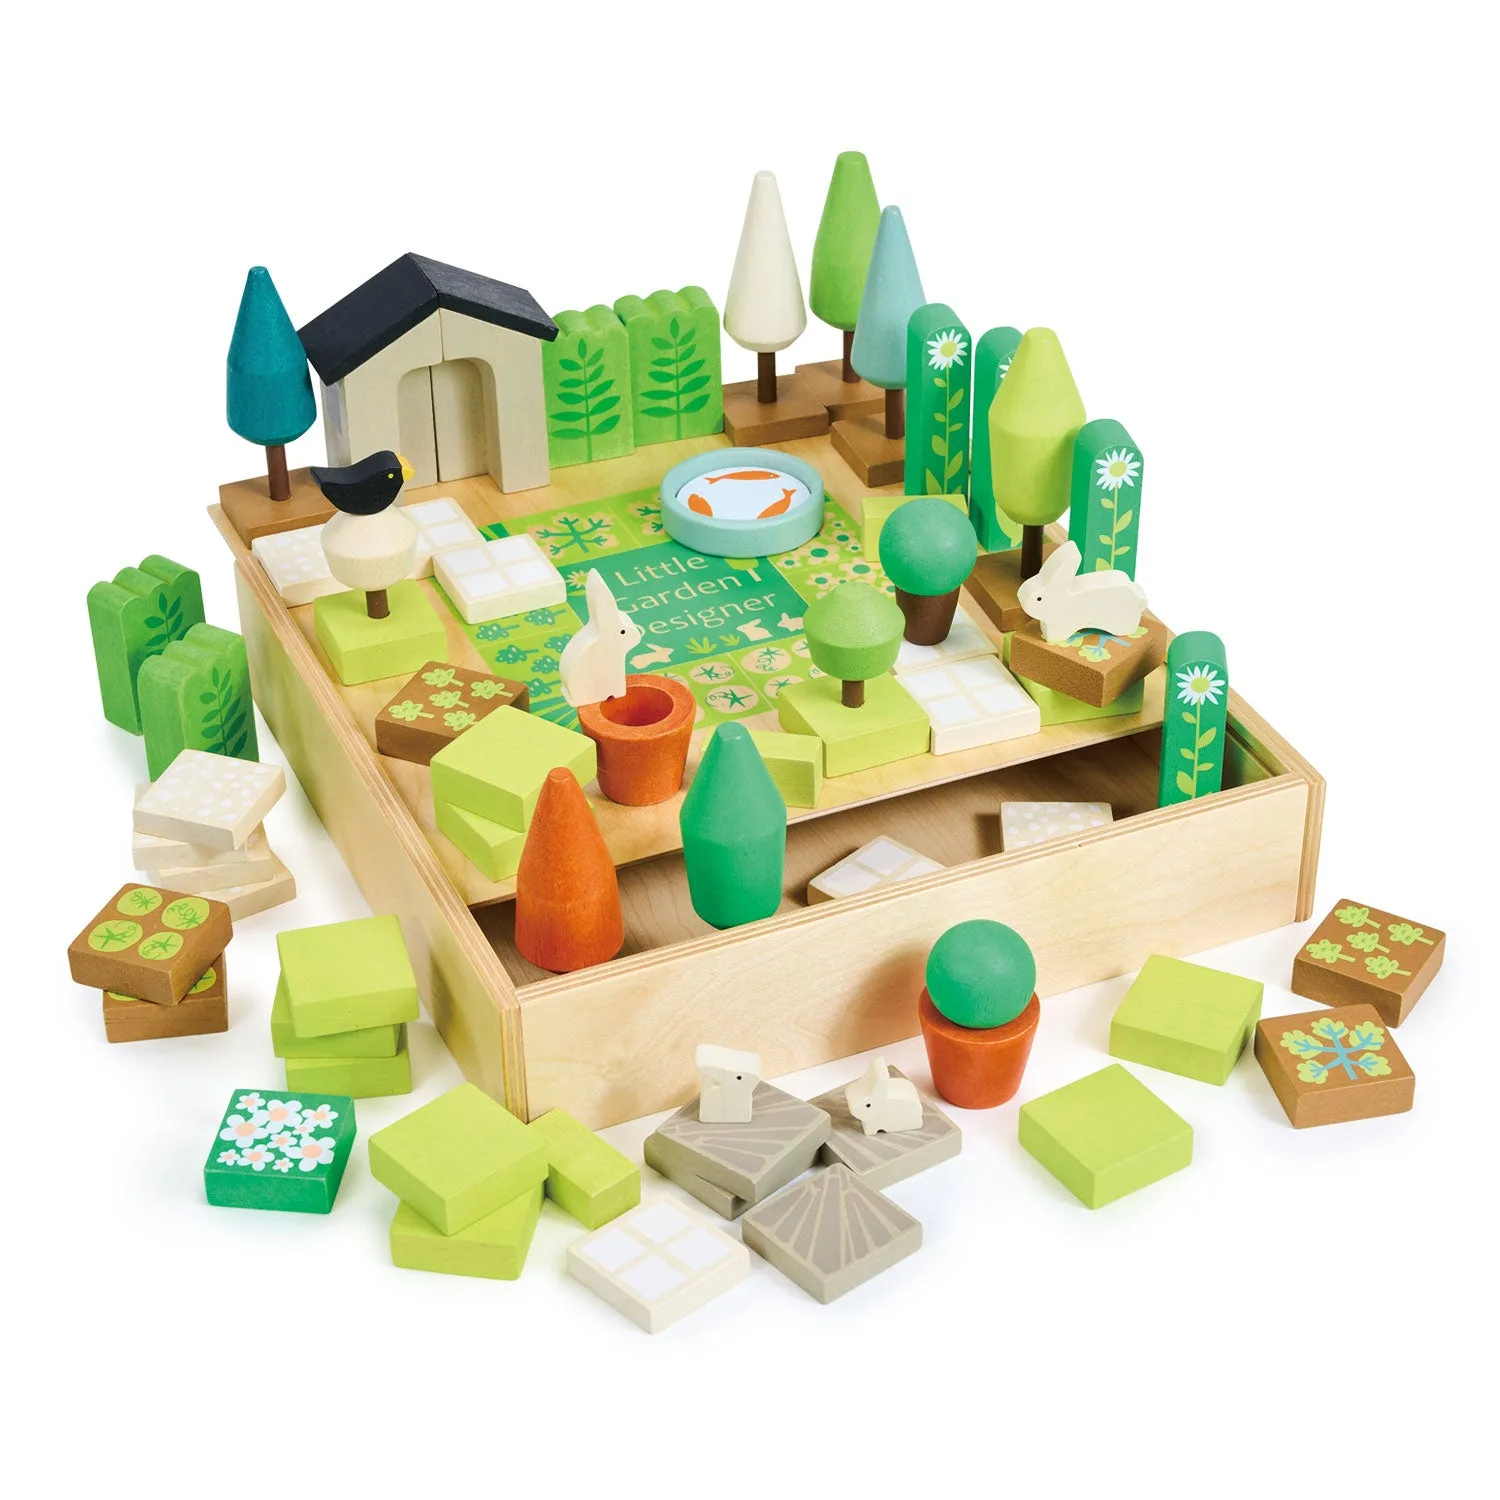
- Little Garden Designer: A 67-piece open-ended set with 7 trees, 6 vegetable patch tiles, 4 sunflowers, and a pond, all arrangeable into garden designs. The vegetable and garden pieces can become soup ingredients or a garden shop, which keeps pretend soup recipes concrete and varied.
- Doctor's Bag: A retro-styled canvas and wood bag with a stethoscope, syringe, thermometer, and other tools for treating patients. Works as a third station when your child wants to check on the soup customer, adding a new story without new setup work.
A soup maker play kitchen does not need a full pretend kitchen setup to work. Give it a station, a simple recipe, and a customer, and the play will carry itself. Start with the steps above, keep the ingredients safe and dry, and let your child's ideas lead the menu.