Quick answer
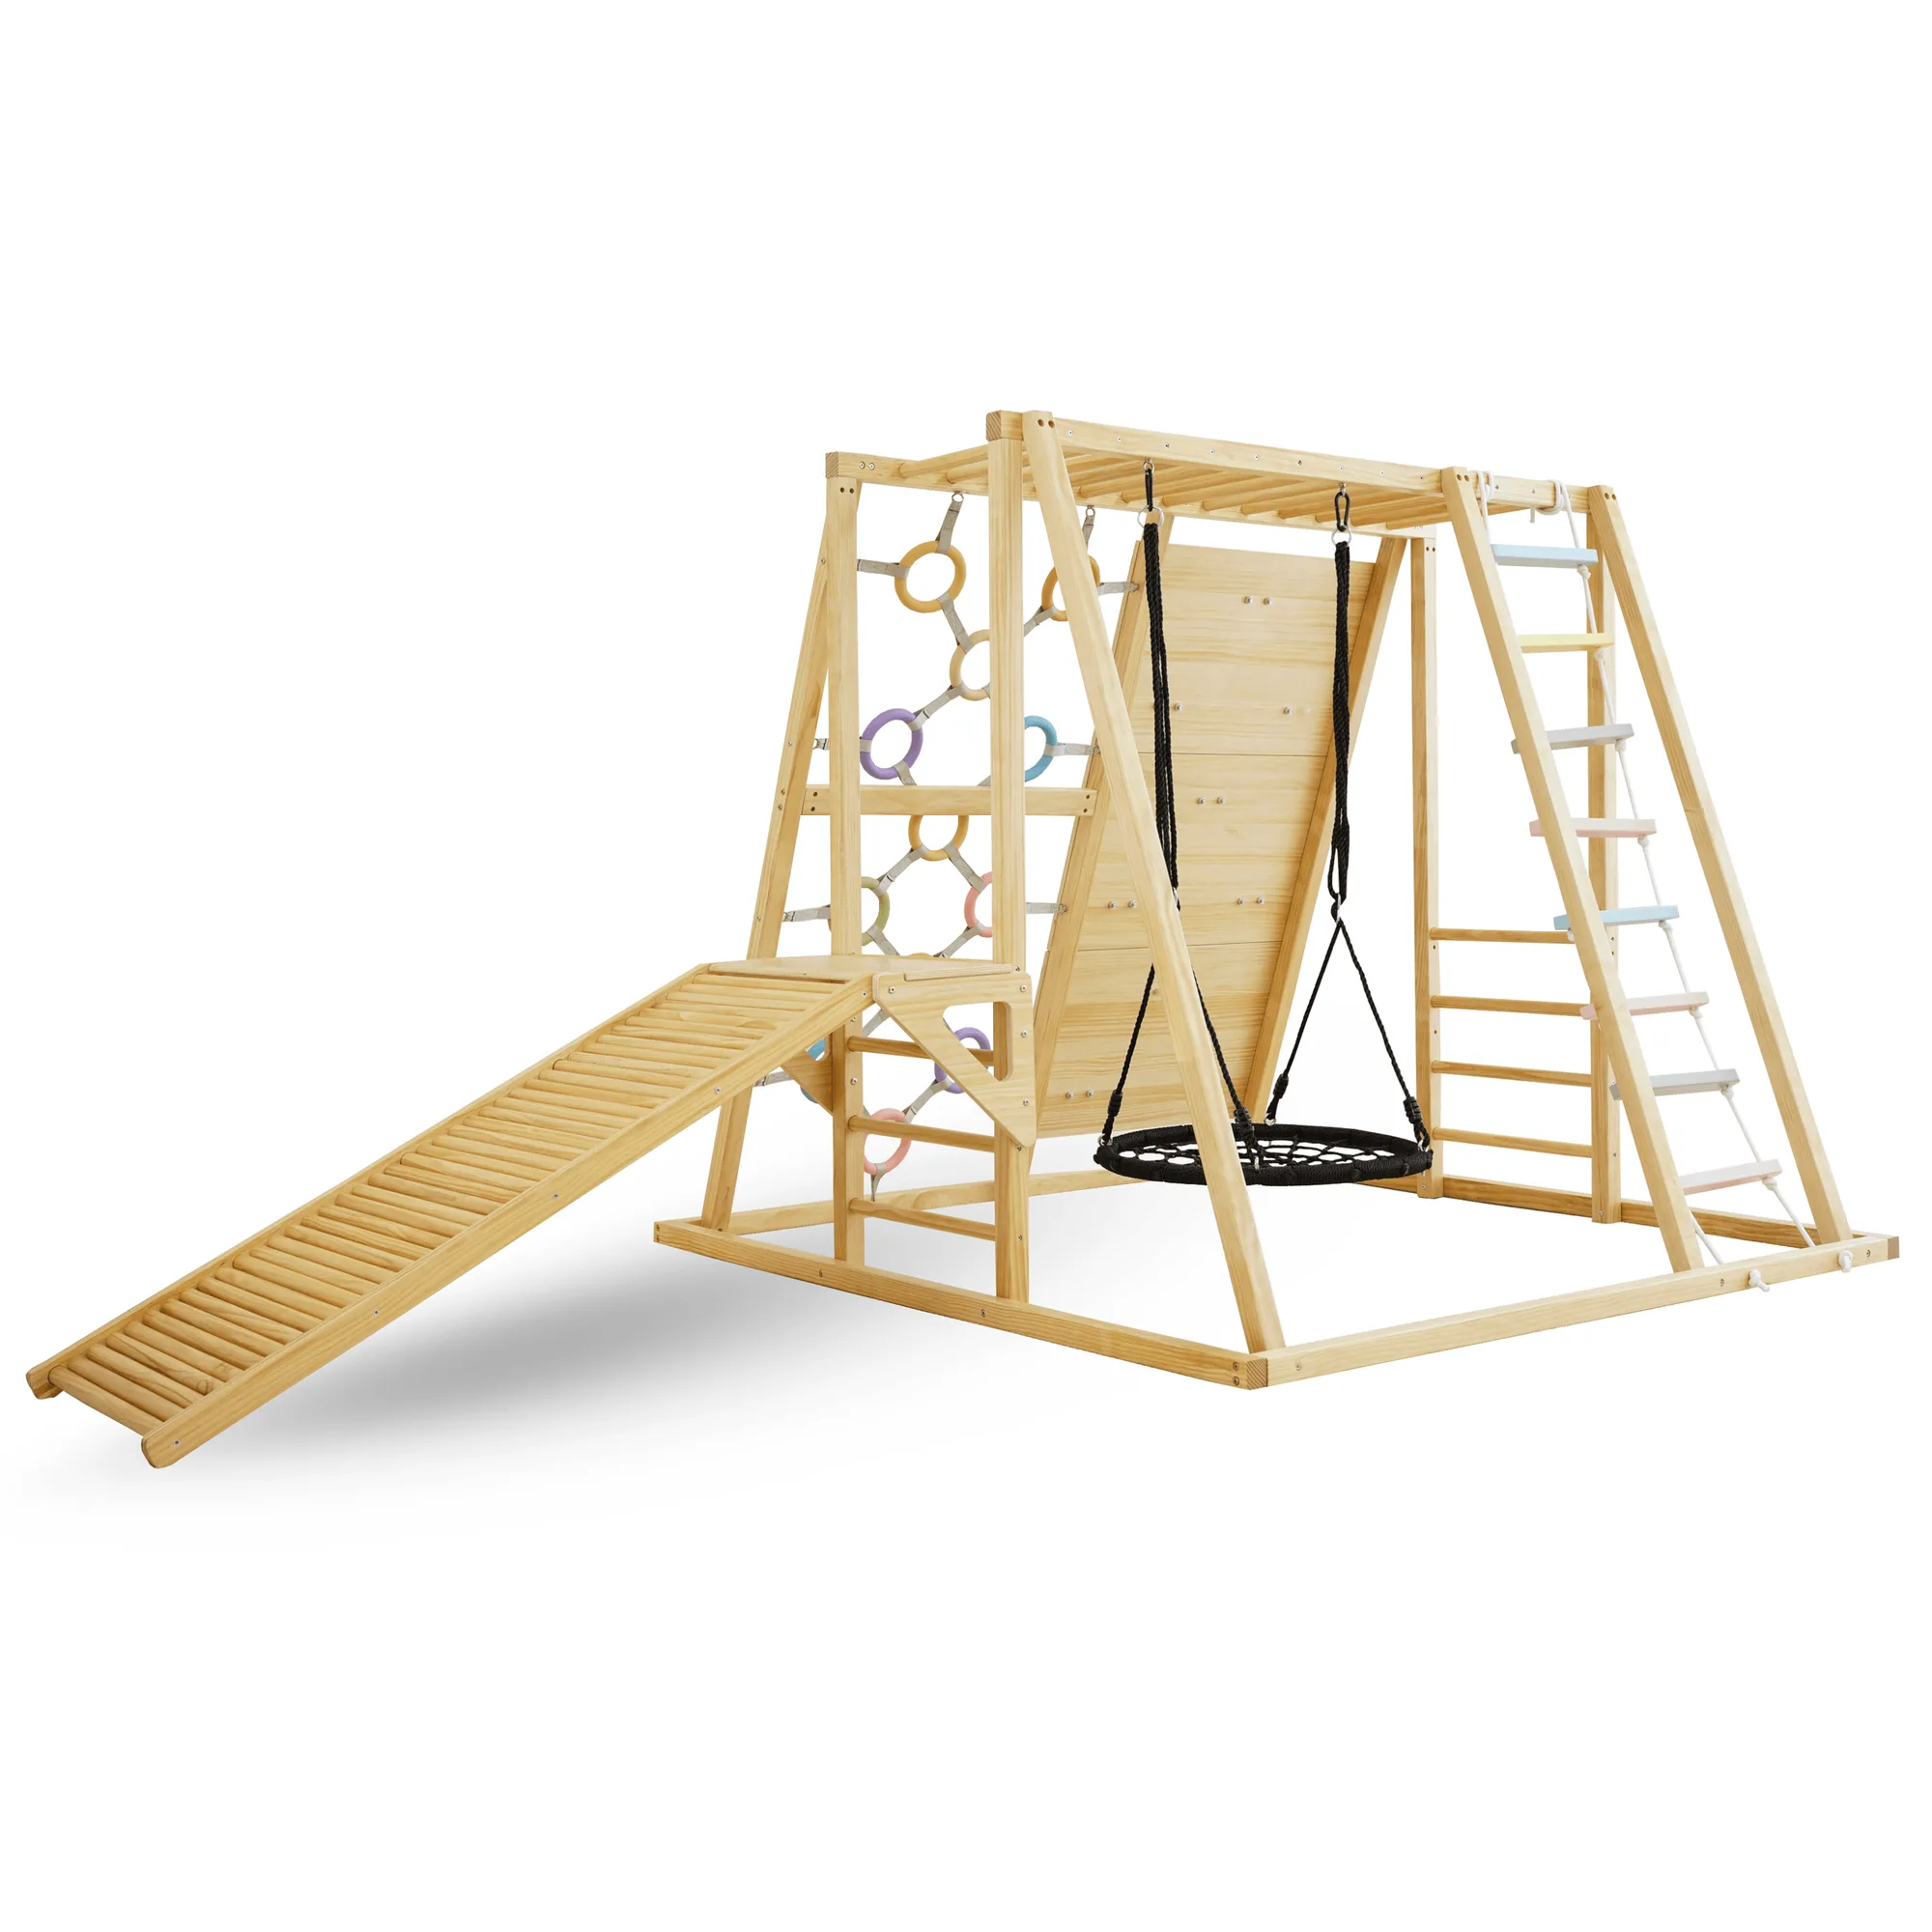
Set up the Sweetgum in this order: choose the size and clear the footprint, build the base and platform first, attach the rock wall and ladder, then hang the swing and fix the slide last. Leave at least 2 feet of clear space on every side and check tightness after the first week. If you are unsure about ceiling height or room width, measure before ordering the Large, X-Large, or Jumbo.
Before you start: size, surface, and tools
The Sweetgum comes in three sizes—Large, X-Large, and Jumbo—so the first decision is which one fits your room without crowding the slide run-out or the swing arc. Measure the intended wall length, the ceiling height, and the open floor depth, then compare those numbers to the size you are considering. A carpet or a low-pile rug is fine, but the frame should sit on a flat, level surface so the rock wall and ladder do not rock. You will need a Phillips screwdriver, a rubber mallet, and a helper for the platform and swing steps. Keep the hardware bag labeled by step; mixing bolts is the most common reason a frame feels loose later.
Step 1: Lay out and sort the parts
Open the boxes in the room where the climber will live, because the assembled frame is heavy and awkward to move through doorways. Group the side panels, rungs, rock wall holds, slide, swing rope or hardware, and platform boards by the labels in the manual. Count the bolts against the parts list before you tighten anything. If a piece is missing or a panel has a crack, stop and contact support before assembly—do not try to force a damaged part into place.
Step 2: Build the base frame on a level surface
Assemble the two side frames first, then connect them with the lower rails to form a stable rectangle. Leave every bolt finger-tight until the whole base is square. A common mistake is tightening the first corner fully, which pulls the frame out of square and makes later panels hard to align. Check the diagonals with a tape measure; when both diagonal measurements match, the frame is square and you can snug the bolts.
Step 3: Attach the platform and ladder
Set the platform boards into the frame and fix them with the supplied hardware. The platform is the anchor for the rock wall, slide, and swing, so it must sit flush with no flex. Then attach the ladder to the side you want children to enter from. If the ladder feels springy, check that the rungs are fully seated and that you used the correct bolt length; a long bolt in a shallow hole will not clamp the joint. This is also the point to decide whether the ladder faces the room or a wall, because that choice affects the whole layout.
Step 4: Mount the rock wall
Fix the rock wall panel to the frame at the height shown in the manual, then attach the climbing holds with the supplied bolts. Tighten holds firmly but do not crush the wood. A frequent mistake is placing the rock wall where it blocks the ladder or the slide entry; leave a clear approach so a child can step onto the first hold without twisting. Once mounted, press down on each hold by hand to confirm it does not rotate.
Step 5: Hang the swing and check clearance
Attach the swing according to the hardware supplied with your configuration, then sit the swing seat at a height where a toddler can mount it without help but cannot drag it on the floor. Push the empty swing gently through its full arc and watch for contact with the frame, wall, or slide. The most common mistake here is hanging the swing too low, which lets it scrape the floor and wear the rope. If the arc is tight, move the whole climber away from the wall before you continue.
Step 6: Fit the slide and set the run-out
Attach the slide to the platform using the supplied brackets, then check that the top of the slide sits flush with the platform edge. The slide needs a clear run-out zone at the bottom—at least the length of the slide itself—so children do not land against furniture. A common mistake is angling the slide too steeply to save space; a steeper slide is faster and harder to exit safely. Once positioned, tighten the slide brackets and confirm the slide does not shift when you press down on the middle.
Step 7: Final tighten, test, and weekly check
Go around the whole climber and tighten every bolt, including the ones you left finger-tight in Step 2. Then test each function in order: climb the ladder, cross the platform, step onto the rock wall, sit on the swing, and slide down. Listen for creaks and look for gaps at the joints. After the first week of use, re-tighten all hardware, because wood settles as it adjusts to indoor humidity. Make this a monthly habit, and check the swing rope and slide brackets each time.
Setup steps at a glance
- Sort and count parts: Open boxes in the final room, group panels and hardware by the manual labels, and count bolts before assembly. Missing or cracked parts? Stop and contact support before forcing anything.
- Build the base square: Assemble side frames and lower rails finger-tight, then check both diagonals with a tape measure before snugging bolts. If the diagonals do not match, the frame is not square—adjust before tightening.
- Fit the platform and ladder: Fix platform boards flush, then attach the ladder on your chosen entry side and confirm the rungs do not flex. A springy ladder usually means the wrong bolt length or a rung not fully seated.
- Mount the rock wall: Attach the wall panel at the manual height, add holds, and keep the approach clear of the ladder and slide entry. Press each hold by hand; if it rotates, tighten it before use.
- Hang the swing: Set the seat so a toddler can mount it but it does not drag, then push the empty swing through its full arc. Any contact with the frame or wall means the climber needs to move.
- Attach the slide: Bolt the slide flush to the platform and leave a clear run-out at the bottom at least the length of the slide. Do not steepen the slide to save space; a faster slide is harder to exit safely.
- Tighten and test: Tighten every bolt, test each function in order, then re-tighten after the first week and check monthly. Wood settles with indoor humidity—monthly checks keep the frame solid.
Product facts
- Avenlur Sweetgum Indoor Wooden Climber – Montessori 8-in-1 Playset with Slide, Swing, Rock Wall: 8-in-1 Activity Center: Rock wall, slide, monkey bars, rope climber, swing, platform, ladder & more This is why the setup order matters: the platform anchors the rock wall, slide, and swing, so build it first and add the rest around it.
- Avenlur Sweetgum Indoor Wooden Climber – Montessori 8-in-1 Playset with Slide, Swing, Rock Wall: Choose from three thoughtfully crafted sizes (Large, X-Large, or Jumbo) to fit your space Measure your room before ordering; the size choice determines how much clear space you need for the slide run-out and swing arc.
- Avenlur Sweetgum Indoor Wooden Climber – Montessori 8-in-1 Playset with Slide, Swing, Rock Wall: Montessori-Inspired The design supports independent, child-led play, so place the entry points where your child can reach them without adult lifting.
- Banyan | Jumbo Rocker & Climber: Dual-function design lets kids rock, climb, balance, and even use it as a tunnel or imaginative play space A good outdoor companion if you want to extend active play beyond the indoor climber without duplicating the same footprint.