Quick answer
For a natural look, choose The Dreamer Brunette Pre-Glued Lashes and apply them under your natural lashes using the pre-glued strip. Focus on placement and gentle pressing to blend seamlessly.
Why The Dreamer Brunette Pre-Glued Lashes Work for Natural Looks
The Dreamer Brunette Pre-Glued Lashes feature soft brunette fibers that mimic natural lash color, creating depth without looking harsh. The pre-glued design eliminates the need for separate adhesive, making application faster and reducing the risk of glue mishaps. With ProTECHt™ technology, these lashes offer smoother application and cleaner wear, which helps maintain a natural appearance throughout the day.
Trade-offs: Pre-Glued vs. Traditional Adhesive Lashes
Pre-glued lashes are convenient but may have slightly less hold than traditional glue-on lashes, especially for oily eyelids. They are best for short to medium wear (a few hours to a day). If you need all-day hold or have very oily lids, you might prefer traditional adhesive. However, for most natural daily looks, pre-glued lashes offer a comfortable, fuss-free option.
Step-by-step application for a natural look
- Prep your natural lashes: Ensure your natural lashes are clean, dry, and free of mascara or oils. Curl them gently if needed. This helps the pre-glued lash strip adhere better and blend seamlessly. Common mistake: applying over oily or dirty lashes reduces adhesion and can cause the strip to lift.
- Remove the pre-glued lash from the tray: Gently peel the lash strip from the tray using tweezers or your fingers. Hold it by the outer edge to avoid touching the adhesive. The pre-glued strip is ready to use—no additional glue needed. Checkpoint: ensure the adhesive strip is intact and not folded or damaged before application.
- Position the lash under your natural lashes: Place the pre-glued lash strip underneath your natural lashes, as close to the lash line as possible. Use a mirror and look downward to see the placement clearly. Press gently along the strip for 10–15 seconds to secure. Common mistake: placing it too far from the lash line creates a visible gap. Adjust immediately before the adhesive sets.
- Blend with a lash curler or mascara: After the lash is secure, gently press your natural lashes and the false lashes together using a clean lash curler. Optionally, apply a light coat of mascara to blend the lashes into one seamless line. Checkpoint: avoid heavy mascara on the false lashes, as it can clump and ruin the natural effect.
- Set and enjoy your natural look: Gently press the lashes one more time along the strip to ensure full adhesion. The pre-glued lashes should feel comfortable and lightweight. For best results, avoid rubbing your eyes or getting the lashes wet for the first hour. Common mistake: touching or adjusting the lashes too much after application can loosen the adhesive.
Product facts
-
The Dreamer Brunette Pre-Glued (2 Pair) with ProTECHt™: The Dreamer STICK•tionary Edition brings its signature length and feathered curl—now pre-glued for quick underlash application and multi-day wear, with ProTECHt™ for smoother application and zero lash cling. The pre-glued strip and ProTECHt™ make it easy to achieve a natural, fluttery look without glue mess, and the multi-day wear option is ideal for special events.
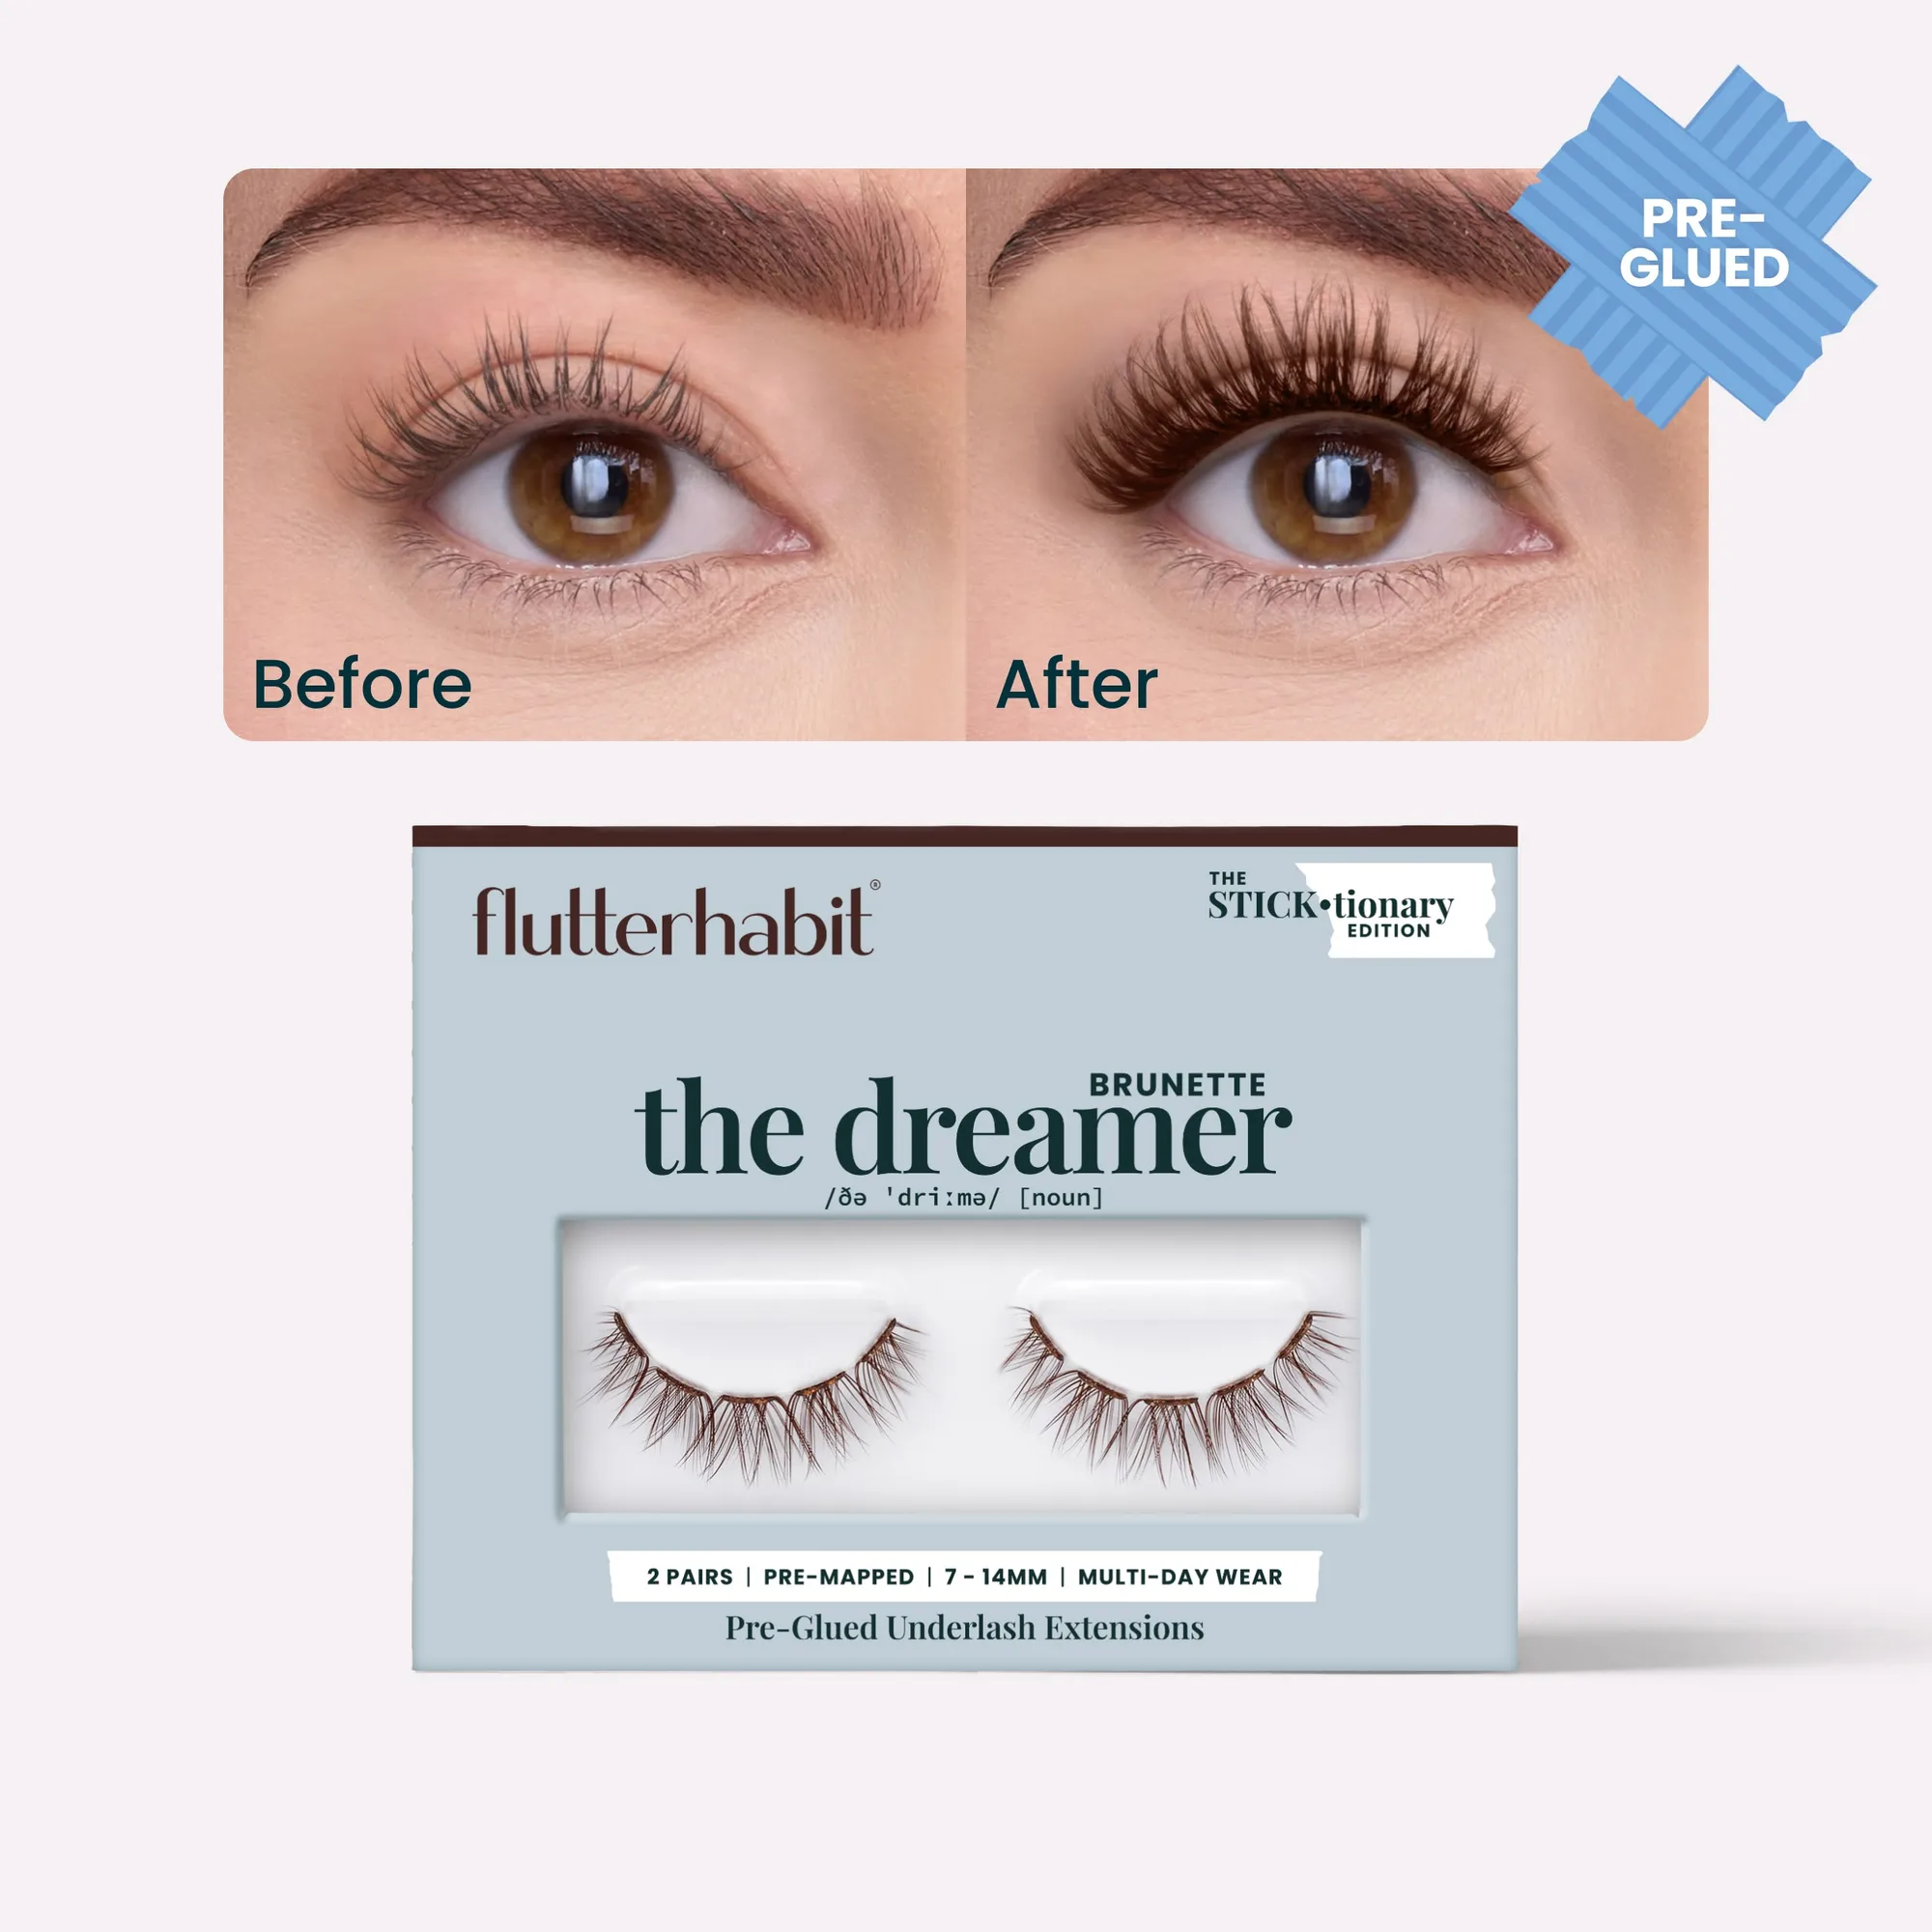
The Dreamer Brunette Pre-Glued (2 Pair) with ProTECHt™
-
The Dreamer Brunette Pre-Glued with ProTECHt™: This 7–14mm beauty features soft brunette fibers for natural-looking depth with just the right touch of volume, with ProTECHt™ for cleaner wear and zero lash cling. The range of lash lengths (7–14mm) lets you customize the look from barely-there to soft glam, while the brunette fibers blend naturally with brown or dark lashes.
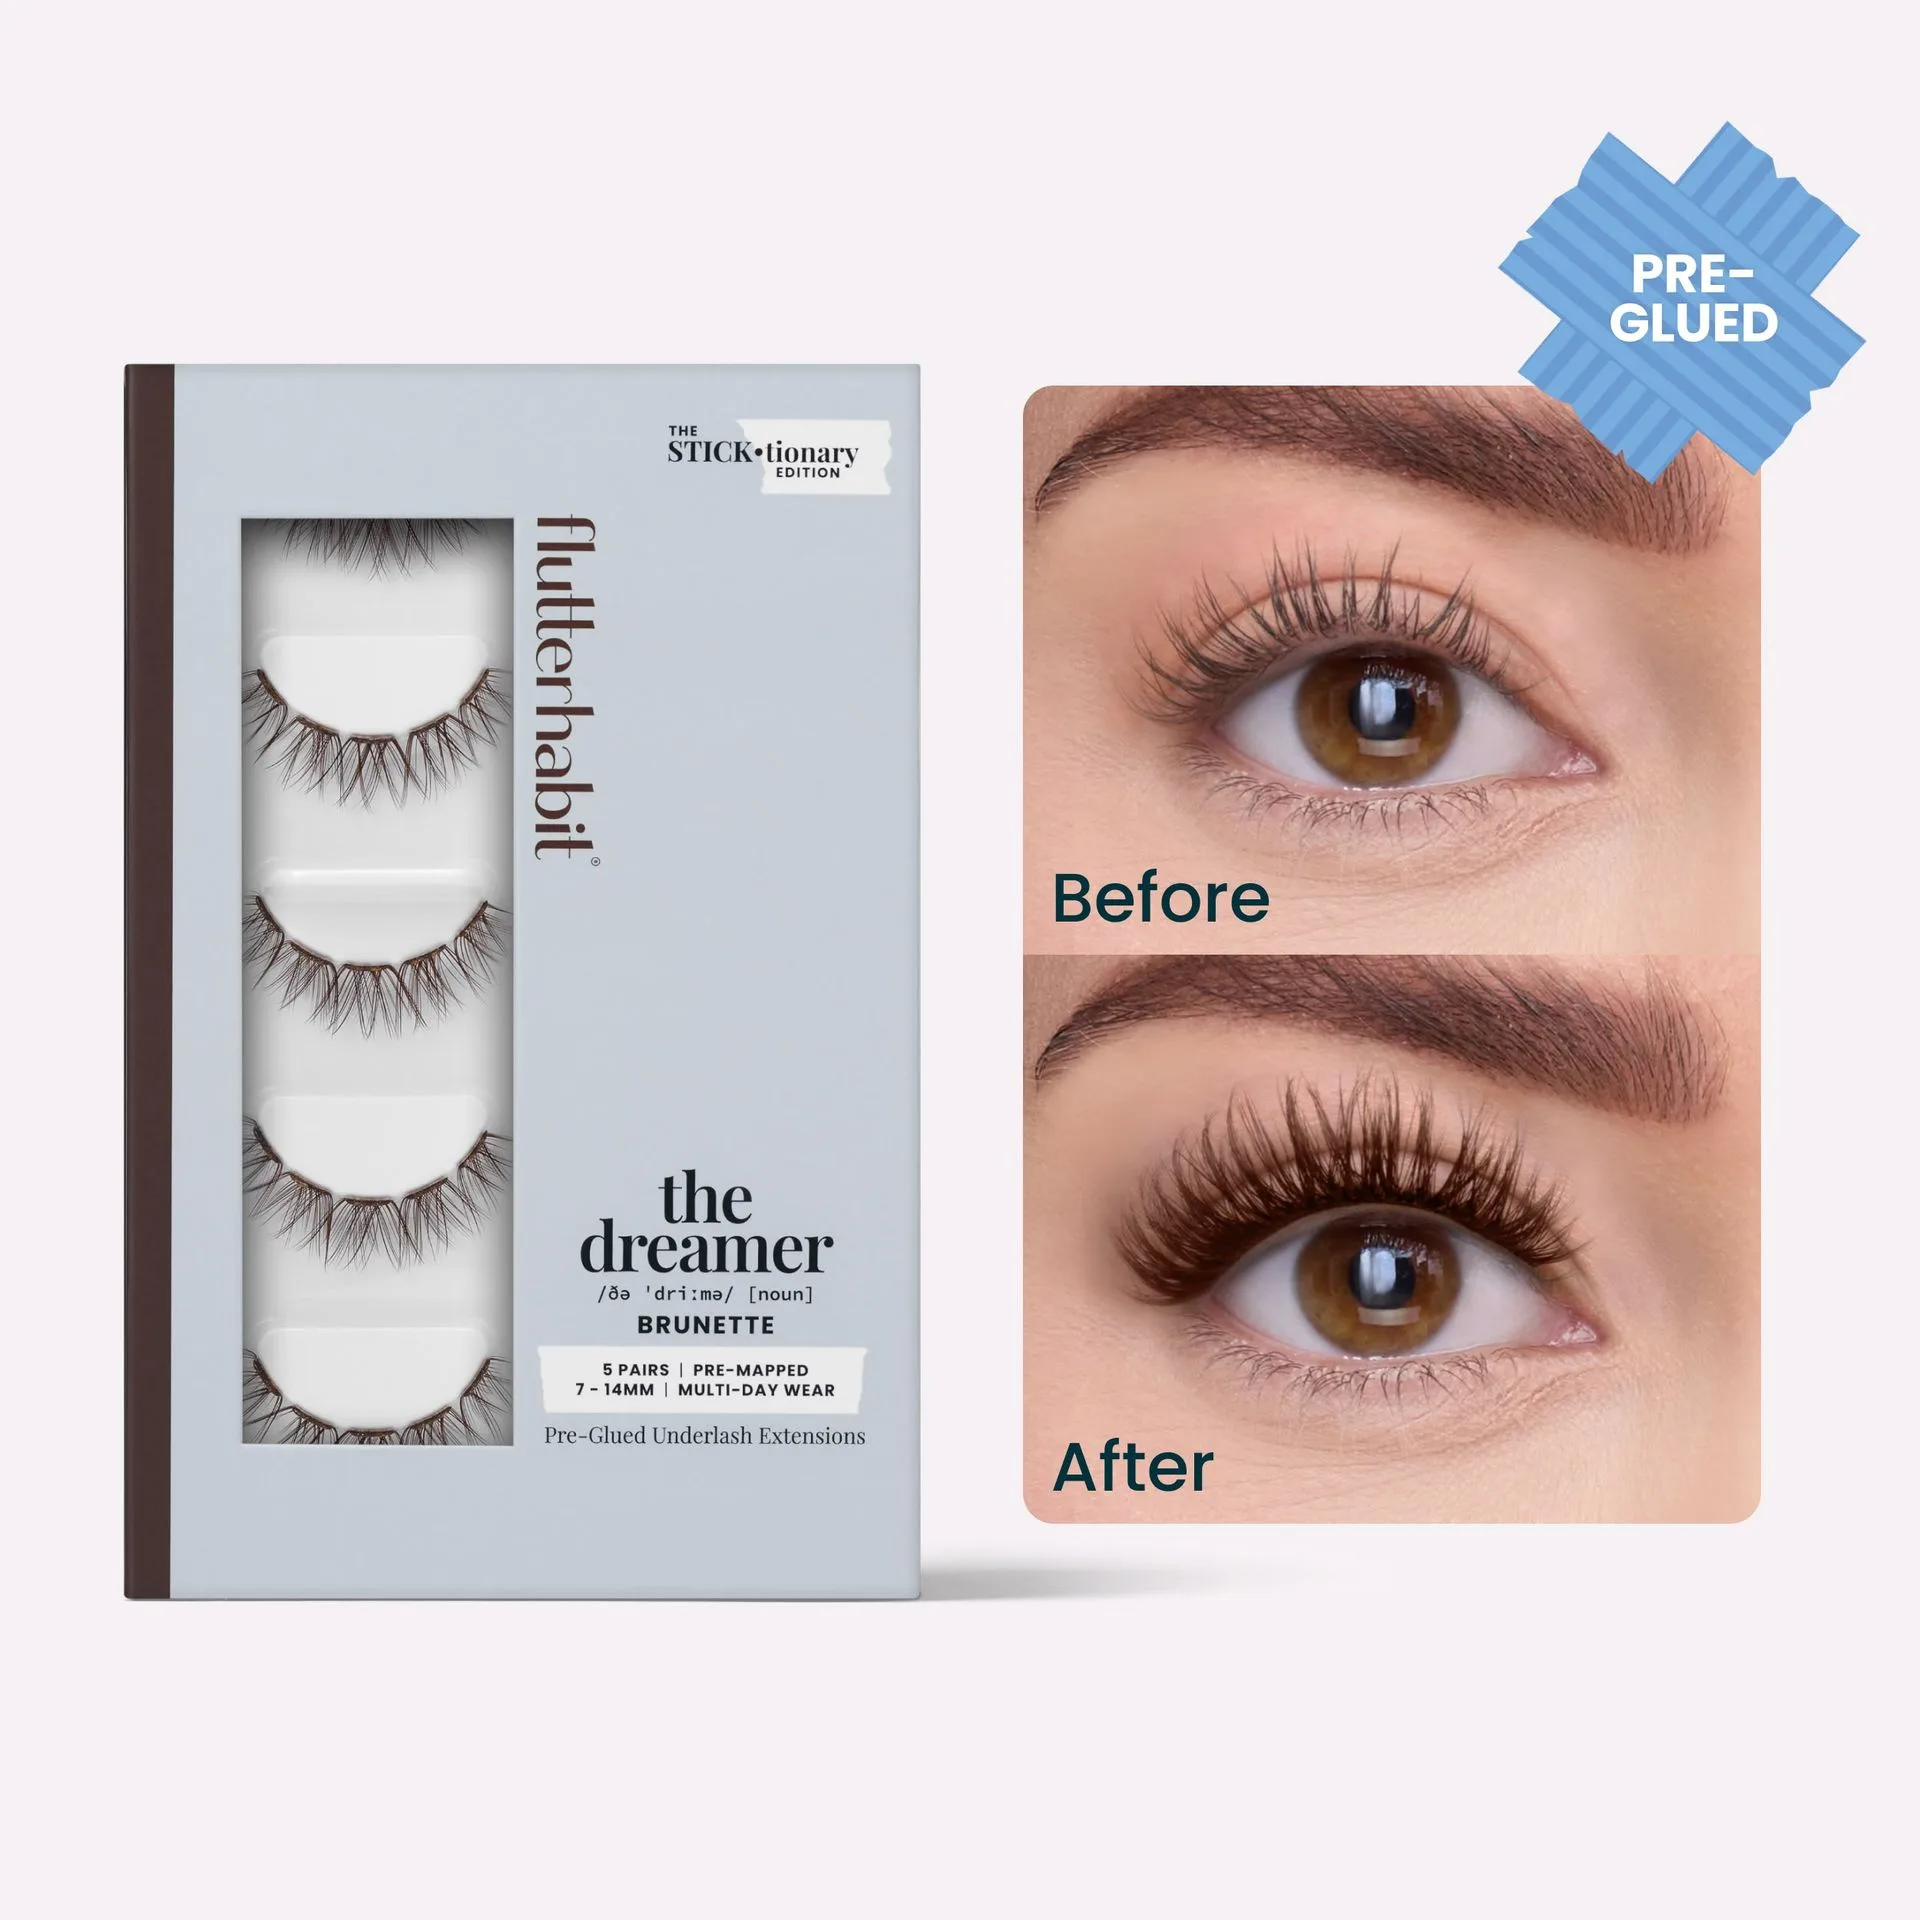
The Dreamer Brunette Pre-Glued with ProTECHt™