Quick answer
Pack hair care for travel in three layers: TSA-compliant liquids in a clear quart bag, heat tools in a padded pouch with the cord wrapped and secured, and small accessories in a separate zip pocket. Build the kit around what you actually use daily, not what you might need, and keep heat tools out of checked bags when possible.
Start with the TSA liquid limit, not your routine
The single biggest packing mistake is bringing full-size bottles and hoping they pass. TSA rules for carry-on liquids, gels, and aerosols cap each container at 3.4 ounces (100 milliliters) and require everything to fit in one clear quart-sized bag. That means your shampoo, conditioner, leave-in, and styling cream all compete for the same space. Decant your daily formulas into reusable travel bottles, or buy travel-size versions of the products you already trust. If a product comes in a pump bottle that cannot be opened, squeeze some into a small silicone tube and label it with a marker. Don't rely on hotel shampoo if your hair is color-treated or prone to dryness; the wrong formula for three days can undo weeks of care.
Choose tools by trip length and outlet reality
A flat iron or curling wand is usually the bulkiest item in a hair kit, so decide before you pack whether you actually need it. For a weekend trip with a single event, one versatile tool beats three. For a longer trip, a dual-voltage travel styler saves space and avoids the need for a converter. Check the plug type for your destination and pack a plug adapter, not a voltage converter, unless your tool is single-voltage. A common mistake is assuming a hotel hair dryer will work for your styling routine; many run hot and dry, which can rough up fine or damaged hair. If your style depends on controlled heat, bring your own dryer or a heat-protective styling product to compensate.
Pack heat tools so they arrive undamaged
Heat tools break in transit for two reasons: the barrel gets crushed, or the cord gets bent sharply at the base. Wrap the cord loosely around your hand, secure it with a velcro tie, and place the tool in a padded pouch or rolled inside a towel. Never coil the cord tightly around the hot barrel, even when cool, because that stresses the connection point over time. Let the tool cool completely before packing; a warm barrel inside a bag can damage the coating and anything touching it. If you are flying carry-on only, a travel-size flat iron fits more easily than a full-size dryer, and it leaves room for the accessories that actually change your finished look.
Build a small accessory layer that earns its space
Travel hair accessories should solve specific problems, not fill a pouch. A wide-tooth comb detangles wet hair without pulling, a few claw clips hold hair during washing or while a treatment sets, and a satin scrunchie reduces creasing if you sleep with hair tied back. If you use a hair towel, choose a microfiber one because it dries faster and is lighter than terry. Skip full-size brushes you can replace with a compact paddle or a comb. The checkpoint: if you have not used an accessory in the last month at home, leave it behind. A tight kit is easier to repack and less likely to leak or snag.
Travel hair care packing steps
- Step 1: Audit your daily routine: List the shampoo, conditioner, and one styling product you use every wash day. Those three are the core of your kit. Mistake to avoid: packing a treatment you use monthly and skipping the leave-in you use daily. Checkpoint: if a product is not used at least weekly at home, it stays home.
- Step 2: Decant into TSA-size containers: Fill 3.4-ounce (100 ml) bottles or tubes and place them in one clear quart bag. Label each bottle. Mistake to avoid: filling bottles to the very brim, which can leak when cabin pressure changes. Checkpoint: the filled bag must close flat without forcing the zipper.
- Step 3: Pick one heat tool and prep it: Choose a single styler that covers your trip, confirm voltage and plug type, and wrap the cord loosely with a tie. Mistake to avoid: packing a tool while still warm or coiling the cord tightly around the barrel. Checkpoint: the tool should be cool, padded, and easy to pull out without untying anything else.
- Step 4: Add accessories that solve a problem: Include a wide-tooth comb, two claw clips, and one satin scrunchie. Mistake to avoid: bringing a full brush collection; one compact brush or comb is enough for most trips. Checkpoint: every accessory should have a specific job you can name.
- Step 5: Pack the kit as one removable layer: Put liquids in the quart bag, tools in a padded pouch, and accessories in a small zip pocket, then place all three together on top of your clothes. Mistake to avoid: scattering hair items across the bag, which makes security checks and hotel unpacking slower. Checkpoint: you should be able to lift the entire hair kit out in one motion.
From the product catalog
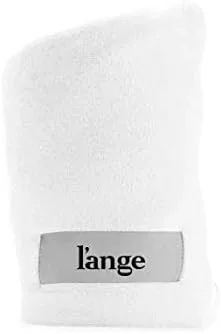
- L'ANGE HAIR Microfiber Hair Wrap: L'ANGE HAIR Microfiber Hair Wrap is a practical accessory designed to gently dry and protect your hair. Crafted from soft microfiber material, it helps reduce frizz and speed up drying time without causing damage. Made from high-quality microfiber fabric for gentle absorption Helps minimize frizz and breakage during the drying process Convenient wrap design for easy use after washing Suitable for all hair types and…
- L’ange Alligator Hair Clips (Blush): L’ange Alligator Hair Clips in Blush offer a practical and stylish solution for sectioning and styling your hair. These clips are designed to hold hair securely in place, making them a useful accessory for your daily routine or professional salon use. Blush color adds a subtle, feminine touch to your hair styling tools. Alligator clip design provides a firm grip for sectioning or holding hair. Suitable for a variety…