Quick answer
Place the Velvet Ramp on a firm, flat surface before you begin, then test the angle with your body weight while fully clothed or with a towel over it. Adjust the ramp's position until your hips and lower back feel evenly supported, not strained. Use it to lift and tilt the pelvis rather than to force a position, and stop if you feel pinching or numbness. The goal is comfortable support, not extreme angles.
Why the Velvet Ramp works as an angle support tool
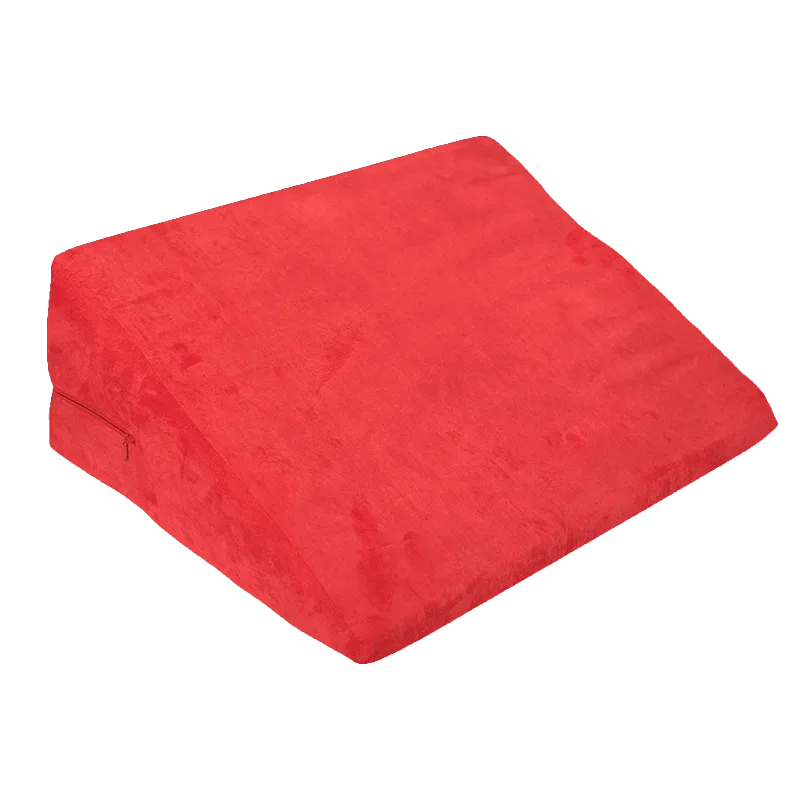
The Velvet Ramp is shaped to provide lift and support during intimate moments, which changes the angle of the pelvis without requiring you to hold a position through muscle tension. That matters because most discomfort during sex comes from unsupported joints and overworked muscles, not from the position itself. By putting a stable wedge under the hips or lower back, the ramp lets your body rest into the angle instead of straining to maintain it. This is especially useful for couples exploring new positions or anyone who wants added comfort during longer sessions. The ramp is not a medical device and does not treat pain, but it can reduce the effort needed to stay in a position.
Preparing your space and the ramp before first use
Set up on a firm surface such as a bed with a supportive mattress or a padded floor. Soft, sinking surfaces make the ramp unstable and reduce its effectiveness. Place a towel or a washable cover over the ramp if you want to keep it clean, and keep a second towel nearby for quick cleanup. Check the area around you for sharp corners, loose bedding, or anything that could restrict movement. If you are using the ramp with a partner, agree on a verbal pause signal before you start so either person can stop instantly without negotiation. Have water and a light blanket within reach, because changing positions can cool you down quickly.
Finding the right angle for your body
Start with the ramp at its lowest practical incline and lie back onto it so your hips rest on the high side. If your lower back arches uncomfortably or your chin tucks toward your chest, the angle is too steep. Slide the ramp a few inches toward your feet to reduce the tilt, or move it higher under your sacrum to increase support. For rear-entry or side positions, place the ramp under the receiving partner's hips so the pelvis tilts toward the partner rather than away. Test each adjustment for at least thirty seconds before deciding; immediate comfort is a better guide than appearance. If you feel pressure points on your tailbone or hip bones, add a folded towel as a buffer or change the ramp's orientation.
Common mistakes that make the ramp uncomfortable
The most frequent error is placing the ramp on a soft mattress topper or uneven blankets, which causes it to shift mid-movement and creates unstable support. Another mistake is choosing an angle that looks exciting but compresses the diaphragm or restricts breathing; if you cannot take a full breath, lower the incline. Some users try to use the ramp as a restraint anchor or pull on it during position changes, which can tip it. Keep the ramp as a passive support and use dedicated restraint gear if you want to explore power dynamics. Finally, do not ignore numbness or tingling in the legs; that is a signal to change position, not to push through.
Cleaning and storing the Velvet Ramp between uses
Wipe the surface with a damp cloth and a mild soap after each use, then dry it completely before storing. Avoid soaking the ramp or putting it in a washing machine unless the care label explicitly allows it. Store it flat or upright in a cool, dry place away from direct sunlight, which can degrade surface materials over time. If you use a towel or cover during sessions, wash that separately and keep a spare on hand so the ramp is always ready. Check the ramp periodically for cracks, compressed foam, or loose stitching, and replace it if the shape no longer holds.
Step-by-step Velvet Ramp setup
- Choose a firm, flat surface: Place the ramp on a supportive mattress or padded floor, not on soft bedding or a sagging couch. Remove loose blankets and pillows from the immediate area. Checkpoint: press down on the ramp with your hand. If it shifts or sinks unevenly, move to a firmer surface.
- Cover the ramp for comfort and cleanup: Lay a large towel or washable cover over the ramp, smoothing out wrinkles that could create pressure points. Keep a second towel within reach for afterward. Checkpoint: the cover should stay in place when you slide onto the ramp, not bunch up under your hips.
- Test the angle with your body weight: Lie back onto the ramp with your hips on the high side. Start at a low incline and adjust by sliding the ramp toward your feet to reduce tilt or higher under your sacrum to increase support. Checkpoint: you should be able to breathe fully and feel even support across your hips and lower back, with no pinching.
- Add a buffer for bony areas: If your tailbone or hip bones feel pressure, fold a small towel under those spots or rotate the ramp slightly. Do not ignore numbness or tingling in your legs. Checkpoint: any numbness or tingling means you should change position or lower the angle immediately.
- Agree on a pause signal with your partner: Before you start moving, decide on a word or gesture that means stop instantly. Use it if the ramp shifts, if you feel strain, or if you simply want to readjust. Checkpoint: either partner can call the pause at any time, and the other person stops without debate.
- Clean and store after use: Wipe the ramp with a damp cloth and mild soap, dry it completely, and store it flat or upright in a cool, dry place away from sunlight. Wash the towel or cover separately. Checkpoint: inspect the ramp for cracks or compressed foam before putting it away, and replace it if the shape no longer holds.
Product facts
- Velvet Ramp: The Velvet Ramp from Cosara is designed to make every angle the right one, helping couples find comfortable and exciting positions with ease. It is thoughtfully shaped to provide optimal support and lift during intimate moments. This means the ramp is intended as a positioning aid for comfort and angle support, not as a restraint or a medical device, so you can use it to reduce strain rather than force a position.