Quick answer
Dissolvable embroidery uses a water-soluble stabiliser as a temporary backing or topping that holds stitches steady while you sew, then rinses away in warm water. Use it when stitching on felt, lace, towelling, knits or any fabric that would otherwise pucker, sink or distort. Choose a film-type stabiliser for sheer or textured fabric and a paper-type for dense designs, then always test a scrap before committing your final piece.
Dissolvable embroidery is one of those techniques that quietly solves a lot of problems. If you have ever tried to stitch a monogram onto felt and watched the letters sink into the fibres, or attempted free-motion work on a loose knit and ended up with a puckered mess, a water-soluble stabiliser is the missing layer. It gives your needle something firm to bite into, then disappears when you are done.
This guide walks through the whole process in order, from picking the right stabiliser to rinsing the finished piece. It is written for hand and machine stitching, because the principle is the same: support the fabric, stitch the design, then dissolve the support. The checkpoints below are the ones that save the most ruined projects.
What dissolvable embroidery actually is
Dissolvable embroidery refers to any stitching project where a water-soluble stabiliser is used as a temporary layer. The stabiliser sits either behind the fabric as a backing or on top as a topper. While it is in place, it stops stitches from pulling the fabric out of shape, stops textured surfaces from swallowing thread, and gives fine details something to hold onto. Once the stitching is complete, you soak or rinse the piece and the stabiliser breaks down, leaving only your embroidery.
There are two common forms. Film-type stabiliser looks like clear plastic and is ideal for sheer fabric, lace, and anything where a paper backing would show through. Paper-type stabiliser has a fibrous, slightly stiff feel and suits dense designs, appliqué and machine embroidery where you need more body. Some products are described as water soluble embroidery stabiliser, which simply means the same thing: it dissolves in water rather than tearing away.
- Film types are best for see-through fabric and delicate edges.
- Paper types give more structure for dense stitching and appliqué.
- Always check the manufacturer's rinse temperature before you start.
Choosing the right stabiliser for your fabric
The fabric decides the stabiliser, not the other way around. For felt, fleece, terry towelling and other high-loft surfaces, use a film-type topper on top of the fabric so the stitches sit on a smooth surface instead of disappearing into the pile. For lightweight cottons, silk, chiffon and knits, use a backing layer behind the fabric to prevent stretching and holes. For dense machine embroidery on woven fabric, a paper-type backing gives the most support.
If you are stitching a design with fine details, such as an alphabet or a small motif, a film topper is usually the better choice because it holds the edges of each letter crisp. For large filled areas, a paper backing underneath prevents the fabric from rippling. You can combine both if your project needs it, but start with one layer and add more only if the fabric still moves.
- Test on a scrap of the same fabric before stitching your final piece.
- If the fabric puckers, add a second layer of stabiliser rather than tightening the hoop.
- Keep a note of which stabiliser worked for each fabric so you can repeat it.
Setting up your hoop and fabric
Hooping is where most beginners lose the battle. Place the stabiliser against the wrong side of the fabric if you are using a backing, or on top if you are using a topper. Then hoop the layers together so the fabric is taut but not stretched. A common mistake is hooping the fabric drum-tight, which distorts the weave and causes the design to pull out of shape once it is removed. You want a gentle, even tension, like a drum skin that springs back when tapped.
If you are using an embroidery hoop for a hand-stitched project, the same rule applies. The stabiliser should be smooth and wrinkle-free, and the fabric should not be visibly stretched. For machine embroidery, use the smallest hoop that fits the design, because a large hoop with a small design gives the fabric too much room to shift.
- Smooth the stabiliser flat before tightening the outer ring.
- Avoid over-tightening; if the fabric rings like a drum, it is too tight.
- Check that no stabiliser wrinkles sit under the stitching area.
Stitching your design
Once the hoop is set, stitch as normal. If you are working a design with fine details, slow the machine down or take smaller hand stitches so the needle does not punch through the stabiliser and tear it. For water soluble embroidery on delicate fabric, a sharp needle and a fine thread reduce the risk of pulling. If you are stitching an alphabet, work one letter at a time and check the spacing before moving on, because adjusting later is difficult once the stabiliser starts to dissolve.
The main checkpoint here is tension. If you see the fabric puckering around the stitches, stop and add another layer of stabiliser rather than continuing. If the stitches are sinking into a textured fabric, you need a topper. If the stabiliser is tearing as you stitch, your needle may be too large or your design too dense for the stabiliser weight.
- Stop and check after the first few stitches, not at the end.
- Keep a spare piece of stabiliser nearby to add a layer if needed.
- For dense designs, reduce stitch density rather than forcing the needle through.
Dissolving the stabiliser
When the stitching is complete, remove the hoop and trim away any excess stabiliser with small scissors. Then soak the piece in warm water, following the manufacturer's temperature guidance. Most water-soluble stabilisers break down in a few minutes, but thicker paper types may need a longer soak or a gentle rub between your fingers. Do not scrub aggressively, especially on delicate embroidery, because you can distort the stitches you just worked so hard to keep straight.
Rinse until the water runs clear and no slippery residue remains. If you skip this step, the leftover stabiliser can dry stiff and leave a visible film. Lay the piece flat to dry on a towel, reshaping it gently if needed. Once dry, press from the wrong side with a cool iron if the fabric allows it.
- Use warm, not hot, water unless the manufacturer says otherwise.
- Rinse until the water is clear, not just until the piece feels soft.
- Dry flat to avoid stretching the damp fabric.
Step-by-step: dissolvable embroidery from start to finish
- Pick your stabiliser type: Choose a film-type topper for felt, lace, towelling or sheer fabric, and a paper-type backing for dense designs on woven fabric. If you are unsure, test both on a scrap. Checkpoint: the stabiliser should support the fabric without adding bulk you can see through the front.
- Hoop the layers together: Place the stabiliser against the wrong side for backing or on top for a topper, then hoop the fabric and stabiliser together with even, gentle tension. Smooth out every wrinkle before tightening the outer ring. Mistake to avoid: hooping too tightly, which distorts the fabric and pulls the design out of shape.
- Stitch a test area first: Before committing to the full design, stitch a few letters or a small motif. Watch for puckering, sinking stitches or tearing stabiliser. Adjust by adding a layer or changing your needle if needed. Checkpoint: if the test area is clean, continue; if not, fix the setup before stitching further.
- Complete the design: Stitch the rest of your design at a moderate speed, checking tension as you go. For alphabets or fine details, work slowly and keep the stabiliser flat under the needle. Mistake to avoid: rushing dense areas, which can tear the stabiliser and leave gaps in the stitching.
- Trim and dissolve: Trim excess stabiliser, then soak the piece in warm water until the stabiliser dissolves. Rinse until the water runs clear, then dry flat and press from the wrong side if needed. Checkpoint: no slippery residue should remain; if it does, rinse again before drying.
Tools that help with dissolvable embroidery
- Crafter's Companion - Shimmer Spray Care Kit: Designed to be used with the Crafter's Companion range of Shimmer Sprays, this set keeps spray nozzles clean, clear and clog free. If you use shimmer sprays to tint or finish embroidery projects, keeping nozzles clear means you can add colour without interruptions or splatters.
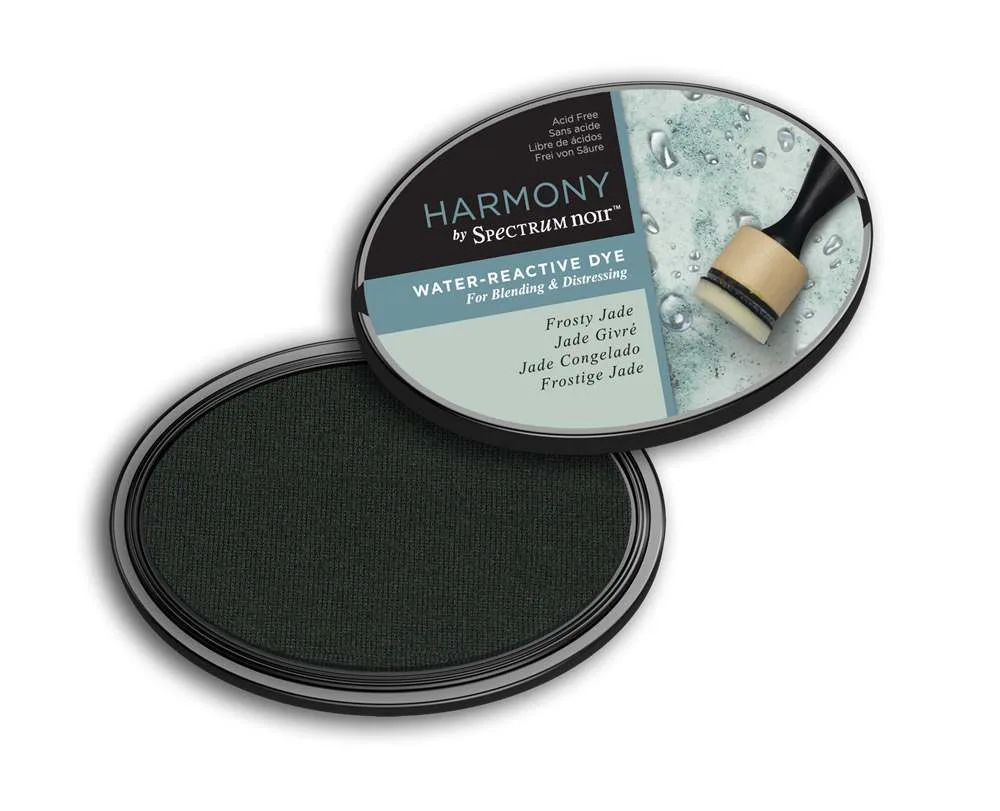
- Harmony by Spectrum Noir Water Reactive Dye Inkpad - Frosty Jade: This pad is filled with a water-based dye that also reacts with water, so you can flick, mist or sprinkle water onto your colour to create distress effects. Useful when you want a soft, water-reactive background on fabric or paper behind your stitching, and the water-reactive behaviour pairs naturally with the rinsing step.
Dissolvable embroidery is less about special equipment and more about giving your stitches the right temporary support. Start with a small test piece, match the stabiliser to your fabric, and rinse thoroughly at the end. Once you have done it once, you will find yourself reaching for water-soluble stabiliser every time a fabric refuses to behave.