Quick answer
For a perfectly baked skillet cookie with a crisp edge and soft center, use a preheated Lodge cast iron baker's skillet and follow a simple step-by-step method that accounts for the pan's superior heat retention.
Why a cast iron baker's skillet works best
A skillet cookie demands even, steady heat to avoid a burnt bottom and raw middle. The Lodge 10.25 Inch Seasoned Cast Iron Baker's Skillet excels because cast iron won't warp at high temperatures and holds heat consistently, giving you reliable results every time. The naturally seasoned surface is ready to use straight from the foundry, so you don't need to worry about sticking or extra oil.
Unlike thin metal pans, cast iron's heat retention also means your cookie stays warm longer at the table—a bonus for serving dessert family-style.
Choosing your cookie dough
Almost any standard chocolate chip cookie dough works, but a slightly thicker dough (chilled for at least 30 minutes) spreads more slowly and yields a thicker, chewier cookie. If you prefer a thinner, crispier result, use room-temperature dough. Avoid doughs with large mix-ins like whole nuts or oversized chocolate chunks—they can create uneven spots in the bake.
Step-by-step: Bake a skillet cookie in a cast iron baker's skillet
- Preheat the skillet: Place the Lodge cast iron baker's skillet in a cold oven, then set the oven to 350°F (175°C). Let the pan preheat for at least 15 minutes after the oven reaches temperature. This step ensures the bottom of the cookie starts baking immediately, creating a crisp golden crust. A cold pan will cause the dough to spread too much before it sets, resulting in a thin, greasy cookie.
- Prepare the dough: While the skillet heats, prepare your cookie dough. Press the dough into a disc about 1 inch thick—do not roll it into balls. Chilling the dough for 30 minutes beforehand helps control spread and gives a thicker, chewier texture. If the dough is too warm, it will melt into a flat puddle instead of rising into a thick cookie.
- Transfer dough to hot skillet: Carefully remove the hot skillet from the oven using oven mitts. Place the dough disc in the center—it will sizzle slightly. Gently press it down to fill the bottom evenly, leaving about 1/2 inch of space from the edges. Do not grease the skillet; the preheated seasoned surface is non-stick enough. Extra oil can make the edges greasy.
- Bake and rotate: Bake for 18–22 minutes, rotating the skillet halfway through. The edges should be golden brown and set, while the center still looks slightly soft and underdone. A toothpick inserted near the center should come out with a few moist crumbs. Overbaking is the most common mistake—the cookie continues to cook from the residual heat of the cast iron after you remove it from the oven.
- Cool and serve: Let the skillet cookie cool on a wire rack for 10–15 minutes. This allows the center to finish setting without drying out. Serve warm directly from the skillet with a scoop of ice cream or a drizzle of caramel sauce. Serving straight from the skillet keeps the cookie warm and makes for an impressive presentation—but warn guests that the handle stays hot for a long time.
Product spotlight
-
10.25 Inch Seasoned Cast Iron Baker's Skillet: Cast iron is a baker’s best friend because it won’t dent, bend, or warp at high temperatures, so you can keep perfecting your dinner rolls. The naturally seasoned cooking surface is ready to go, straight from the foundry. This means your skillet cookie bakes evenly without hot spots, and you don't need to season the pan before your first use—just preheat and bake.
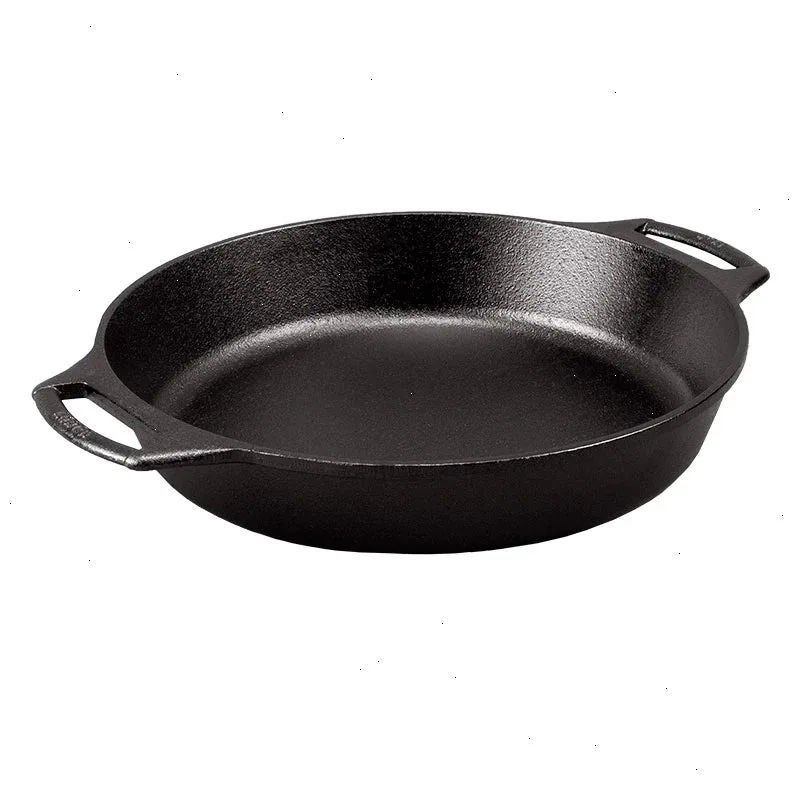
10.25 Inch Seasoned Cast Iron Baker's Skillet