Quick answer
To set up a pet gate for maximum safety, measure the opening width accurately, choose a gate with a secure locking system, and install it without gaps using the included hardware—no tools needed for many models.
Why a proper setup matters more than the gate itself
Even the sturdiest gate can fail if installed incorrectly. The most common safety issues are gaps at the sides, a loose fit that lets pets push through, and a locking mechanism that a clever dog can learn to open. Taking a few extra minutes during installation prevents these risks.
A gate that is too narrow for the opening forces you to stretch it, which stresses the frame and can create instability. Conversely, a gate that is too wide may not lock properly. Always measure twice before unpacking.
Step-by-step pet gate setup
- Measure the opening accurately: Use a tape measure to find the width of the doorway or hallway at both the top and bottom. Note the narrowest point. For a pressure-mounted gate, the opening must be within the gate's adjustable range (e.g., 73–83 cm for the PET GATE). For a hardware-mounted gate, mark screw positions. Common mistake: measuring only one spot and finding the gate doesn't fit at the other end.
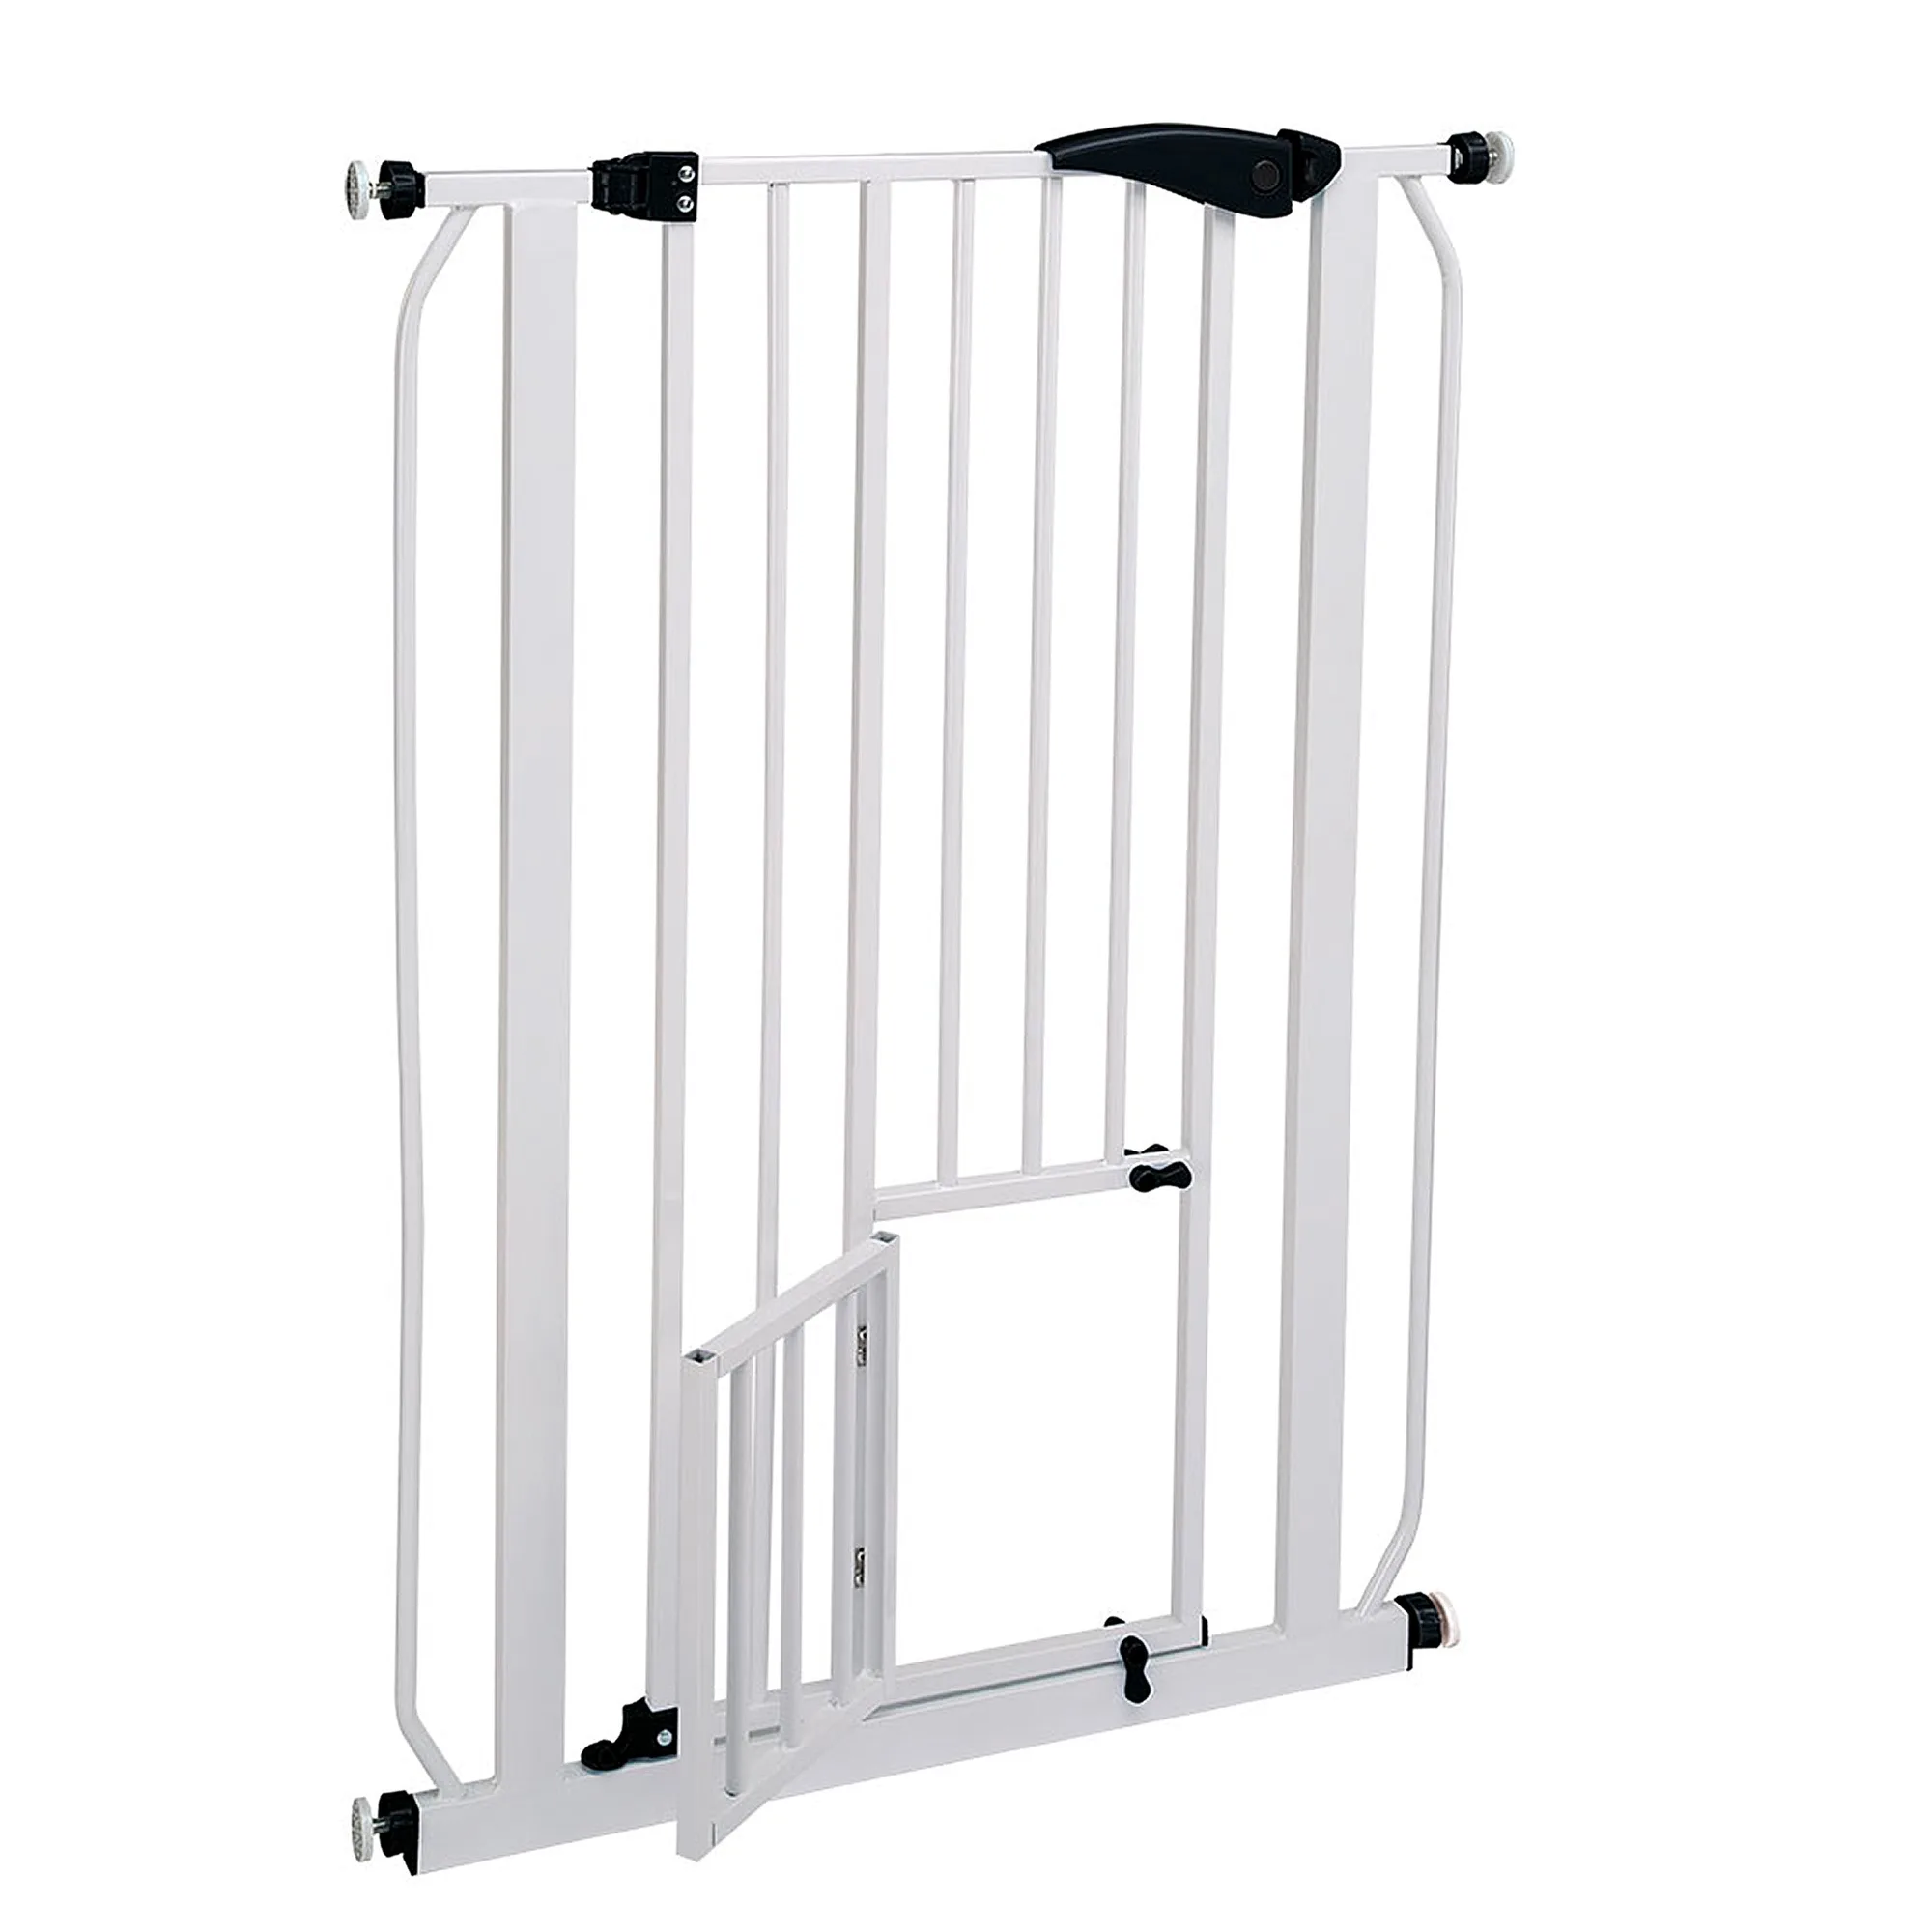
- Check the locking mechanism before mounting: Open and close the gate a few times to understand how the lock engages. For the PET GATE, the special closing system and 2-way opening let you swing it in either direction. Make sure the latch clicks fully into place—partial engagement is a frequent cause of accidental opening. Checkpoint: if the lock feels loose or doesn't click, adjust the tension screws or reposition the gate.
- Install the gate without gaps: Position the gate in the opening so that the frame sits flush against both sides. For pressure-mounted gates, tighten the pressure knobs evenly until the gate is firm but not warped. For hardware-mounted gates, use the supplied screws and wall anchors (if needed) to secure brackets. The PET GATE requires no tools—just hand-tighten the knobs. Common mistake: over-tightening on one side, which bends the frame and creates a gap on the opposite side.
- Test stability with firm pressure: Push the gate from both sides using moderate force—simulate what a determined dog might do. Check that the gate does not tilt, slide, or pop out of its mounting. If it moves, re-tighten the pressure knobs or add rubber shims to fill small gaps. Checkpoint: a gate that wobbles under 10–15 lbs of force is not safe; reinforce before letting your pet near it.
- Verify the cat door or pet door is secure: If your gate includes a small door for cats or small dogs (like the 22 x 30 cm door on the PET GATE), open and close it several times. Ensure it latches properly and does not swing open when bumped. Teach family members to always close the pet door after use. Common mistake: leaving the pet door unlatched, which defeats the gate's purpose for larger pets.
Product facts
-
PET GATE: The PET GATE has solid bars spaced 5 cm apart and a special closing system with a 2-way opening. It adjusts from 73 cm to 83 cm and includes a cat door sized 22 x 30 cm. Assembly requires no tools. The 5 cm bar spacing prevents most dogs and cats from squeezing through, and the tool-free assembly means you can set it up quickly without special skills.
PET GATE