Quick answer
Assemble your Modular Paint Rack by dry-fitting the MDF pieces, applying wood glue, and clamping until set. Choose straight, 45-degree, or 90-degree angle racks based on your desk space and how you want to view bottle labels.
Why choose a modular paint rack?
A disorganized desk slows down your painting flow. The Modular Paint Rack system keeps dropper-style bottles and brushes in a tiered layout so you can grab the color you need without shuffling through piles. Because the racks clip together, you can expand your storage as your paint collection grows without buying a whole new unit.
Each rack is made from MDF and designed for dropper bottles—the kind most miniature paint lines use. The three angle options let you tailor the rack to your workspace: straight racks for deep shelves, 45-degree for a slight tilt that makes labels readable, and 90-degree for a vertical display that saves desk depth.
How to assemble your Modular Paint Rack
- Dry-fit all pieces before gluing: Lay out the MDF panels on a flat surface. Fit the slots together without glue to confirm each piece aligns. This step reveals any warped boards or mismatched slots before adhesive sets. Common mistake: forcing a piece into a tight slot can crack the MDF. If a joint is too snug, sand the tab lightly with fine-grit sandpaper.
- Apply wood glue to the tabs: Use a thin bead of wood glue on every tab that fits into a slot. Spread it evenly with a toothpick or small brush so the glue reaches the inner surfaces. Avoid excess—it will squeeze out and mar the finish. Checkpoint: wipe away any glue squeeze-out immediately with a damp cloth. Dried glue is hard to remove and may interfere with paint bottle placement.
- Press joints together and clamp: Join each tab-slot pair firmly. Use small spring clamps or painter's tape to hold the assembly together while the glue dries. Leave the rack flat for at least 30 minutes before moving it. Common mistake: over-clamping can bow the MDF. Tighten only enough to close the joint without visible gaps.
- Let the glue cure fully before loading paints: After clamping, set the rack aside for 24 hours to allow the wood glue to reach full strength. Rushing this step risks joints loosening under the weight of paint bottles. Checkpoint: test each joint by gently wiggling it after curing. Any movement means the glue didn't bond and you need to re-glue that joint.
- Clip multiple racks together for a larger system: Once individual racks are assembled and cured, align them side by side and snap the included clips over the adjacent edges. The clips hold the racks together without additional glue, so you can reconfigure your layout later. Common mistake: clipping racks that are slightly misaligned can stress the clips. Adjust the racks on a flat surface before snapping the clips shut.
- Arrange bottles by frequency of use: Place your most-used paint colors on the front row and less-used ones behind. For angled racks, tilt the bottles so labels face outward. Straight racks work best for tall bottles that need vertical clearance. Checkpoint: leave a finger-width gap between bottles so you can easily pick them out without knocking others over.
Product facts
-
Modular Paint Rack - 26mm Straight: Suitable for dropper style bottles, like those used by most miniature paint brands. This rack is purpose-built for the bottle shape you already use, so paints stay secure and don't tip over.
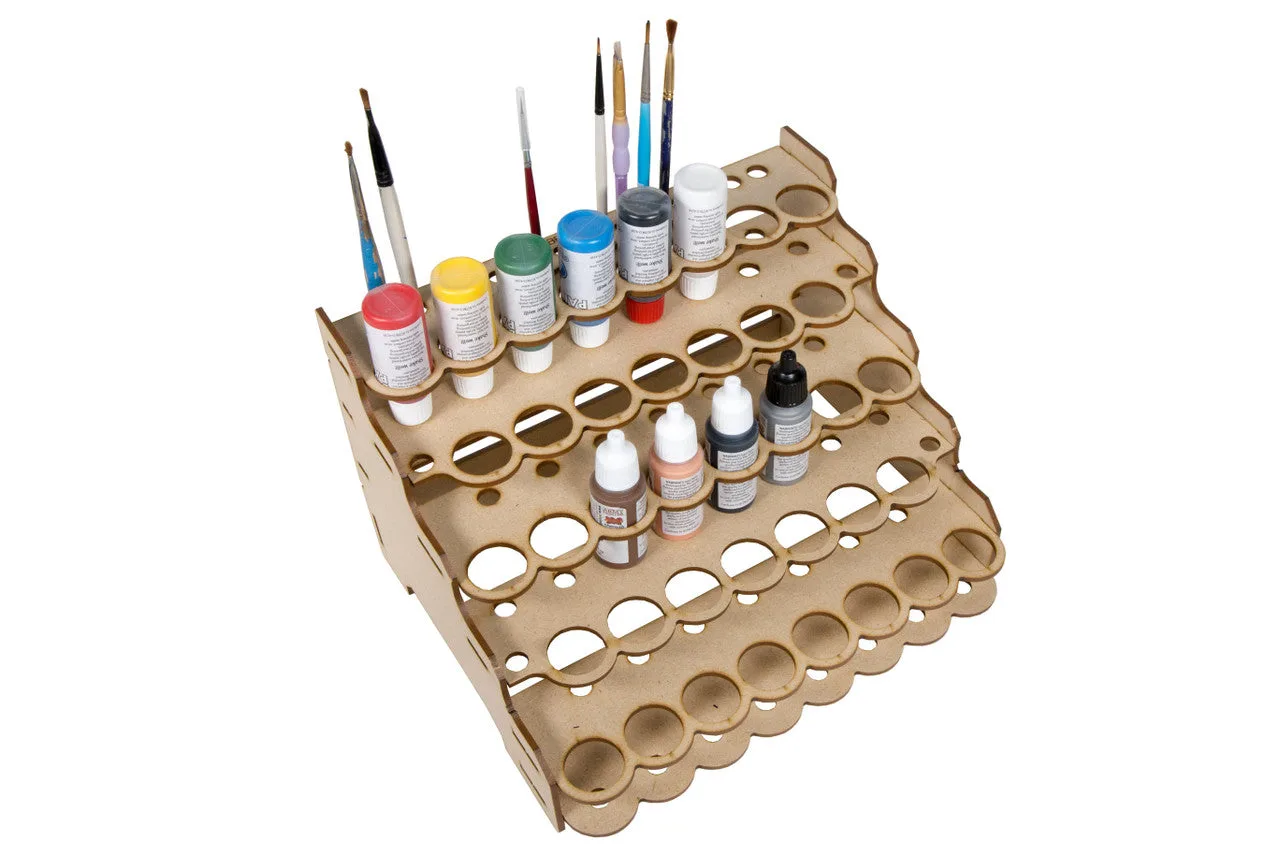
Modular Paint Rack - 26mm Straight
-
Modular Paint Rack - 26mm 90 Degree Angle: Multiple racks can be combined into a larger system using the included clips. You can start with one 90-degree rack and add more later without buying a separate connector kit.
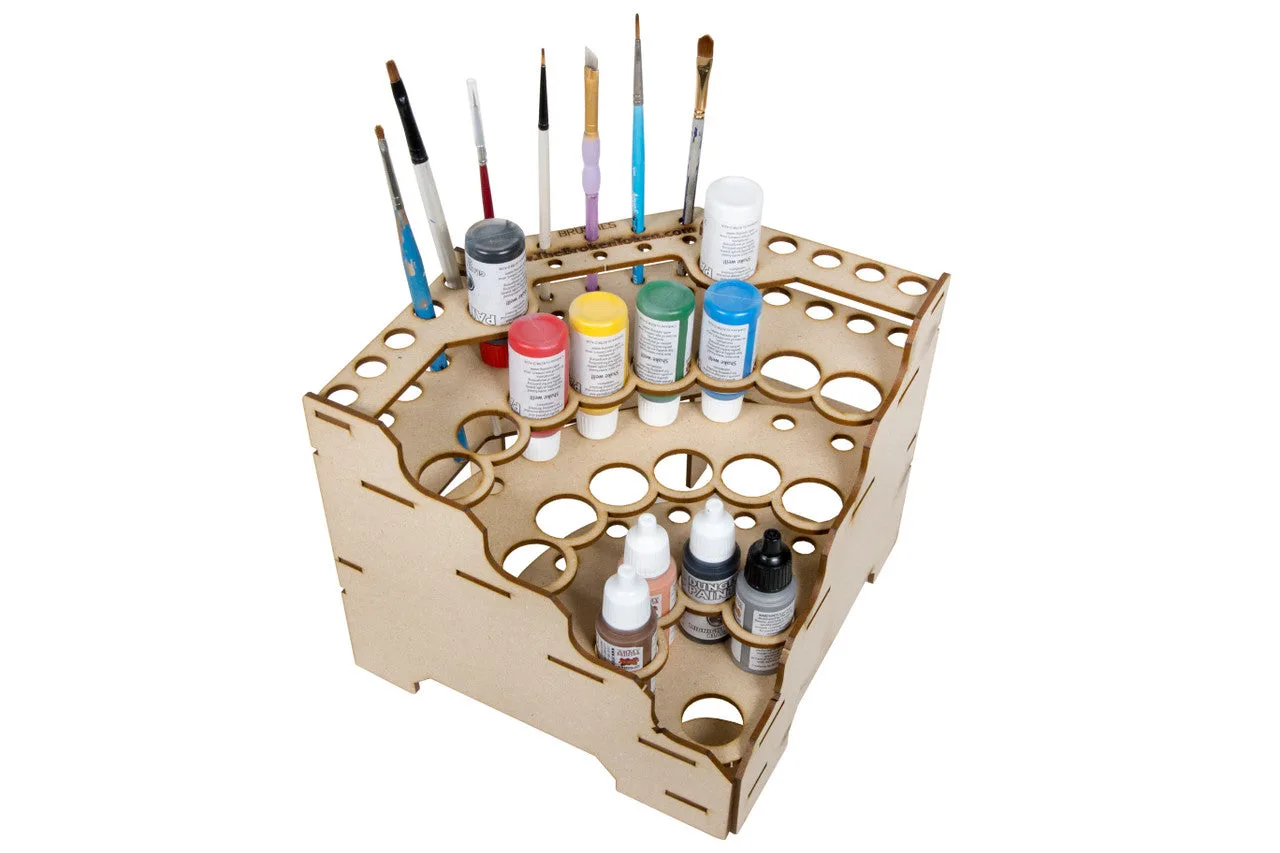
Modular Paint Rack - 26mm 90 Degree Angle