Quick Answer
To set up an imaging Newtonian for deep-sky astrophotography, start with proper collimation, then attach a coma corrector and camera at prime focus, and finally balance the mount for accurate tracking.
Why an f/4 Newtonian is a Great Choice for Deep-Sky Imaging
Fast focal ratios like f/4 are prized in deep-sky astrophotography because they capture more light in less time, reducing total exposure requirements. The Apertura 10" f/4 Imaging Newtonian OTA is a versatile option, offering a large 10-inch aperture that gathers ample light for faint nebulae and galaxies.
However, fast optics demand precise collimation and introduce coma, which is why a coma corrector is essential. Understanding these trade-offs upfront helps you avoid frustration and wasted imaging sessions.
What You'll Need Before You Start
Before setting up, gather the essentials: a collimation tool (laser or Cheshire), a coma corrector, a T-ring and adapter for your camera, and a sturdy equatorial mount capable of handling the telescope's weight. The Apertura 10" f/4 OTA weighs 29.25 lb without accessories, so your mount must support that plus the camera and corrector.
Also, ensure you have a clear view of the southern sky if you're in the northern hemisphere, as many deep-sky targets are best captured there.
Step-by-Step Setup Process
- Collimate the optics: Use a laser collimator or Cheshire eyepiece to align the primary and secondary mirrors. For an f/4 scope, precision is critical; even slight misalignment will show as elongated stars at the edges of the frame. Check collimation every time you set up, especially after transport.
- Install the coma corrector: Attach the coma corrector to the focuser drawtube. This is non-negotiable for f/4 scopes; without it, stars at the edges of your images will appear comet-shaped. Make sure the corrector is snug but not over-tightened. Confirm the corrector's spacing matches your camera's sensor distance for optimal correction.
- Attach your camera at prime focus: Connect the camera via a T-ring and adapter to the coma corrector. This is prime focus astrophotography, where the telescope acts as the lens. Ensure the camera is firmly attached and the sensor is square to the optical axis. Use a Bahtinov mask to fine-tune focus before starting your imaging run.
- Balance the mount: Slide the telescope in the rings and counterweights to achieve perfect balance in both axes. An unbalanced mount causes tracking errors and star trails. Start with the telescope pointing east or west, and adjust until it stays put when you release the clutches. Re-balance when you change cameras or add accessories like a guidescope.
- Focus and frame your target: Use a bright star to achieve sharp focus with a Bahtinov mask or live view zoom. Then slew to your target and frame it in the camera's field of view. Take a short test exposure to verify focus and composition before starting the full sequence. Always capture a test shot and zoom in on a star to check for trailing.
- Start imaging and monitor: Begin your exposure sequence, and periodically check focus and tracking. For beginners, start with 60-90 second sub-exposures at ISO 800-1600. Monitor the first few frames to ensure stars are round and the target is centered. Keep a log of your settings and conditions for future sessions.
Telescope Facts
-
Apertura 10" f/4 Imaging Newtonian OTA - 10F4N: The Apertura 10" f/4 Imaging Newtonian OTA has a 10-inch aperture and an f/4 focal ratio, making it well-suited for wide-field deep-sky imaging. The fast focal ratio reduces exposure times, allowing you to capture more targets in a single night, while the large aperture gathers enough light for faint objects.
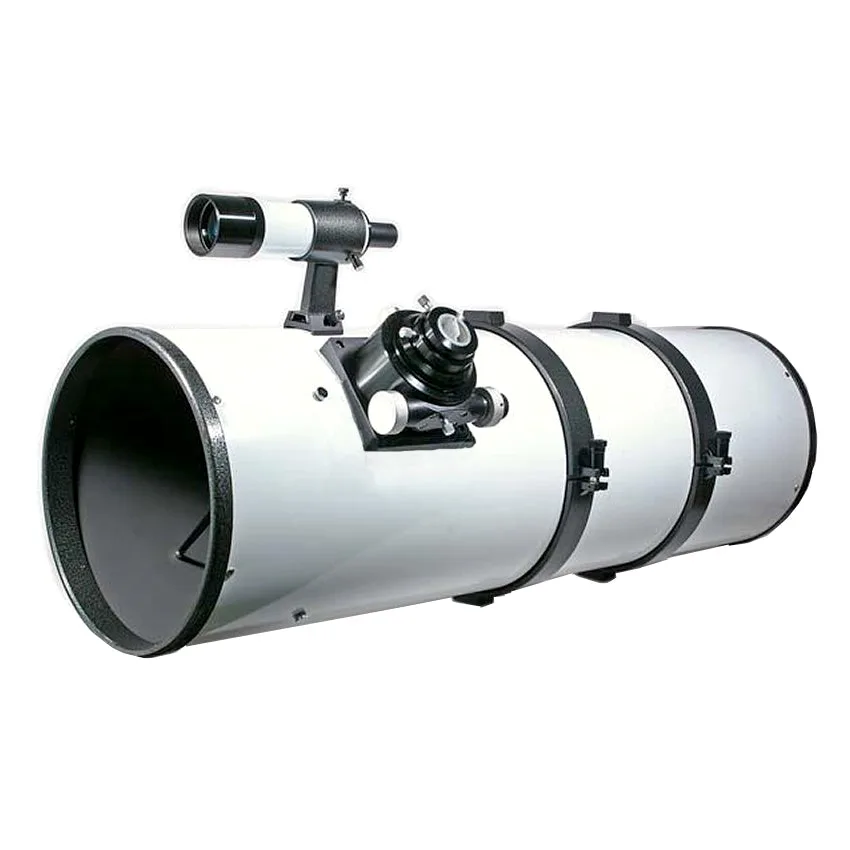
Apertura 10" f/4 Imaging Newtonian OTA - 10F4N