Start with the cage’s built-in mounts, not a cold shoe
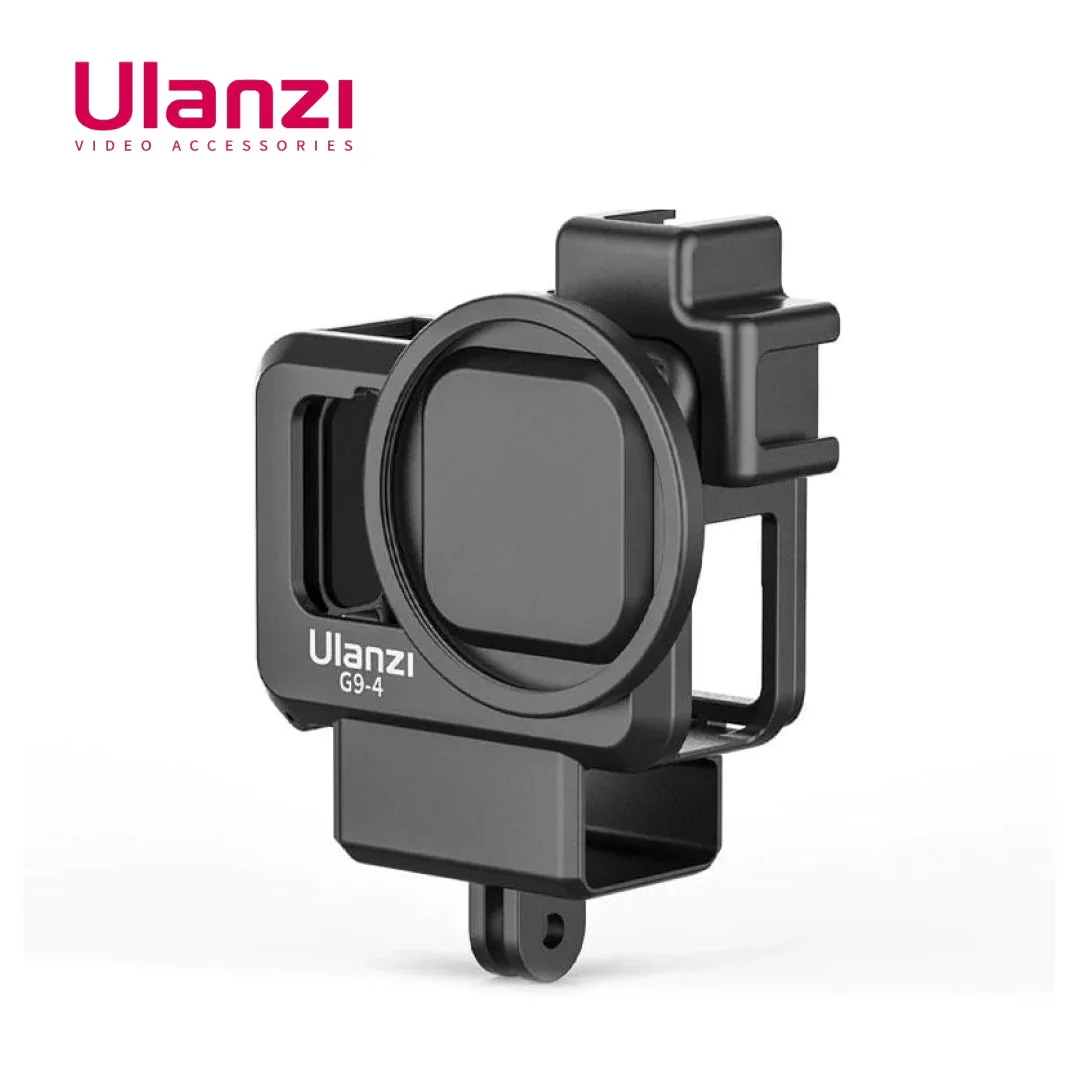
The Ulanzi G9-4 is a plastic cage for the GoPro Hero 9 that bundles a 52mm filter adapter, a snap-in lens protector, and a top-up base. Before you plan a cold shoe accessory, note that the supplied product information does not list a cold shoe mount on the cage itself. The cage does include a microphone booster pad and a storage compartment for a microphone adapter, so the practical first step is to mount audio through those supplied features rather than assuming a cold shoe is present.
If your rig plan depends on a cold shoe, treat that as a separate accessory decision. The G9-4’s confirmed mounting points are the 52mm filter adapter ring and the microphone adapter storage compartment. Any cold shoe would need to come from another part of your rig, and the supplied evidence does not confirm one on this cage.
What the G9-4 cage actually provides
-
Ulanzi G9-4 Camera Cage for GoPro Hero 9: Standard buckle type 52mm filter adapter ring; you can mount 52mm ND or CPL filters. This is the cage’s main front-of-lens mounting point, so filter choice should be planned around 52mm accessories.
Ulanzi G9-4 Camera Cage for GoPro Hero 9
-
Ulanzi G9-4 Camera Cage for GoPro Hero 9: Microphone booster pad: with this cage, the mic will not show up in the image when shooting. This is the supplied audio-mounting feature to use before adding a separate cold shoe.
-
Ulanzi G9-4 Camera Cage for GoPro Hero 9: Storage compartment design for a microphone adapter, so your camera can be connected to an external microphone. It gives the mic adapter a dedicated place in the rig instead of hanging loose.
-
Ulanzi G9-4 Camera Cage for GoPro Hero 9: Rechargeable battery cover design reserves a charging port; you can replace the battery at any time, and charge GoPro 9/10/11/12 or connect an external microphone. This affects how you plan power and audio cables during a shoot.
-
Ulanzi G9-4 Camera Cage for GoPro Hero 9: Note: the original battery cover needs to be taken out before use. This is a required preparation step before the cage’s battery cover design works as intended.
Assemble the cage in a sensible order
- Remove the original battery cover: The supplied note says the original battery cover needs to be taken out before use. Do this before fitting the cage so the reserved charging port and battery access are not blocked.
- Fit the GoPro Hero 9 into the cage: The G9-4 is listed for the Hero 9. The supplied information does not describe the exact insertion procedure, so follow the physical fit of the cage rather than forcing it.
- Attach the 52mm filter adapter: The standard buckle type adapter ring accepts 52mm ND or CPL filters. Screw on the filter you need for the light conditions before mounting the camera on your rig.
- Seat the lens protector: The snap-in protective cover is for storage convenience. Use it when the camera is packed away, and remove it for shooting if your filter or lens setup requires it.
- Place the microphone adapter in the storage compartment: If you are using an external microphone, the storage compartment is designed to hold the microphone adapter. Route the cable so it does not strain the port.
- Check the mic booster pad: The booster pad is intended to keep the mic out of the image. Confirm the mic position before you start recording, since the supplied information does not give a specific adjustment procedure.
Where a cold shoe fits into a GoPro rig
A cold shoe is a common way to add a microphone, light, or monitor to a camera rig. On the G9-4, the supplied evidence does not confirm a cold shoe mount. If your build needs one, plan it as an add-on that attaches to a handle, top plate, or other rig component rather than to the cage itself.
For audio specifically, the G9-4 already provides a microphone booster pad and a storage compartment for a microphone adapter. Those features let you connect an external microphone without a cold shoe. A cold shoe becomes relevant when you want to mount a mic that requires a shoe, or when you want to add a light or monitor that is not supported by the cage’s supplied mounts.
Cold shoe uses that make sense for a Hero 9 rig
- Mounting a shotgun microphone: If your microphone has a cold shoe foot, a separate cold shoe adapter on a handle or top plate can hold it. The G9-4’s booster pad is the supplied path for keeping a mic out of frame, but the cold shoe itself would be an external part.
- Adding a small video light: A cold shoe is a common mounting point for compact lights. Since the G9-4’s supplied mounts do not include a cold shoe, plan the light mount on another rig component.
- Holding a monitor or phone: A cold shoe can support a monitor mount or phone holder, but check the weight and balance of your rig. The supplied information does not give a load rating for the cage.
Power and cable planning with the battery cover design
The G9-4’s battery cover design reserves a charging port. According to the supplied information, this lets you replace the battery at any time, charge GoPro 9/10/11/12, or connect an external microphone. That flexibility is useful on a rig, but it also means you need to decide whether the port will be used for power or audio on a given shoot.
If you are charging while shooting, route the charging cable so it does not interfere with the filter adapter or the microphone adapter compartment. The supplied information does not specify cable lengths or port orientation, so check the physical clearance on your own rig before relying on a particular cable.
Box contents and compatibility limits to check
- Ulanzi G9-4 Camera Cage for GoPro Hero 9: What’s in the box: plastic cage ×1, ND filter adapter ×1, lens protector ×1, top-up base ×1. These are the parts you can expect to work with; any cold shoe or extra mount would be separate.
- Ulanzi G9-4 Camera Cage for GoPro Hero 9: The cage is listed for the GoPro Hero 9, while the battery cover design mentions charging GoPro 9/10/11/12. The cage fit is stated for Hero 9; the charging-port note covers later models, but the supplied information does not confirm cage fit for those models.
A practical build order for your first shoot
Build the rig in the order you will use it: remove the original battery cover, fit the cage, attach the 52mm filter adapter and filter, place the microphone adapter in its compartment, and check the booster pad with your mic. If you are adding a cold shoe accessory, mount it on a separate rig component and confirm it does not block the cage’s filter adapter or battery access.
Before you record, check three things: the filter is the one you want for the light, the microphone cable is seated and the mic is out of frame, and the charging port is either free or connected as planned. The supplied information does not provide a setup checklist beyond these physical features, so use these checkpoints as a starting point and adjust to your own rig.