Quick answer
Calibrate your Card Dealing Robot color sensor by teaching it the exact card colors under the same lighting you will actually use, then re-test before changing any code. If it is not reading cards, check card position, sensor distance, stray light, and loose wiring in that order. Most problems come from the environment or alignment, not from a broken sensor.
Why the sensor reads one card and misses the next
A color sensor does not see a card the way your eye does. It shines light on the surface and measures how much red, green, and blue bounce back. That reading depends on three things: the card surface, the distance between the sensor and the card, and the light already in the room. Change any one of those and the same card can produce a different number.
That is why a robot can deal five cards perfectly and then stall on the sixth. The sensor is not guessing; it is comparing a new reading against whatever values you taught it. If those taught values came from a different card, a different height, or a different room, the comparison fails. Calibration is simply the process of teaching the sensor the readings it should expect in the real setup.
What to prepare before you calibrate
Set up the robot exactly where it will run, not on a workbench you will later clear away. Use the same deck of cards you plan to deal, since print finish, gloss, and wear all shift the reading. If your kit includes a color sensor build such as the Card Dealing Robot - Color Sensor, keep it assembled and powered the way it will be during play.
Have a small notebook or a note on your phone ready. You will want to record the raw values for each card color so you can compare them later if something drifts.
- The robot in its final position, powered on
- The exact cards you will deal, including any worn ones
- The room lighting you will actually use, including lamps or window light
- A way to write down raw sensor values
How to tell calibration drift from a real fault
Before you touch any settings, run a simple test. Deal the same card ten times in a row and watch whether the readings stay steady or wander. Steady readings that are simply wrong usually mean the taught values are off, which calibration fixes. Readings that jump around, drop to zero, or disappear entirely point to a physical problem such as a loose connector or a card sitting too far from the sensor.
Write down what you see. If the numbers are stable but misclassified, go to the calibration steps. If they are unstable, go straight to the troubleshooting checks below and come back to calibration once the hardware is solid.
Color sensor calibration steps
- 1. Lock in the final lighting: Place the robot where it will actually run and turn on the lights you will normally use. Close blinds or move lamps now, not after calibration. If you calibrate under one light and play under another, the taught values will not match. Checkpoint: the light on the cards during calibration should look identical to the light during play.
- 2. Position a card at the true sensing distance: Slide one card under the sensor at the exact height the robot uses when dealing. Do not hold it closer by hand to make the reading look stronger. The robot will sense at that fixed distance, so that is the distance you must teach. Common mistake: calibrating with a card held too close, which makes every real reading look too weak.
- 3. Record raw values for each card color: Run the sensor readout for each color in your deck and write down the numbers. You are looking for clear separation between colors, not perfect numbers. If two colors sit almost on top of each other, note that now. Checkpoint: each color should have a distinct cluster of values you can point to.
- 4. Set thresholds midway between clusters: Place each color threshold in the gap between neighboring value clusters rather than at the edge of one. A midpoint gives you room for normal variation as cards age or lighting shifts slightly. Common mistake: setting a threshold right on a cluster edge, which causes intermittent misreads.
- 5. Test with the full deck, not one card: Deal through every card at least twice, including the most worn and the most glossy. Watch specifically for the cards that gave the tightest value clusters in step three. Checkpoint: a full pass with zero misreads is the pass condition.
- 6. Re-check after ten minutes of running: Sensors and lights warm up, and readings can creep. Run the robot for a few minutes, then repeat a short deal test and compare against your recorded values. If values have drifted, re-record them now rather than re-calibrating from scratch.
Product facts
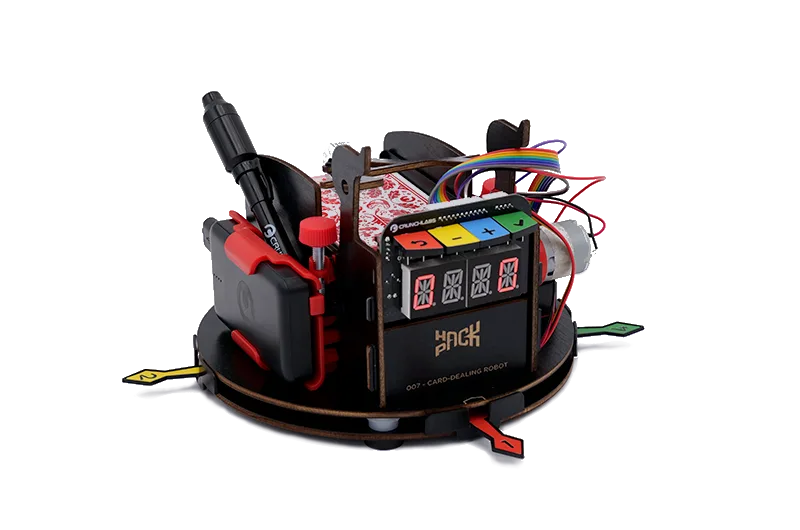
- Card Dealing Robot - Color Sensor: Card Dealing Robot - Color Sensor is part of the CrunchLabs Hack Pack Toys line, built for kids and adults who want to learn to think like engineers, and combines a card-dealing robot with a color sensor. Because the color sensor is the part that decides which card is which, calibration and alignment checks are the highest-value maintenance you can do on this build.
- Label Maker - Stepper Motor: Label Maker - Stepper Motor contains 16 total parts and is part of the Hack Pack Toys line for hands-on engineering exploration. If you enjoy the mechanical side of the card dealer, a stepper-driven build is a useful next project for practicing precise, repeatable movement.