Quick answer
Wash and dry your hands completely, then work over a clean, well-lit surface. Insert the lens by looking straight ahead and placing it on the center of your eye while holding your upper lid steady. To remove it, look up, slide the lens down slightly, and pinch it gently with your thumb and index finger. Keep your nails short, blink slowly after insertion, and stop if you feel sharp pain.
Most contact lens irritation comes from small, fixable habits: damp hands, a lens that flips inside out, or rushing the removal pinch. The good news is that a calm, consistent routine solves almost all of it. Whether you are putting in contacts for the first time or you have worn them for years, the steps below work the same way.
This beginner contact lens guide walks through insertion and removal in order, with the one mistake that trips people up at each stage. You do not need perfect technique on day one. You need clean hands, a mirror, and enough patience to let your blink reflex settle.
Before you touch the lens
Start with clean hands contact lens handling. Wash with a mild, fragrance-free soap and water, then dry your hands on a lint-free towel. Even a little tap water left on your fingertips can transfer to the lens and cause stinging. Avoid soaps with moisturizers or oils, since those leave a film that clouds the lens.
Set up your space before you open the case. A well-lit mirror, a clean counter, and your lens solution within reach make the process faster. If you wear makeup, insert lenses before applying it. Long or jagged nails are the most common cause of a torn lens during removal, so keep them filed short and smooth.
- Check the lens for debris or a tear before it goes anywhere near your eye.
- If the lens is dry or stiff, rinse it with fresh solution, not water.
How to insert contact lenses step by step
Place the lens on the tip of your index finger and look at it from the side. It should curve up like a bowl, not flare out like a saucer. If the edges flare, the lens is inside out and will feel scratchy. Rinse it with solution and flip it before trying again.
Look straight ahead into the mirror, pull your upper lid up with your other hand, and pull the lower lid down with the middle finger of your lens hand. Place the lens on the center of your eye and release your lids slowly. Blink once or twice to settle it. If it feels off-center, close your eye and gently massage the lid toward the lens.
- Common mistake: looking away as the lens approaches, which makes you blink too early.
- Checkpoint: the lens should feel like nothing after a few blinks. Sharp pain means remove it and inspect.
How to remove contacts easily
Wash and dry your hands again before removal. Look up toward the ceiling, then use your middle finger to pull the lower lid down. Slide the lens down onto the white of your eye with your index finger. Pinch it gently between your thumb and index finger and lift it away. The slide matters more than the pinch.
If the lens will not move, add a drop of rewetting solution and blink. A dry lens sticks to the eye and pinching it too hard is what causes contact lens removal without pain to become painful. Never use your fingernails to pry at the edge. For soft lenses, the slide-and-pinch method works for daily, weekly, and monthly schedules alike.
- Common mistake: pinching the center of the lens instead of sliding it to the side first.
- Checkpoint: if it takes more than three attempts, stop, rewet, and wait a minute before trying again.
Handling irritation and first-week nerves
Some awareness in the first few days is normal, especially when putting in contacts for the first time. A foreign-body sensation that fades after a few blinks is usually just the lens settling. Burning, redness, or pain that does not go away after removal is different. Take the lens out, keep it out, and speak with your eye care professional.
Your blink reflex is the biggest hurdle early on. Practicing insertion and removal at the same time each day builds the muscle memory faster than sporadic attempts. If one eye is easier than the other, start with the harder eye while you are still fresh, then finish with the easy one.
- Keep a small mirror and solution at your bedside if mornings are rushed.
- Never sleep in lenses unless your eye care professional has cleared that specific lens.
Your five-step contact lens routine
- Wash and fully dry your hands: Use a mild, fragrance-free soap and a lint-free towel. Water and soap residue are the leading causes of stinging on insertion. Checkpoint: hands should feel dry, not tacky, before you touch the lens.
- Inspect the lens orientation: Set the lens on your index finger and check the profile. A bowl shape is correct; a flared saucer shape means it is inside out. Common mistake: skipping this check and inserting a flipped lens, which feels scratchy.
- Insert while looking straight ahead: Hold the upper lid with one hand and the lower lid with the other, place the lens on the center of the eye, then release and blink slowly. Checkpoint: the lens should settle within two or three blinks.
- Remove with the slide-and-pinch method: Look up, slide the lens down to the white of the eye, then pinch gently with your thumb and index finger and lift it away. Common mistake: pinching the center of the lens instead of sliding it first.
- Clean the case and reset: Empty the old solution, rinse the case with fresh solution, and let it air-dry face down. Replace the case every few months. Next step: if irritation persists after removal, leave the lens out and contact your eye care professional.
Where Lensabl fits in
- FENCROFT: The FENCROFT from Out East Eyewear pairs a classic tortoise frame with dark green lenses and is designed for everyday wear across casual or professional settings. If you remove your contacts in the evening, a pair of glasses like this keeps your vision corrected without touching your eyes again.
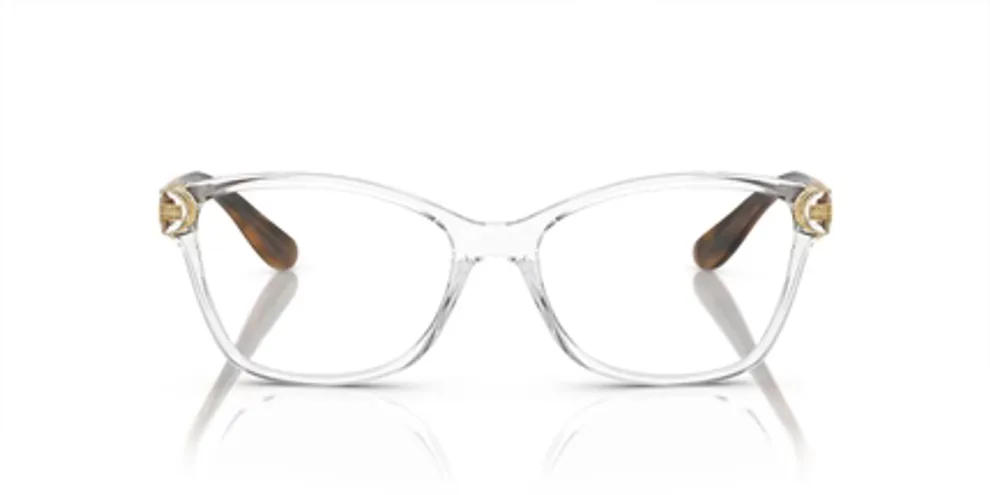
- 0vo2998-106a4a6e88885710f3f288d2-1703126">0VO2998: The 0VO2998 from Vogue Optical comes in a Transparent frame color with Clear lenses, with frame color and lens color as the available options. A clear, understated frame is a practical backup for contact lens wearers who want a low-profile look on rest days.
Insertion and removal get easier with a routine you repeat the same way each time. Clean, dry hands, a quick orientation check, and a gentle slide-and-pinch are the habits that prevent most irritation. If something feels wrong, take the lens out, rewet, and try again later.