Quick Answer
Program your Makeblock xLight interactive night light by connecting it to a computer via USB, using the free mBlock software to drag-and-drop code blocks, and uploading your custom light sequences to the controller.
Understanding Your xLight Controller
The xLight S1 and N1 models share the same core controller, which uses individually addressable WS2812B RGB LEDs. This means you can control each LED independently, enabling complex patterns and animations beyond simple color changes.
The controller connects via USB to your computer and is recognized as a standard Arduino-compatible device. This allows you to use mBlock's block-based programming environment, which is ideal for beginners and educators.
Choosing the Right Software
mBlock is the recommended programming environment for xLight. It supports both block-based coding and Python, giving you flexibility as your skills grow. Download the latest version from the Makeblock website and install it on your computer.
Make sure to install the necessary drivers for the xLight controller. mBlock typically handles this automatically, but if your computer does not detect the device, you may need to install the CH340 driver manually.
Step-by-Step Programming Guide
- Connect the xLight Controller: Plug the xLight controller into your computer using the USB cable. Ensure the LED strip is connected to the controller's output port. Wait for the computer to recognize the device. If the device is not detected, check the USB cable and try a different port. Install the CH340 driver if needed.
- Open mBlock and Select the Device: Launch mBlock. Click on the 'Devices' tab and select 'Arduino Uno' (the xLight controller is based on this board). Make sure the correct COM port is selected under 'Connect'. Selecting the wrong board type may cause upload errors. Always verify the port and board match your hardware.
- Write Your First Program: Drag a 'when green flag clicked' block from the Events category. Then add a 'set all LEDs to color' block from the Robots/Neopixel category. Choose a color and click the green flag to test. Start simple. Test one LED color before adding loops or animations to isolate any wiring or connection issues.
- Add Interactivity with Sensors: To make your night light respond to touch or sound, use the 'when [sensor] is [condition]' blocks. For example, use a sound sensor block to change colors when you clap. Sensor blocks may require calibration. Test the sensor value first using a 'show variable' block to ensure it triggers as expected.
- Upload the Program to the Controller: Once your program is ready, click 'Upload to Arduino'. mBlock will compile and transfer the code to the xLight controller. Disconnect the USB cable to run the program standalone. If upload fails, close other programs using the COM port and try again. A solid green LED on the controller indicates successful upload.
Product Facts
-
Makeblock xLight: Night Lights with Interactive Programmable Controller: The xLight S1 features a fully customizable strip light with individually addressable WS2812B RGB LEDs and a powerful control box. This means you can program each LED to a different color and brightness, enabling intricate light shows and interactive effects.
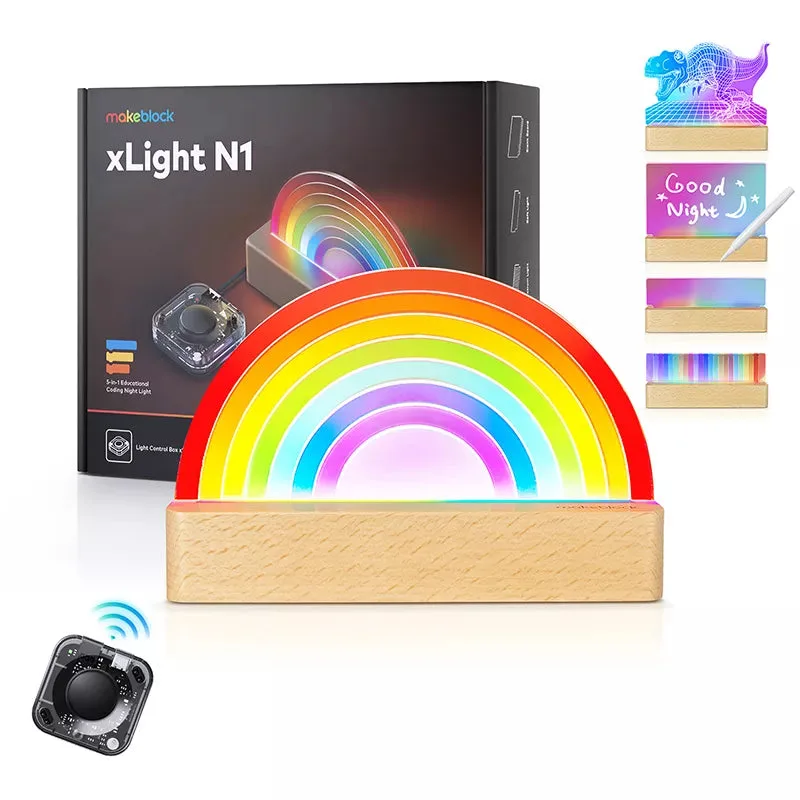
Makeblock xLight: Night Lights with Interactive Programmable Controller