Quick answer
Install the Origin Classic Inner Fender Set by first test-fitting the molded front and rear fenders to your VS4-10 chassis, then securing the integrated adjustable shock mounts and routing wires clear of the fender edges. Use the DERP clip-less body mounting system for body retention, and check clearance at full steering lock before your first trail run.
What the Origin Classic Inner Fender Set actually covers
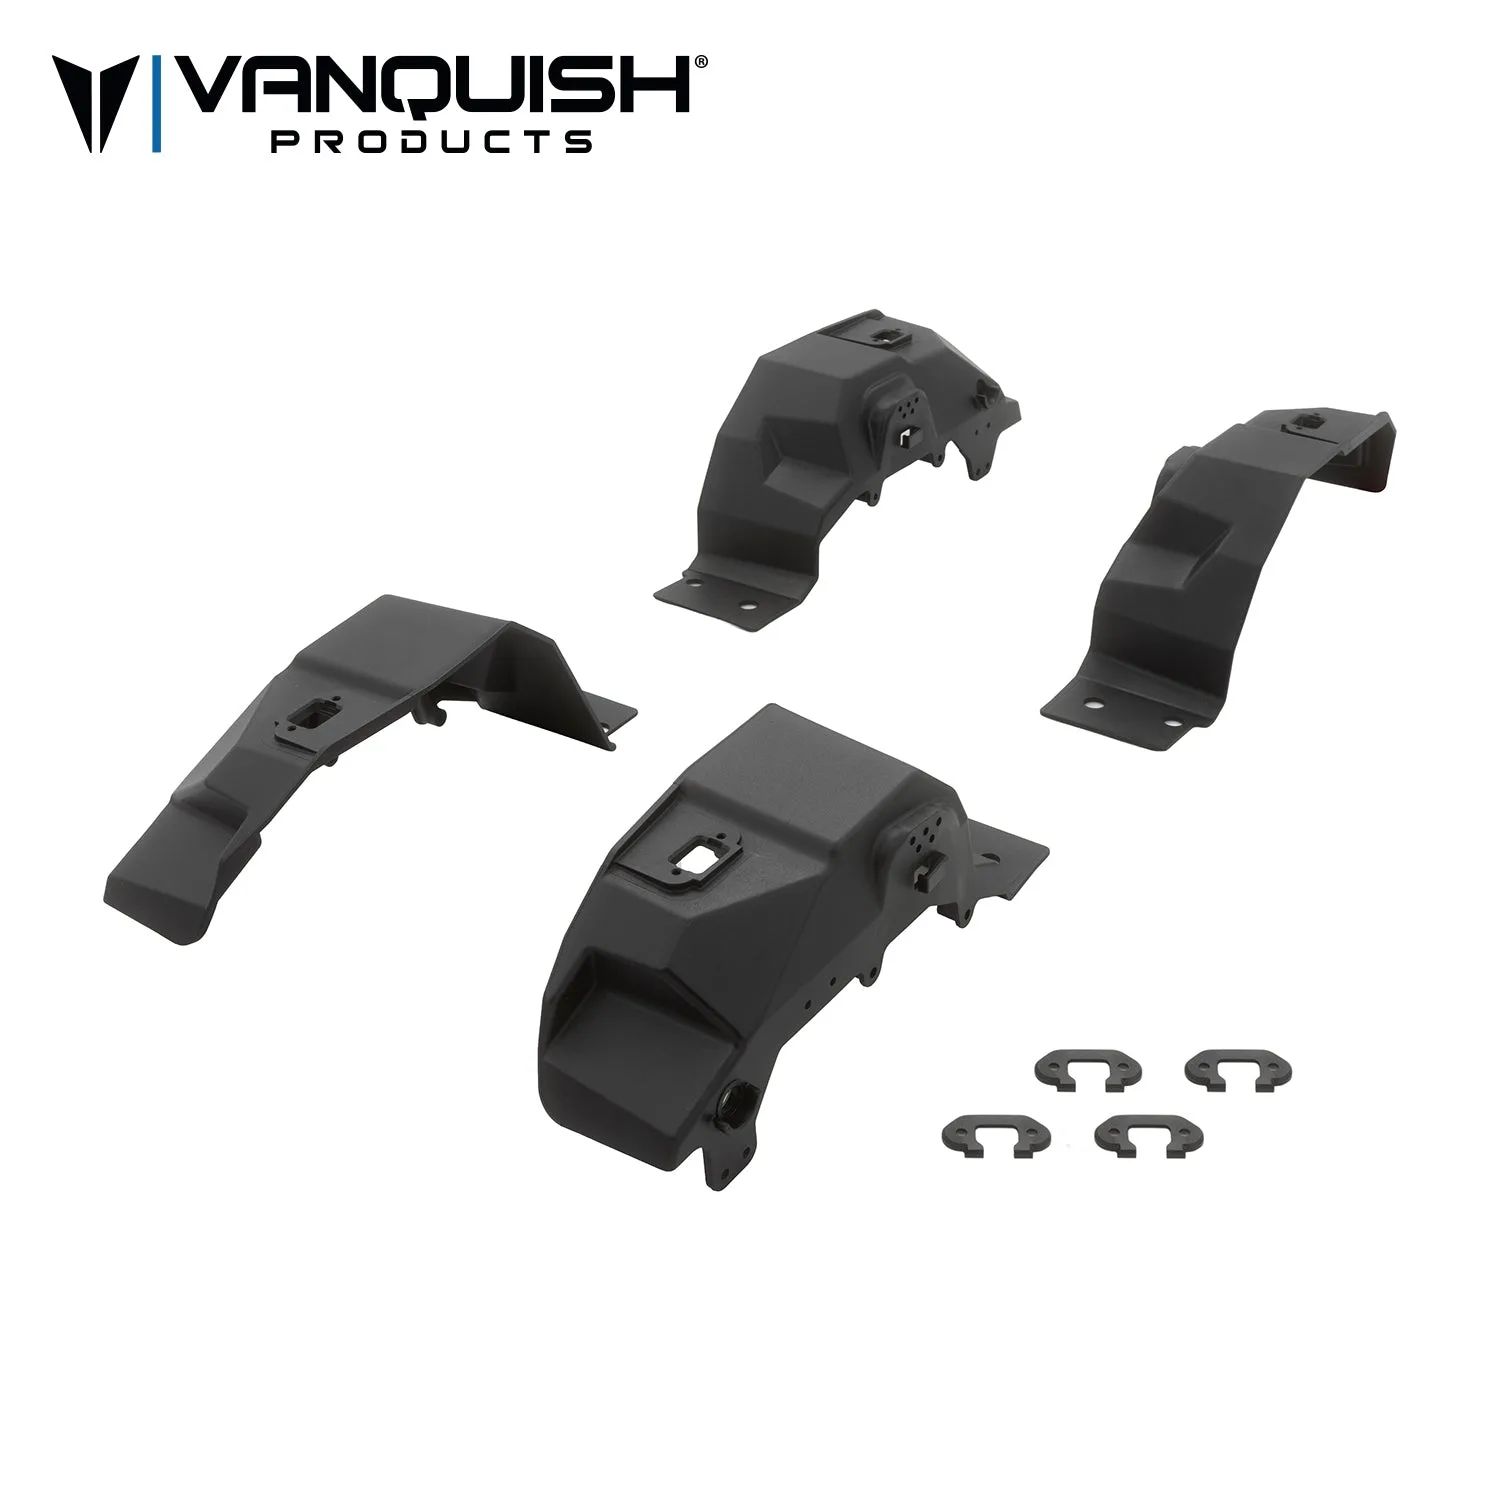
The set includes molded front and rear inner fenders with integrated adjustable shock mounts and rock light mounts, made for the VS4-10 chassis and Origin Classic body. That means it does two jobs at once: it shields electronics from dirt, water, and tire spray, and it gives your shocks a solid mounting point that stays consistent side to side. If you run a mostly stock VS4-10 and want fewer cleanup sessions after wet or dusty trails, this is a practical upgrade rather than a cosmetic one.
Because the fenders are molded for this specific chassis and body, they follow the body lines closely. That tight fit is the main reason debris stays out, but it also means you should not force anything during installation. If a fender feels like it is fighting the chassis, stop and check that you have the correct front or rear piece and that the body is sitting in its normal position.
Tools and prep before you start
You will need the hardware that came with your VS4-10 build, since the fender set does not include hardware. Set out your normal hex drivers, a small tray for screws, and a light source so you can see the mounting points inside the body. Remove the body from the chassis and set it aside where it will not get scratched.
Before installing anything, look at how your electronics are currently routed. The fender set will occupy space that wires and connectors may have been using. Planning the new wire path now is faster than discovering a pinched wire after everything is bolted down.
How the fenders interact with the DERP body mounting system
The Origin Classic Inner Fender Set is compatible with the Dual Engagement Retention Pins (DERP) clip-less body mounting system (VPS10186). If you already run DERP, the fenders are designed to work alongside it, so you keep the clean clip-less look and still get the debris protection. If you are still using body clips, the fenders still fit, but you will not get the full benefit of the integrated mounting layout.
One common mistake is installing the fenders and then trying to adjust the body mounting system afterward. Do it the other way around: confirm the body mount position first, then fit the fenders around it. This avoids forcing the fender into a position it was not molded for.
Install steps with checkpoints
- Step 1: Test-fit the fenders before fastening anything: Hold the front and rear fender pieces against the VS4-10 chassis without screws. Confirm the shock mount tabs line up with your shock towers and that the fender edges clear the body mounting area. Checkpoint: if a fender needs pressure to sit flat, you likely have the front and rear pieces swapped or the body is not seated correctly.
- Step 2: Secure the adjustable shock mounts: Attach the four integrated shock mounts using your existing hardware. Tighten in a cross pattern so the fender does not twist, and leave the final torque until all four are started. Common mistake: over-tightening the first screw pulls the fender out of alignment and makes the remaining holes harder to line up.
- Step 3: Route wires and connectors clear of the fender edges: Move receiver, ESC, and light wiring so it sits inside the fender line rather than pinched between the fender and the chassis. Leave a small service loop so you can unplug connectors without removing the fenders. Checkpoint: turn the wheels to full steering lock and confirm no tire or linkage contacts the fender or the wiring.
- Step 4: Install the rock light mounts if you use them: Fit lights into the molded rock light mounts before you reinstall the body. Route the light wires along the same path as the other electronics and secure them with small zip ties. Common mistake: installing lights after the body is on, which usually means pulling the body again to reach the mounts.
- Step 5: Reinstall the body and verify DERP engagement: Seat the Origin Classic body and engage the DERP clip-less mounting system. Push the body down until both retention points click or seat fully, then lift gently to confirm it is locked. Checkpoint: the body should sit at the same height as before the fender install. A raised body usually means a wire or fender edge is trapped underneath.
- Step 6: Do a low-speed shakedown before a real trail run: Run the crawler at low speed over dirt or gravel for a few minutes, then stop and check that the fenders have not shifted and that no debris has packed into the shock mount area. Next step: after the shakedown, re-check the shock mount screws once. They are the most likely fasteners to loosen after the first run.
Parts that pair with this install
- Origin Classic Inner Fender Set: Molded front and rear inner fenders with integrated adjustable shock mounts (4) and rock light mounts, compatible with the DERP clip-less body mounting system (VPS10186) for the VS4-10 chassis and Origin Classic body. This is the core part of the install. The integrated shock mounts mean you do not need separate standoffs, and the rock light mounts let you add lighting without drilling the body.
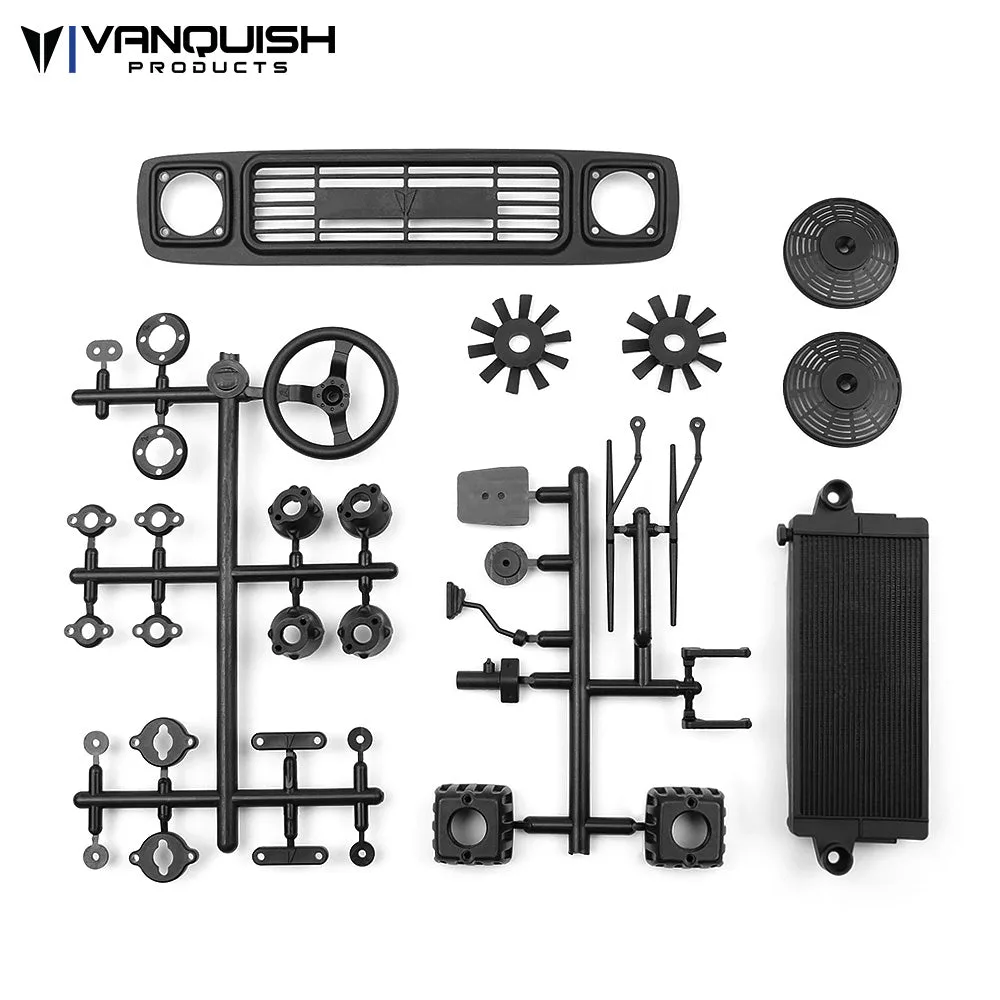
- Origin Body Detail Set: Injection molded nylon detail set that includes a radiator and fans, grille, light buckets, and interior and body detail accessories. If you are already pulling the body for the fender install, this is the efficient time to refresh worn or missing Origin body details so you only reassemble once.