Quick answer
To build a mecanum wheel robot with Makeblock, you need four Mecanum wheels, four motors, a compatible Makeblock controller, and the correct wiring pattern. This guide walks you through assembly, wiring, and programming for full omni-directional movement.
Why Mecanum Wheels for Your Robot?
Standard wheels limit your robot to forward, backward, and turning. Mecanum wheels, with their angled rollers, allow sideways movement without rotating the chassis. This makes them ideal for tight spaces, obstacle courses, or any project requiring precise lateral positioning.
Makeblock’s Mecanum wheels are designed to fit standard Makeblock motor mounts and hub connectors. The 100mm size provides good ground clearance and speed for indoor robotics projects.
What You’ll Need Before Starting
You will need four Makeblock Mecanum wheels, four DC motors (e.g., Makeblock 25mm or 37mm motors), a Makeblock controller (like mCore or Orion), a battery pack, and a chassis frame. The Makeblock Mecanum wheels come as a pair, so order two sets for a full robot.
Also prepare M4 screws and nuts, a screwdriver, and jumper wires. A computer with mBlock software is required for programming.
Building Your Mecanum Wheel Robot: Step by Step
- 1. Attach Wheels to Motors: Slide each Mecanum wheel onto the motor shaft until it clicks or sits flush. Secure with the provided set screw using a hex key. Ensure the wheel is centered and does not wobble. Check that all four wheels spin freely by hand before mounting to the chassis.
- 2. Mount Motors to Chassis: Use M4 screws and nuts to fasten each motor to the chassis frame. Position motors so that the wheel axles point outward. For a rectangular chassis, place one motor at each corner. Double-check that the left-front and right-front wheels are mounted with the roller orientation mirrored—this is critical for strafing.
- 3. Wire Motors to Controller: Connect each motor to a motor driver port on your Makeblock controller. Use a standard wiring pattern: left-front motor to M1, right-front to M2, left-rear to M3, right-rear to M4. Ensure polarity is consistent (e.g., red wire to +, black to -). A common mistake is reversing polarity on one motor, which causes the robot to spin in place. Test each motor individually before finalizing.
- 4. Program Movement in mBlock: Open mBlock and create a new project. Use the 'move' block or set motor speeds manually. For forward movement, set all motors to the same positive speed. For strafing left, set left motors to negative speed and right motors to positive speed. Start with a low speed (e.g., 50 out of 255) to avoid overcurrent or sudden jerks. Increase gradually as you test.
- 5. Test and Calibrate: Place the robot on a flat, open surface. Upload your program and observe movement. If the robot drifts or spins, check wheel orientation and motor wiring. Adjust motor speed values in code to compensate for minor differences. If the robot does not strafe, verify that the front and rear wheels on each side are spinning in opposite directions during a strafe command.
Product Spotlight
-
100mm Left & Right Mecanum Wheel: Makeblock Mecanum wheels allow your robot to not only travel forward and backward, but also side to side. With 4 mecanum wheels, you can build a car/robot that can move in all directions. This means your robot can strafe left or right without turning, making it perfect for navigating narrow paths or aligning with targets.
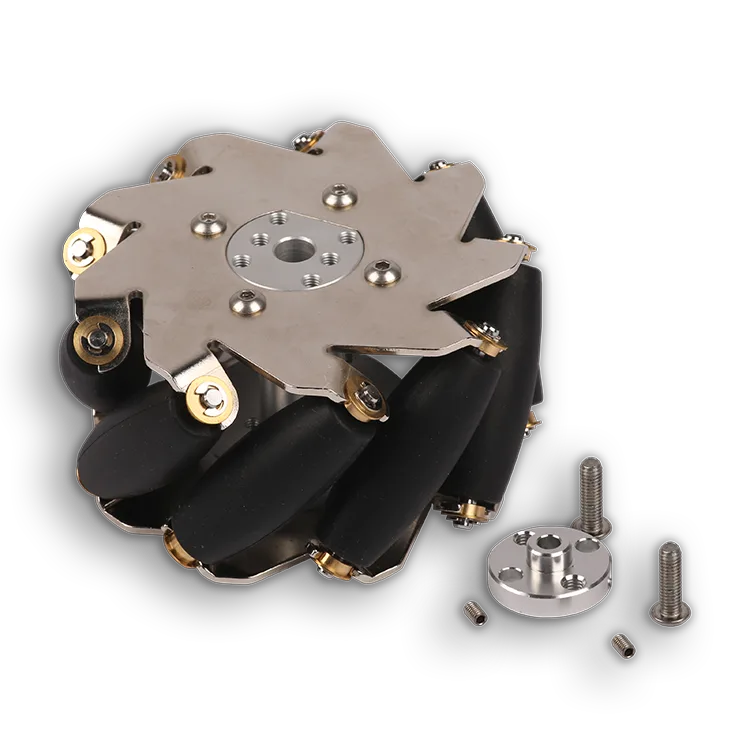
100mm Left & Right Mecanum Wheel